• Facebook
  • Instagram
  • Pinterest

Dada's Place

Crochet wonderland

  • Home
  • Blog
  • Dada’s shop
  • Free Patterns
  • Categories
  • About
  • Contact

Dada’s Flowery square and a cushion

19/06/2018 by Dada Filed Under: Crochet pillows, Other crochet projects 4 Comments

flowery crochet pillow

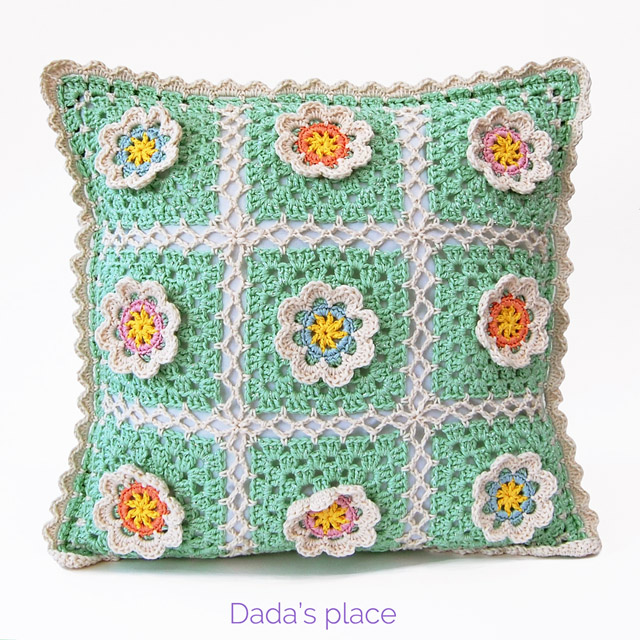
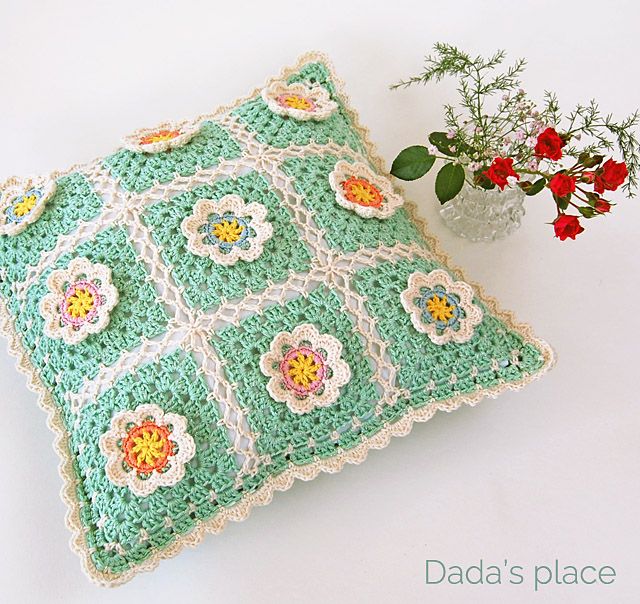
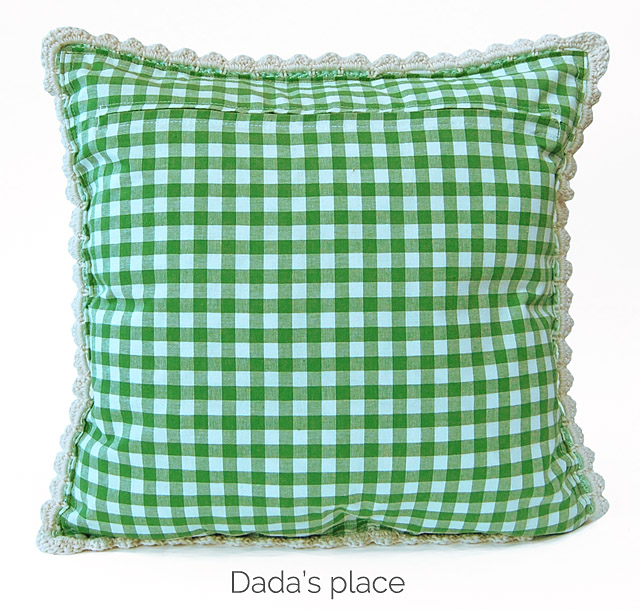
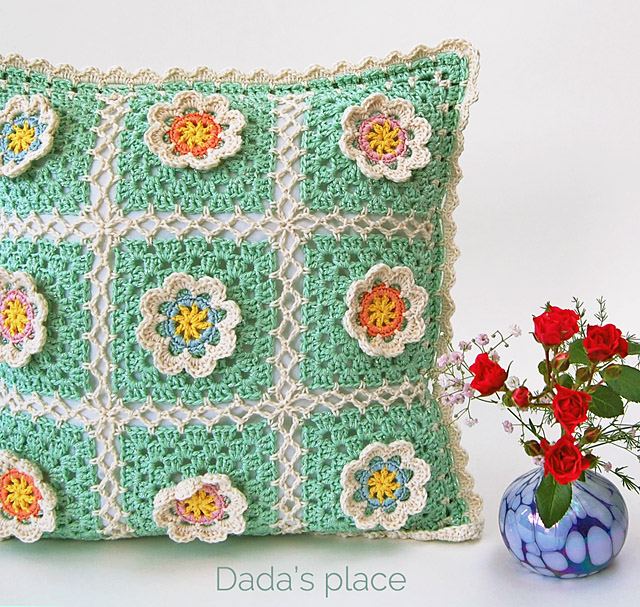
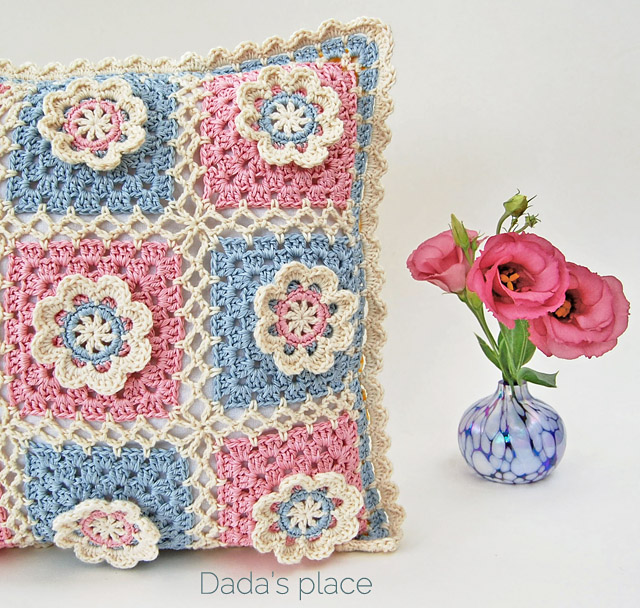
In my previous post I presented you with my flowery cushion. Which you, as it turned out, really liked. I started to work on the pattern for that flowery square, and in the meantime I finished this cushion. I really wanted to try out these colors and see how they would go with each other. I quite like the result! And I like the fact that I finished my flowery square pattern and step-by-step tutorial!

flowery granny square

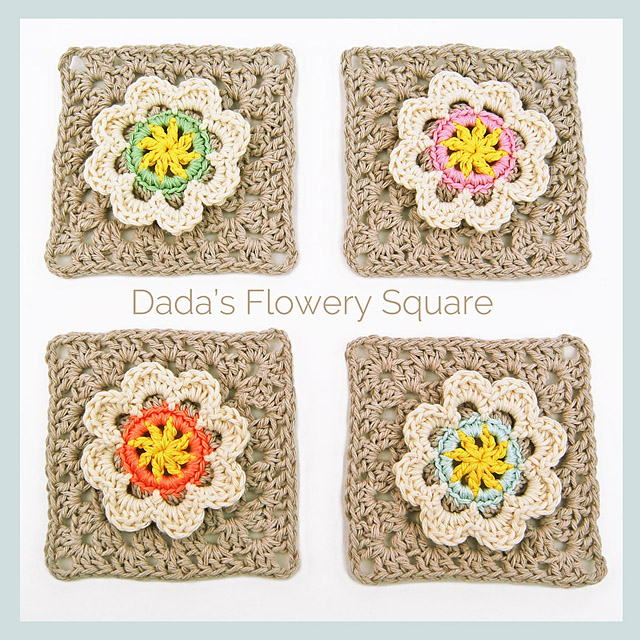
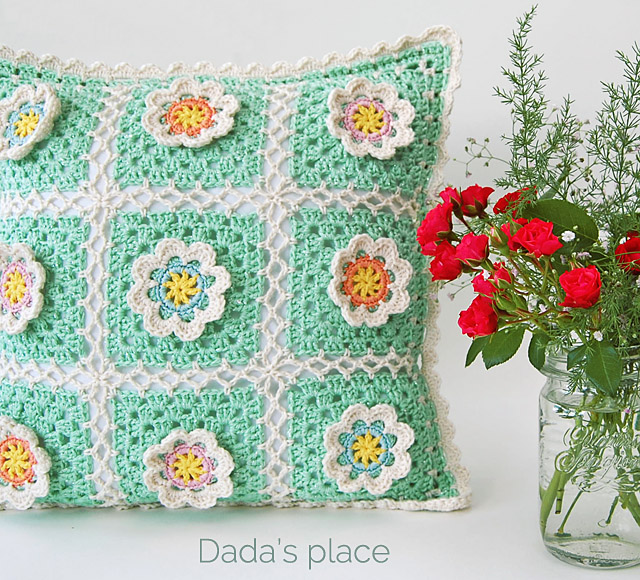
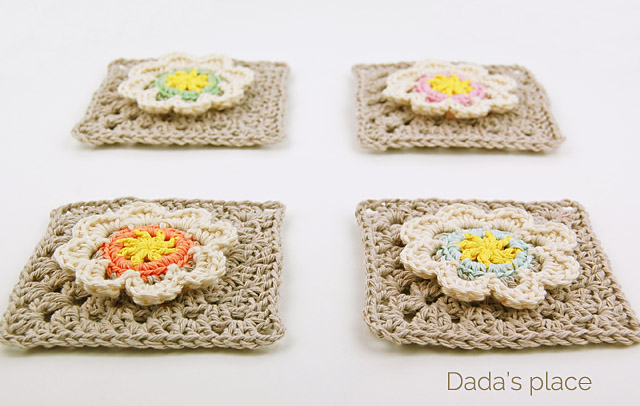
I wanted to try something new with this crochet pattern. Since my patterns are very detailed and making them requires a lot of time, I decided to make the pattern only for the square and not for the whole cushion. I also noticed that many of my customers are experienced enough to manage to make a cushion or blanket if they only have a square pattern. And this may be the answer. The pattern for the square will cost only $3.99. If you have a building block you can make whatever you’d like. Just like with Lego blocks. You can use the same square to make completely different things, by changing the way you join them together, or by making different items. You can use this square to make cushions, blankets, bedspreads, bags, scarves, shawls, ponchos…

granny square cushion

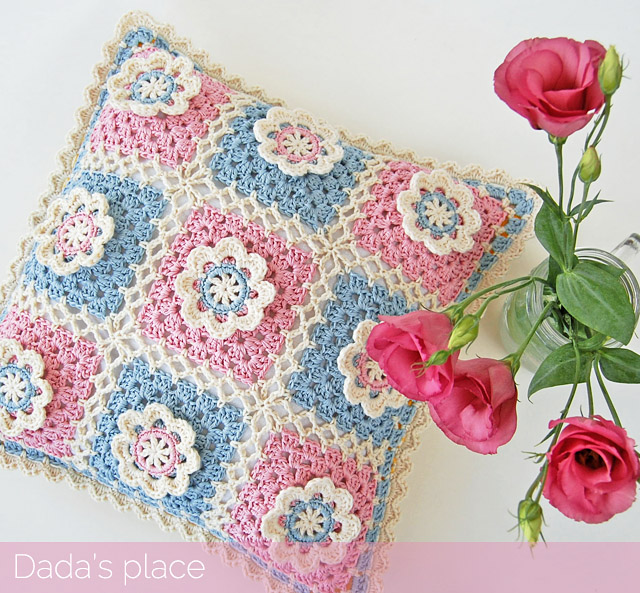
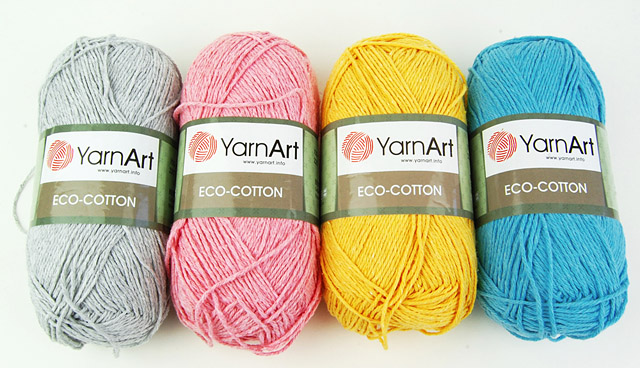
I really like to play with colors and to achieve completely different look with different colors. I find working with colors so fulfilling and enjoyable. Actually, choosing colors for the next crochet project is my favorite part of the process.

crochet flowery square

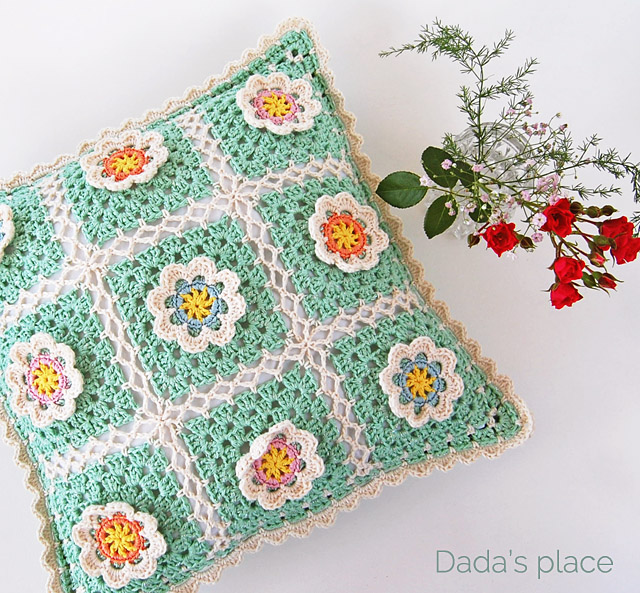
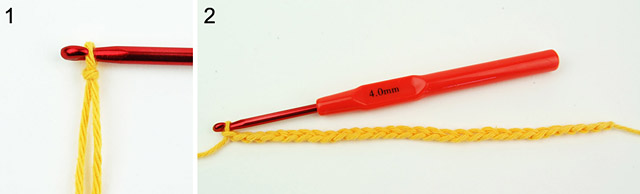
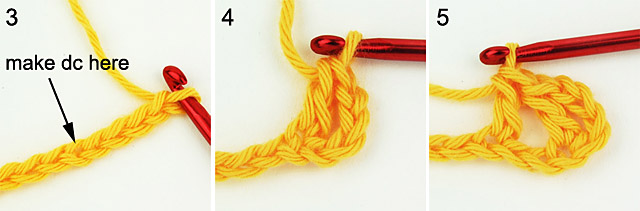
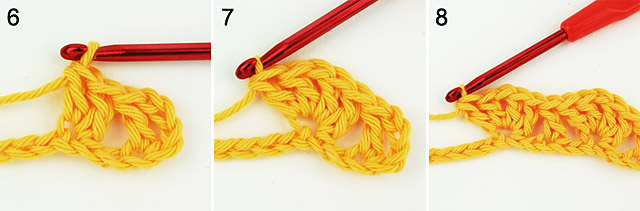
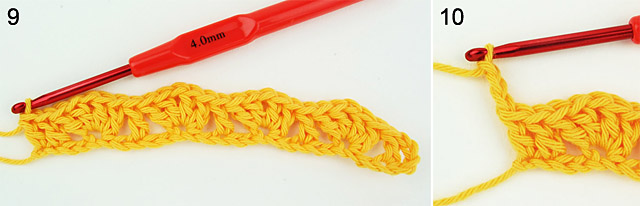
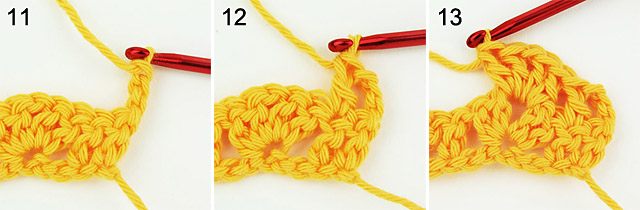
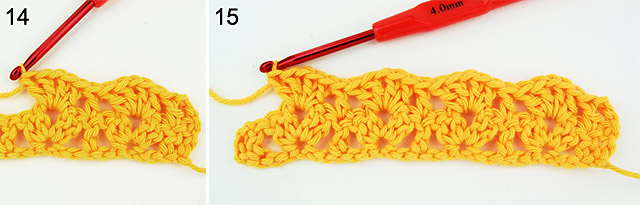
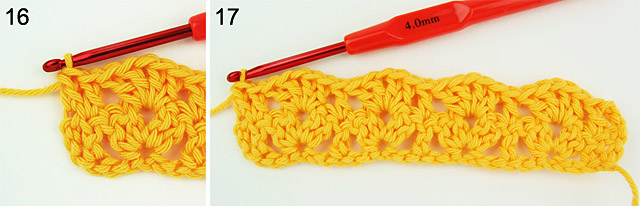
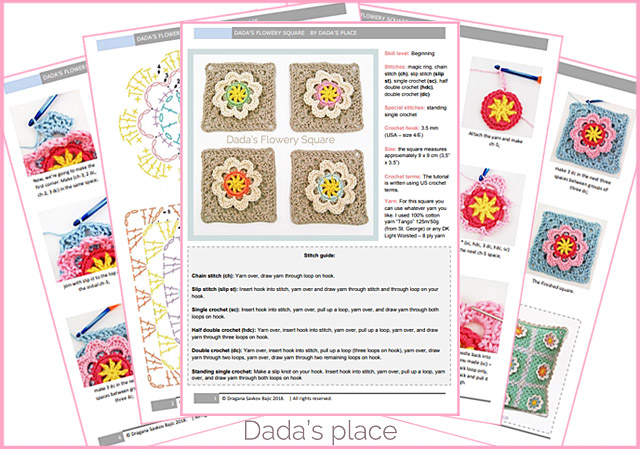
The flowery square pattern is very detailed; there are 42 step-by-step photos which guide you through the process, crochet chart, written pattern, and the stitch guide. I think that the pattern is suitable for beginners who have mastered the basic stitches, like: magic ring, single crochet, half double crochet and double crochet.

 flowery square pattern

The good thing about this square is that you can combine it with the classic granny square.
*
Dada’s flowery square is now available in Dada’s place shop, (payment options: Credit cards & PayPal), in my Ravelry shop, and in my Etsy shop. (payment option: PayPal)

*

Crochet Teddy Bear Blanket

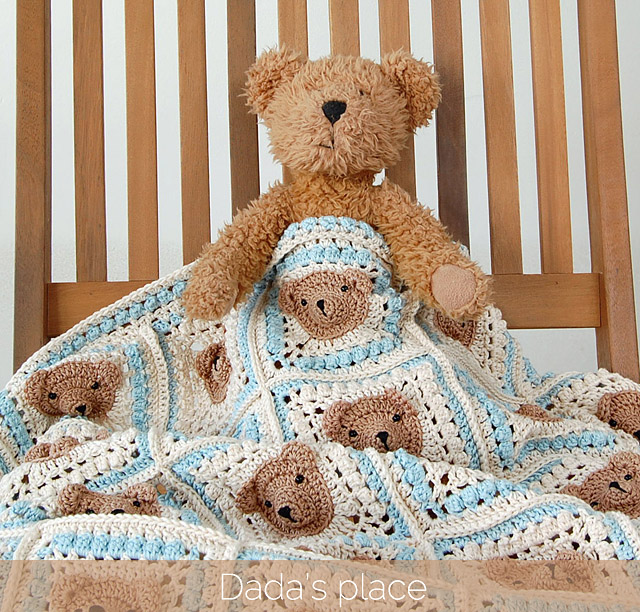
P.S. My Vintage style Teddy Bear Blanket pattern is now available in German, too!

You can buy it in Dada’s place shop, (payment options: Credit cards & PayPal), in my Ravelry shop, and in my Etsy shop. (payment option : PayPal)

*

A crochet pillow that makes me smile

29/05/2018 by Dada Filed Under: Crochet granny square, Crochet pillows 21 Comments

flowery crochet pillow

For the past 2 weeks I’ve been working on my first ever poncho pattern, and although I’m very excited about it, the process of making it has been a little boring. I’ve been working with only one color, back and forth in rows, the same stitch for over 150 rows… You can imagine how monotonous it could be. And in the middle of making the second poncho, which I’m going to take the pictures of for the photo tutorial, I felt that I needed something colorful, and interesting and happy and quick to make. All at the same time. So, I decided to make a crochet pillow.

flowery crochet cushion

I was wondering which pattern I should use? Should I use one of my existing patterns, should I try some new pattern from my Pinterest crochet board, or should I come up with a new pattern? I grabbed my crochet hook, played around a little bit and came up with this flowery granny square.

Then I looked at my yarn stash in search for the appropriate yarn, and first thing that caught my eye was the green glittering yarn I have had for ages. I think that we should always have something shiny and sparkling in our lives, even if it’s a simple skein of yarn. I decided to use it as the background. Then I chose several other bright colors, and the ivory color to balance everything.

granny square pillow

If you don’t live in Serbia, you can skip this section where I write about the yarn, because unfortunately, you can’t buy this yarn anywhere outside Serbia, nor you can order it online. All the yarn I used was manufactured by St. George. The green glittering yarn is “Una” 50g/115m 50% acrilyc, 45% cotton, 5% metallized polyester.
The ivory yarn is “Cotton classic” 100% cotton, 50g/120m, and yellow, orange, pink and blue yarn is “Cotton Cable”, 100% cotton, 50g/95m.

granny square cushion

I used 3.5 mm crochet hook. At first I didn’t know which method of joining squares to use. In the end, when I finished all 9 squares I decided to use join-as-you-go method to join the squares together which I think works well with these squares.

crochet pillow

As with all of my previous pillows I didn’t crochet the back side. I just took a piece of plaid fabric, installed a zipper and sewed it on at the back of the crocheted piece. Nice and easy.

crochet flower pillow

What else can I say about this pillow? First, that I really like how it turned out! I especially like the colors and the yarn I used. Second, that I decided to make the pattern and tutorial for this flowery granny square. Not sure about the whole pillow, though. Will see. Maybe I will also make a baby blanket using the same square pattern. I’m curious to see how it would look, and I have so much yarn in my stash that I could use in that project. Or in some another project…

*

Update: The flowery granny square pattern and step-by-step tutorial  is now available in Dada’s place shop, (payment options: Credit cards & PayPal), in my Ravelry shop, and in my Etsy shop. (payment option: PayPal)

*

Free Crochet Pattern: Lily’s Blanket

21/05/2018 by Dada Filed Under: Crochet baby blanket patterns, Free crochet patterns 9 Comments

If you love crochet blankets, stripes, simplicity and ease, then please continue reading, because this blanket is as simple and easy to make, as it is beautiful and stylish. And stripes surely add that modern touch to it.

You can make Lily’s blanket in just two colors (and I honestly think that gray-white combination might be the real winner), three colors, four colors (like I did), or as many colors as you like. By making every row (or every 2 or 3 rows) in different color it might be the ideal crochet project for going through all of the remaining yarn from your stash, which you don’t know what to do with.

Regarding the yarn, this pattern is not demanding at all. Although I used quality cotton yarn, you can make it with any beautiful, soft yarn. Even with acrylic yarn.

This blanket is worked back and forth in rows, and can be made in any size.
If you’d like to make a different size blanket, simply work the foundation chain to the desired width in a multiple of 6.

Crochet terms: Pattern is written using US crochet terminology. If you prefer UK terminology instead of double crochet make treble crochet, and that’s it! It’s that simple!

Level: Beginner
Size: 70 cm (27.5”) width, 100 cm (39”) length
Crochet hook: 4 mm (USA – G/6)
Gauge: 10 stitches and 9 rows in 10 cm (although gauge is not critical to this project)

Yarn:
Yarn Art – Ecco-cotton
100g/220m
85% cotton 15% polyester

● 3 skeins of gray (763)
● 1 skein of pink (766)
● 1 skein of yellow (764)
● 1 skein of turquoise (765)
or any Light worsted yarn (3 or Light)

So, let’s get started!

* To start, make a slip knot on your hook; (Picture 1)

* continue making foundation chain. Count your chains as you go, and stop when you reach the desired width in multiples of 6. I made ch-x. (Picture 2)

* Count fifth chain of your hook, (Picture 3)

* and make dc in that st. (Picture 4)

* Skip the next two chains, and make dc in the next ch. (Picture 5)

* Make one more dc in the same stitch; (Picture 6)

* Make ch-1, 2 dc in the same stitch. (Picture 7)

* skip the next two chs and make dc in the next ch, skip the next two chs and make [2 dc, ch-1, 2 dc] in the next ch. (Picture 8)

* Repeat from * until you are left with only 4 chs. Skip the next two sts, and make dc in the next two sts. We will make 2 dc at the end of each row. We will make ch-3 (which counts as dc) and dc at the beginning of each row. (Picture 9)

* Make ch-3 (counts as the first dc), (Picture 10)

* turn your work over, (Picture 11)

* and make dc in the next dc. (Picture 12)

* Skip the next two dc and make [2 dc, ch-1, 2 dc] in the next ch-1 space; (Picture 13)

* next dc, skip the next two dc and make [2 dc, ch-1, 2 dc] in the next ch-1 space; (Picture 14)

* Repeat from * until you’re left with only four sts. (Picture 15)

* Skip two dc, make dc in the next dc, and at the end make dc in the last dc. (Picture 16)

* And this is the all you need to know in order to make this blanket. Repeat this row until you reach the desired length.(Picture 17)

Written pattern row by row:

With gray color: Make foundation chain of 150 stitches.
Row 1: Make dc in the fifth chain from the hook, *skip 2 chs, [2 dc, ch-1, 2 dc] into the next ch, skip 2 chs, dc in the next ch; repeat from * 23 more times, dc in the last stitch.
Row 2: ch-3, dc in the next dc, * skip two dc, [2 dc, ch-1, 2 dc] into the next ch-1 space, skip 2 dc, dc in the next dc; repeat from * 23 more times, dc in the top of the initial ch-3.
Row 3 – 6: Repeat row 2. Change the color to pink in the last stitch of the 6th row.
Row 7 – 14: With pink color: Repeat row 2. Change the color to gray in the last stitch of the 14th row.
Row 15 – 20: With gray color: Repeat row 2. Change the color to yellow in the last stitch of the 20th row.
Row 21 – 28: With yellow color: Repeat row 2. Change the color to gray in the last stitch of the 28th row.
Row 29 – 34: With gray color: Repeat row 2. Change the color to turquoise in the last stitch of the 34th row.
Row 35 – 42: With turquoise color: Repeat row 2. Change the color to gray in the last stitch of the 42nd row.
Row 43 – 48: With gray color: Repeat row 2. Change the color to pink in the last stitch of the 48th row.
Row 49 – 56: With pink color: Repeat row 2. Change the color to gray in the last stitch of the 56th row.
Row 57 – 62: With gray color: Repeat row 2. Change the color to yellow in the last stitch of the 62nd row.
Row 63 – 70: With yellow color: Repeat row 2. Change the color to gray in the last stitch of the 70th row.
Row 71 – 76: With gray color: Repeat row 2. Change the color to gray in the last stitch of the 76th row.
Row 77 – 84: With turquoise color: Repeat row 2. Change the color to gray in the last stitch of the 84th row.
Row 85 – 90: With gray color: Repeat row 2. At the end of the 90th fasten off. Weave in the yarn end.

And now you have it! Very simple, but beautiful crochet blanket pattern! Hope you will like the pattern, and if you make it, please share it using the tag #lilysblanket. I would be thrilled to see your own creations of this pattern.

I’m planning on hosting a yarny giveaway related to this blanket very soon, so if you don’t want to miss it, please sign up for my newsletter, or follow me on social media: Facebok here, and Instagram here.

Happy crocheting!

  • « Previous Page
  • 1
  • …
  • 9
  • 10
  • 11
  • 12
  • 13
  • …
  • 50
  • Next Page »

Copyright © 2026 · Dadas Place.com