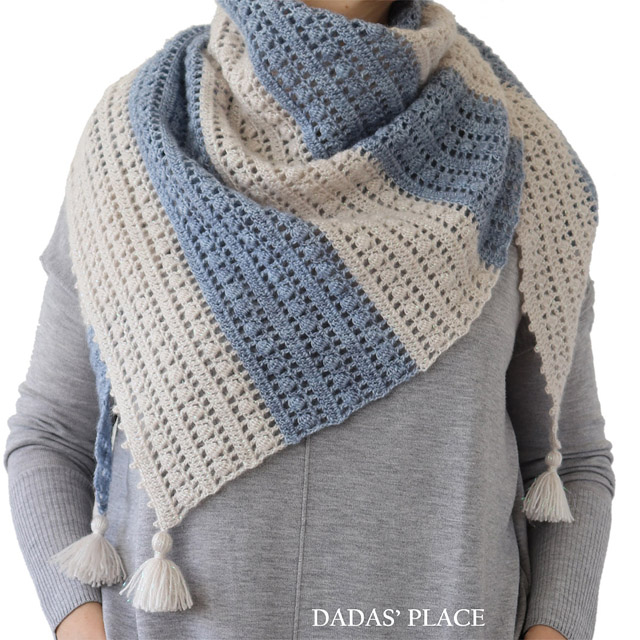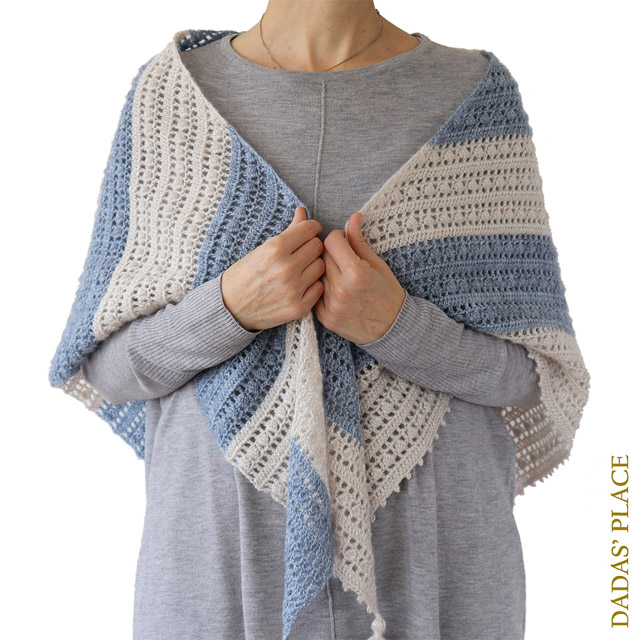
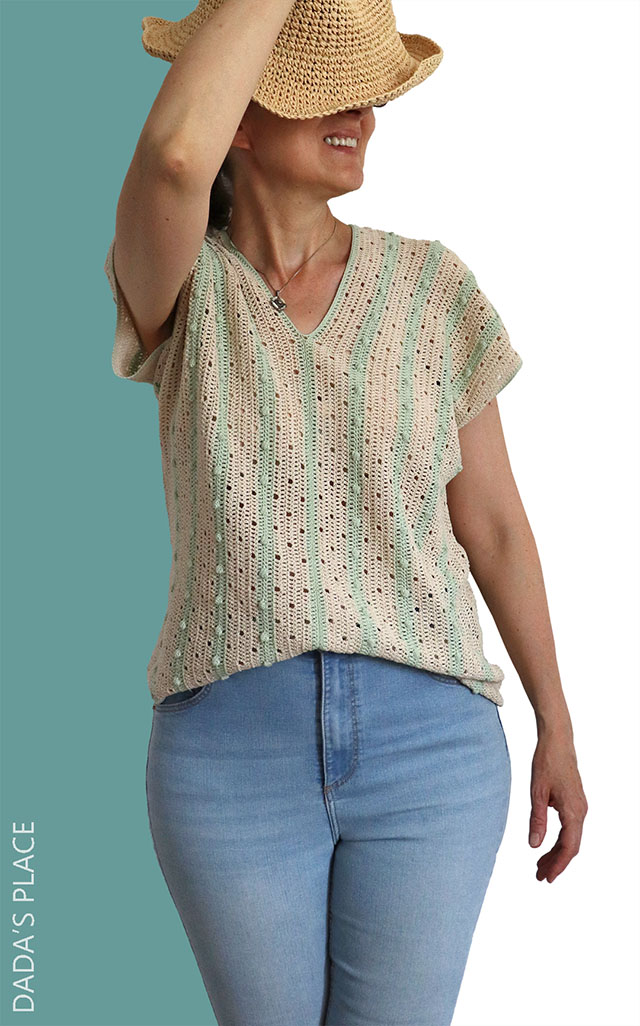
It’s been a while since I last shared a free pattern, so I thought I’d come back with a little surprise! With the warm summer days in full swing, I wanted to create something light, comfortable, and easy to wear—something that could quickly become a favorite handmade piece in your wardrobe.
This simple sleeveless top was originally designed just for me, but I enjoyed making and wearing it so much that I decided to turn my notes into a free pattern and share it with all of you. I hope you’ll enjoy crocheting it as much as I did, and that it will accompany you through many sunny summer days.
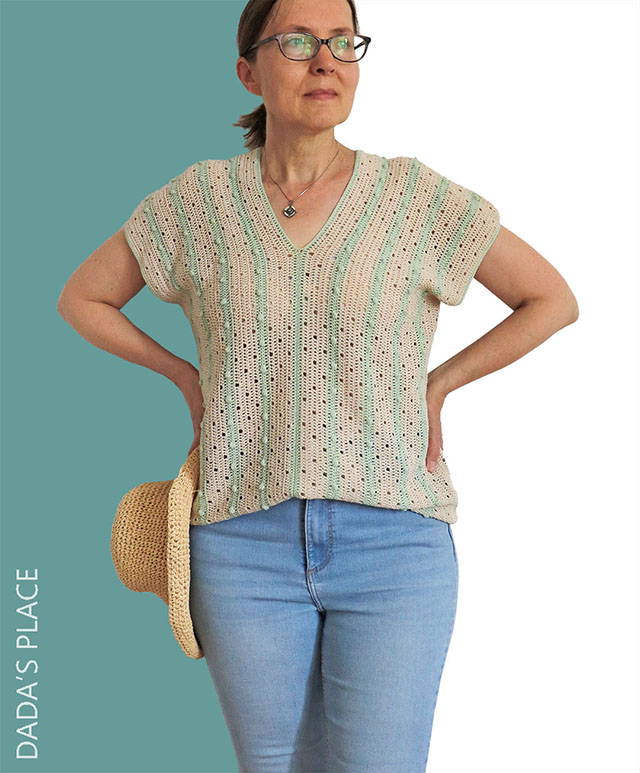
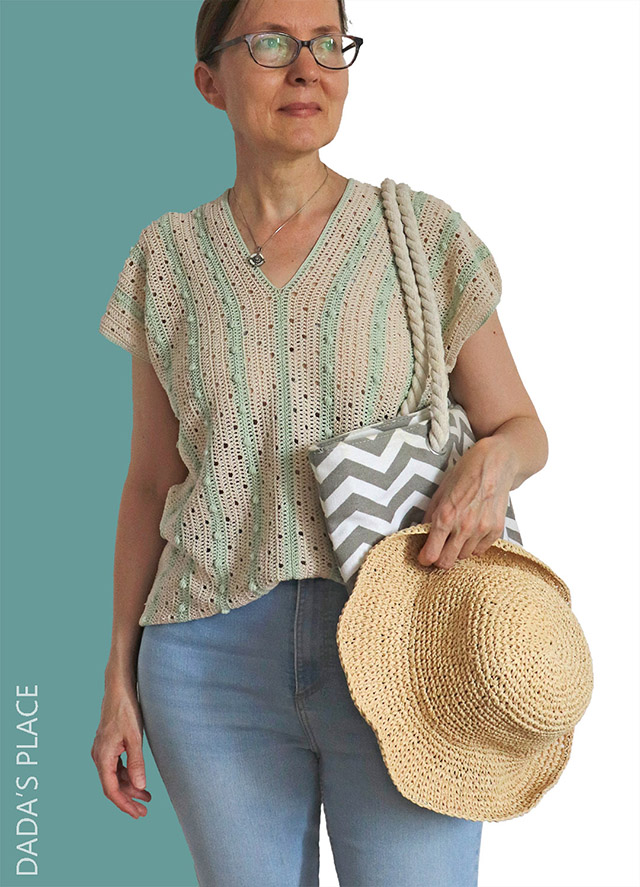
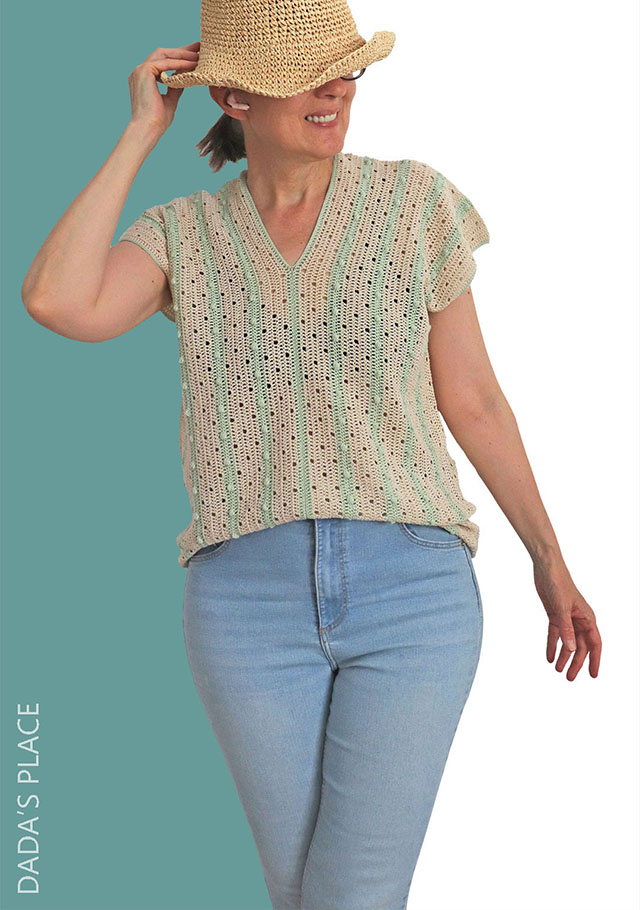
The Elsa Top is a lightweight and airy sleeveless summer top, the perfect project for warm-weather days. Designed with simplicity in mind, it is quick and enjoyable to make, making it an excellent choice even for beginners.
The pattern requires knowledge of only a few basic crochet stitches, allowing you to create a beautiful garment without complicated techniques. The top is constructed from two simple rectangular panels that are joined at the sides as well as along the front and back edges, leaving openings for the armholes and neckline.
Simple yet stylish, this versatile design can easily be customized to suit your preferred length and fit. Whether you’re making your first crochet garment or looking for a relaxing project, this pattern is sure to become a favourite.
The Elsa Top pattern is available in size M only. I originally made this top for myself and, since I loved how it turned out, I wanted to share the pattern with anyone who might like to make one too. As this was a personal project, I decided to keep things simple and not tackle the grading process for multiple sizes just yet.
Designing crochet garments is a direction I am excited to explore, and this pattern is my first step on that path. I hope to design and release another summer top pattern later this season in at least 4–5 sizes, making future patterns more size-inclusive and suitable for a wider range of makers.
Size: This pattern is available only in size M.
To fit chest circumference:
91-97
Measurement:
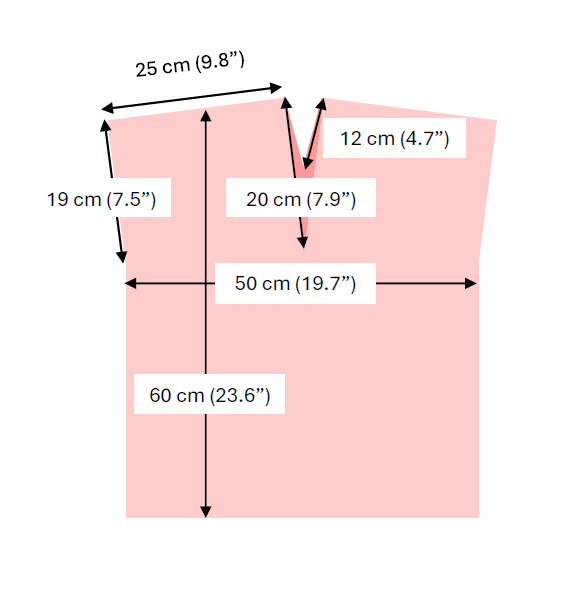
Chest circumference: 100 cm (39.4”)
Total length: 60 cm (23.6”)
Armhole depth: 19 cm (7.5”)
Skill level:
Easy
Crochet terminology:
The pattern is written using US crochet terms.
Crrochet hook: 3 mm
Gauge:
25 sts and 13 rows in dc to measure 10 x 10 cm (4” x 4”) after blocking, with 3 mm crochet hook and recommended yarn.
Yarn:
Hakelgarn 100% cotton, 100g/530m
Or any No. 10 cotton crochet thread
You’ll need:
Main color: Ivory – 2 balls of 100g
Contrasting color: Light green – 1 ball of 100g
ABBREVIATIONS (US terms)
st/sts – stitch/stitches
ch st – chain stitch
sl st – slip stitch
fdc – chainless foundation double crochet
sc – single crochet
dc – double crochet
bobble – 5 dc bobble stitch
rep – repeat
RS – right side
WS – wrong side
MC – main color
CC – contrasting color
Construction:
This lightweight summer top is constructed from two rectangular panels that are first joined along the sides, leaving openings for the armholes. The pieces are then joined at the front and back, creating a neckline with a deeper front opening. To complete the garment, the armholes, neckline, and bottom edge are neatly finished.
Stitch guide
Chain stitch (ch): Yarn over, pull yarn through loop on hook.
Slip stitch (slip st): Insert hook into stitch, yarn over and draw yarn through stitch and through loop on your hook.
Single crochet (sc): Insert hook into stitch, yarn over, pull up a loop, yarn over, and pull yarn through both loops on hook.
Double crochet (dc): Yarn over, insert hook into stitch, pull up a loop (three loops on hook), yarn over, pull yarn through two loops, yo, pull yarn through two remaining loops on hook.
5 dc Bobble stitch (bobble): Yarn over, insert hook into stitch, pull up a loop, yarn over, pull yarn through two loops, (yarn over, insert hook into same stitch, pull up a loop, yarn over, pull yarn through two loops) 4 times, yarn over and pull yarn through all 6 loops on hook.
Notes:
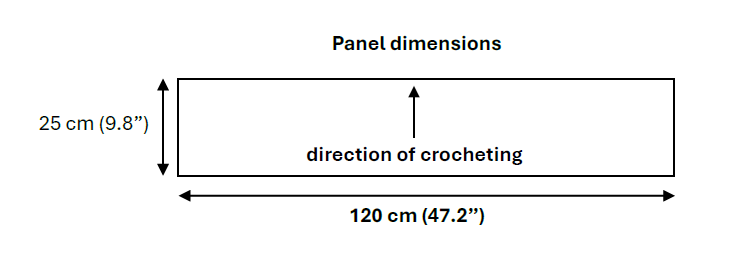
▪ 2 panels are worked back and forth in rows.
▪ Turn after every row.
▪ Ch-2 at the beginning of dc rows counts as dc.
▪ Ch-1 at the beginning of sc rows does not count as a stitch.
▪ First sc is always made in the same st as chain st.
▪ Last sc is always made in second chain of Ch-2.
▪ Every row has the same number of stitches.
▪ Bobble stitch is made of 5 dc.
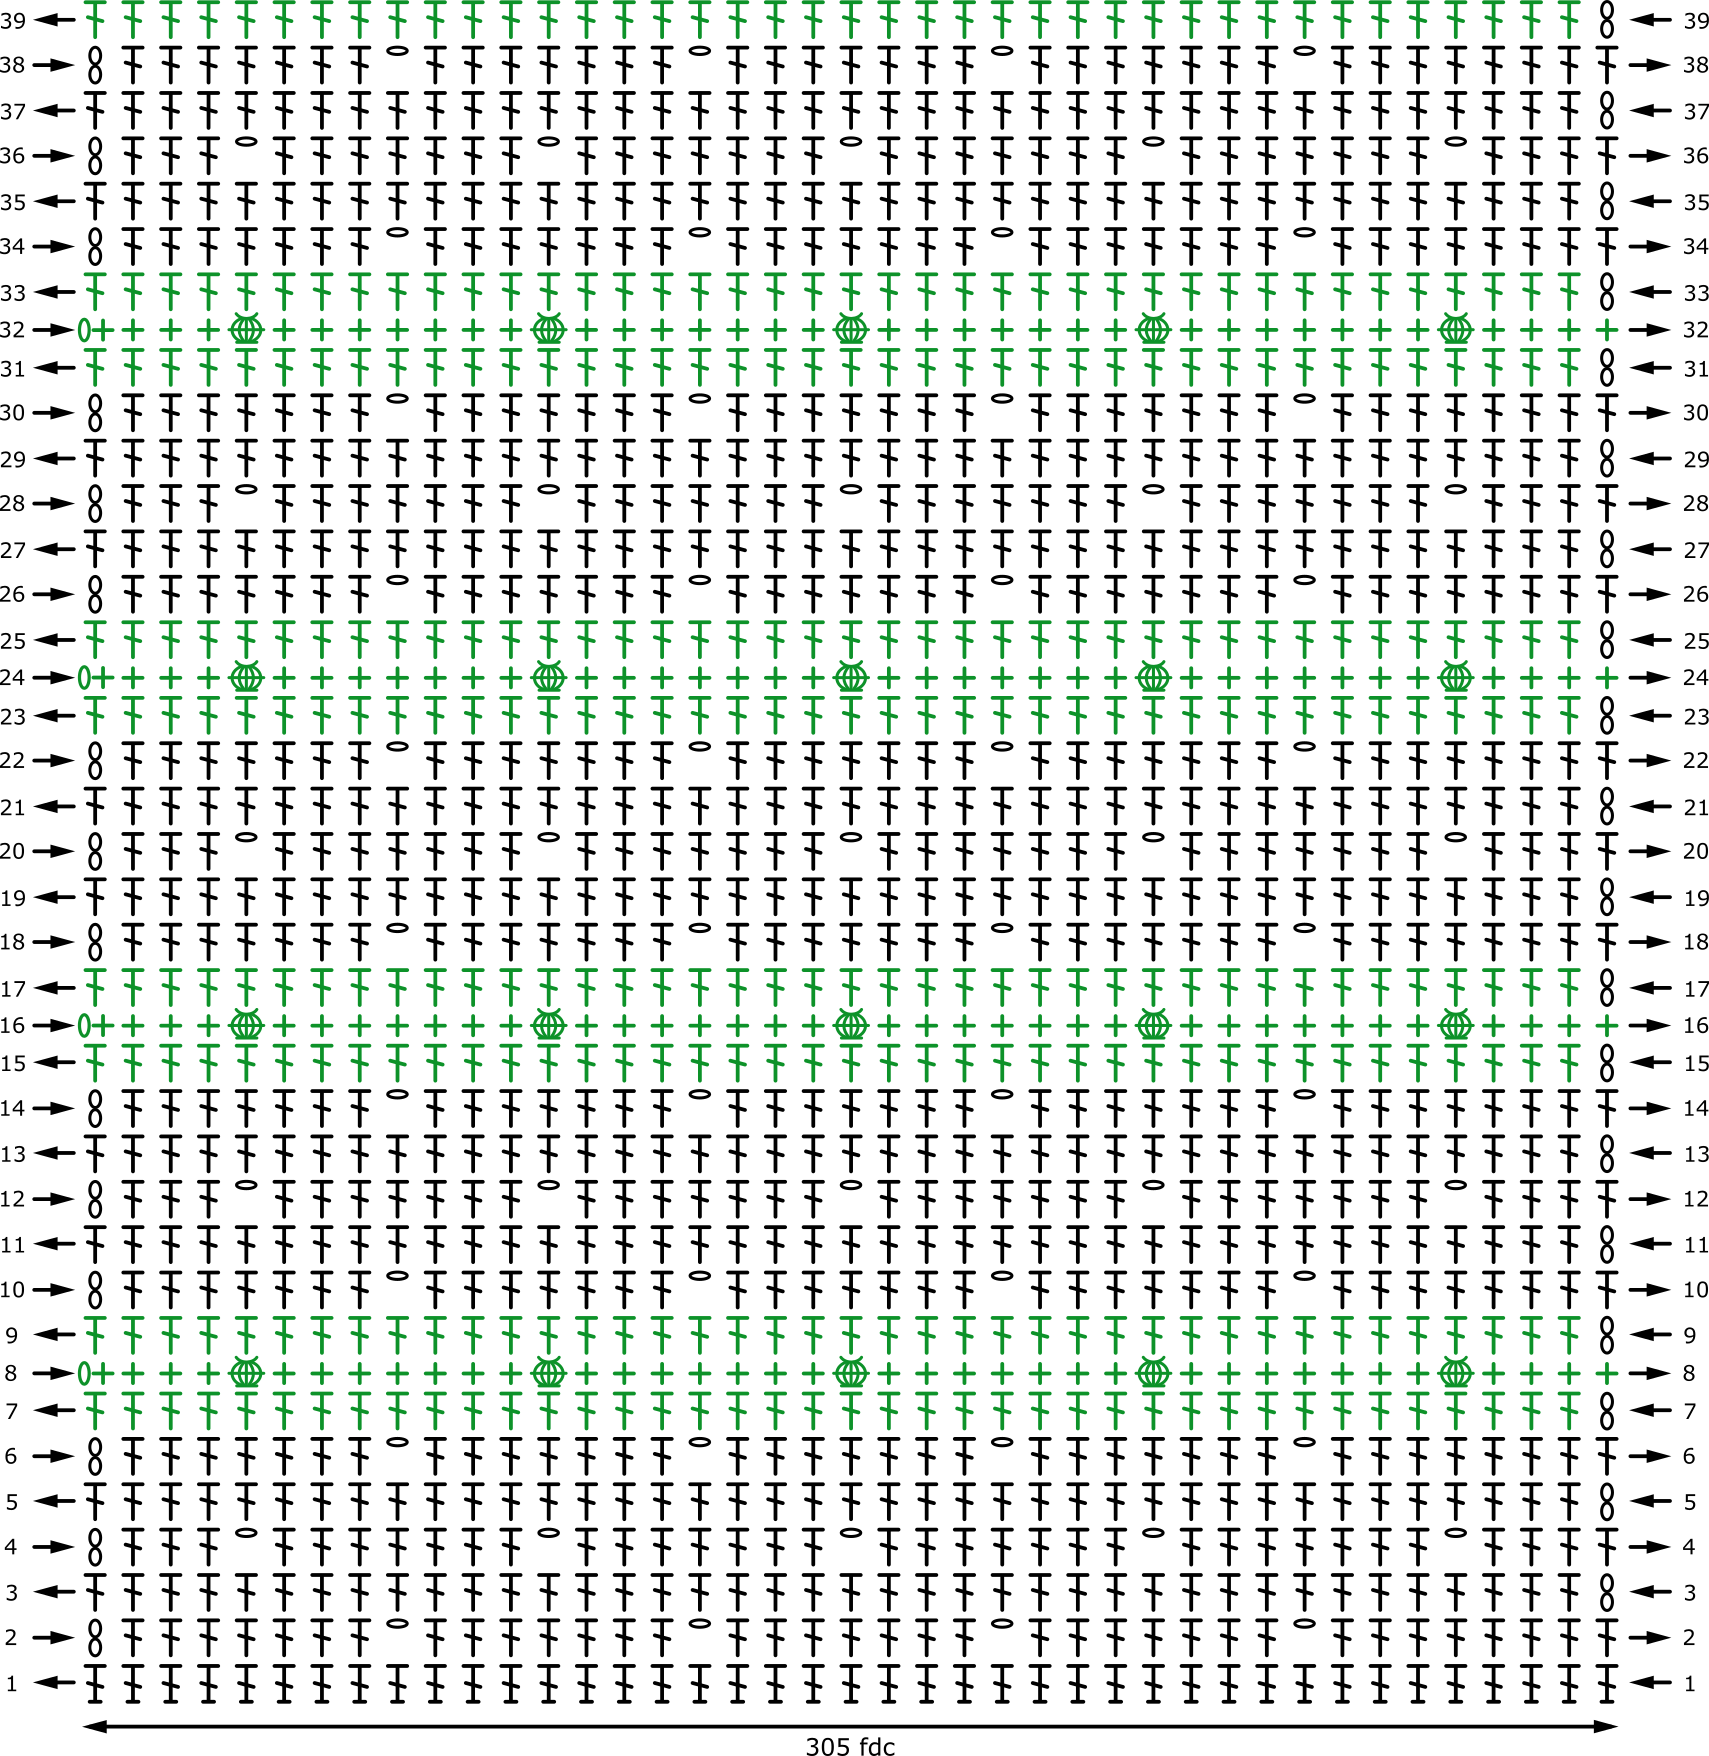
Row 1 (RS): Working with MC – 305 fdc
Row 2 (WS): Ch-2 (counts as dc here and henceforward), 7 dc, *ch-1 skip 1 st, 7 dc; rep from * to end making in last repeat 8 dc instead of 7 dc.
Row 3 (RS): Ch-2, 1 dc in each st and ch-1 sp to end.
Row 4 (WS): Ch-2, 3 dc, *ch-1, skip 1 st, 7 dc; rep from * to last 5 sts, ch-1, skip 1 st, 4 dc.
Row 5 (RS): As row 3.
Row 6 (WS): As row 2, change to CC at last st.
Row 7 (RS): Working with CC – as row 3.
Row 8 (WS): ch-1 (doesn’t count as st here and in all sc rows), 1 sc in same st, 3 sc, *1 bobble, 7 sc; rep from * to last 5 sts, 1 bobble, 4 sc.
Row 9 (RS): As row 3, change to MC at last st.
Rows 10 – 33: rep rows 2 – 9 three times.
Rows 34 – 39: rep rows 2 – 7 once. Fasten off.
Make 2 panels.
Joining
Side Seams (working with MC along main-color edge)
Fold the panel in half and align the edges. Starting at the bottom edge, join the sides along the main-color edge using slip stitches, working upward toward the armhole opening.
Leave approximately 19 dc unworked to create the armhole opening. If desired, this can be adjusted to suit your preference – a larger opening can be made by leaving more stitches unworked, while a smaller opening can be achieved by joining more stitches.
Repeat the instructions for the second panel.
Back Seam (working with CC along contrasting-color edge)
Next, position both pieces together and join them along the back using the same slip stitch method and a contrasting yarn. Starting from the bottom edge, work upward for approximately 44 cm (17.3 inches), or to your desired length, leaving the remaining opening for the neckline.
Front Seam (working with CC along contrasting-color edge )
Using the same slip stitch method and contrasting yarn, join the two pieces along the front edge. Starting from the bottom, work upward for approximately 38 cm (15 inches), leaving a larger opening at the front than at the back to create a deeper neckline.
The depth of the neckline can easily be adjusted to suit your preference. For a deeper neckline, join fewer stitches; for a higher neckline, join more stitches.
Neckline Edging
Without fastening off, work one round of sc around the neckline.
Next, work one round of sl sts in the back loops of sc from the previous round. Fasten off. This creates a neat, polished edge and adds subtle definition to the neckline.
Armhole Edging
Using the contrasting yarn, join the yarn to the armhole opening and work one round of sc around the opening.
Next, work one round of slip stitches in the back loops of sc from the previous round. Fasten off.
Bottom Edging
Using the contrasting yarn, join the yarn to the bottom edge of the top and work one round of sc evenly around the hem. Since there are no clearly defined stitches along this edge, distribute the stitches as evenly as possible to create a smooth finish.
Next, work one round of sl sts in the back loops of sc from the previous round.
Fasten off and weave in all ends.
Tutorial on sl st joining method can be found here
I can’t wait to see your versions of the Elsa summer top! So, please tag me and use the hashtag #elsasummertop when you
post it on social media. I will share the best photos in my Instagram and Facebook stories and on Pinterest.
COPYRIGHT
This pattern is for personal use only. Do not claim the pattern as your own. The pattern (or parts of it) cannot be resold, shared, published, altered, translated or posted anywhere over the internet or offline!
If you prefer working from a printable version, a free PDF download of this pattern is also available on Ravelry. Click here for a free download.