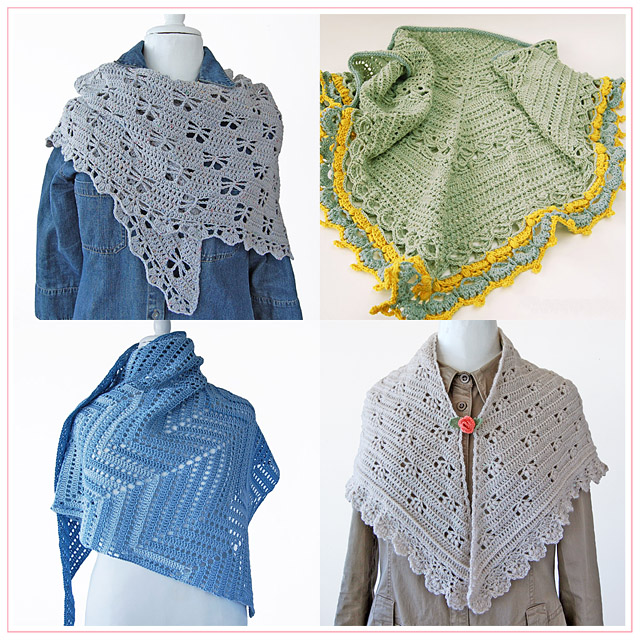
Do you want to add to your wardrobe by making something with your own hands? Then, you’re in the right place! Do you want to express your creativity through crochet but you aren’t very experienced in it? Or maybe, you’ve just started your crochet adventure, but you’d like to make something beautiful and useful immediately? Then you’re in the right place! Are you an experienced crocheter, but you’d like to watch your favorite TV show while crocheting, so you need something easy to work on? Then you’re in the right place!
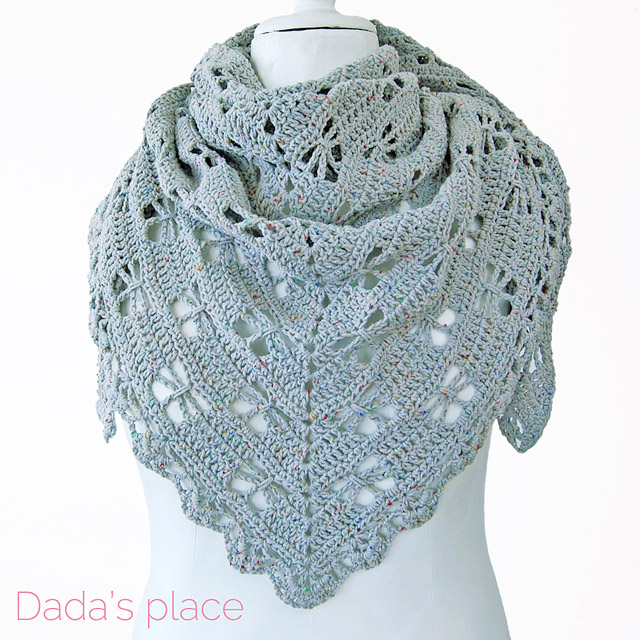
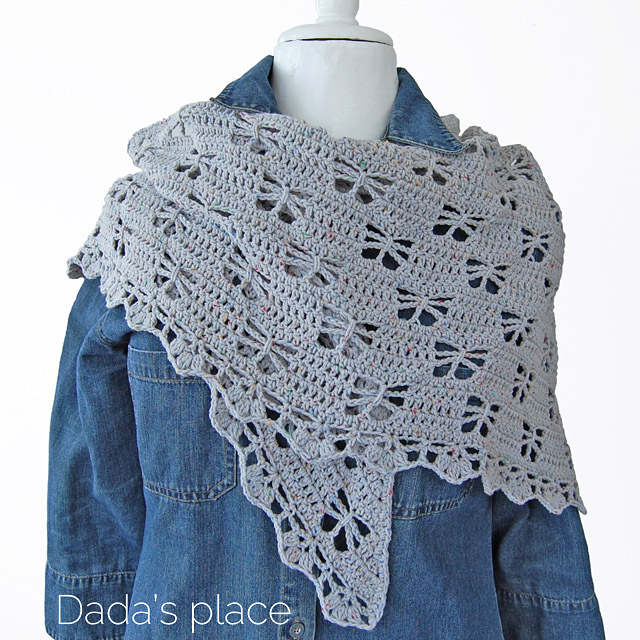
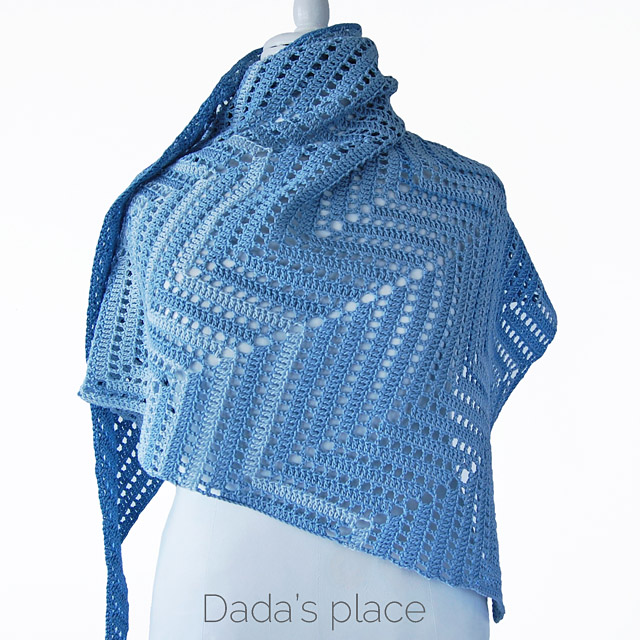
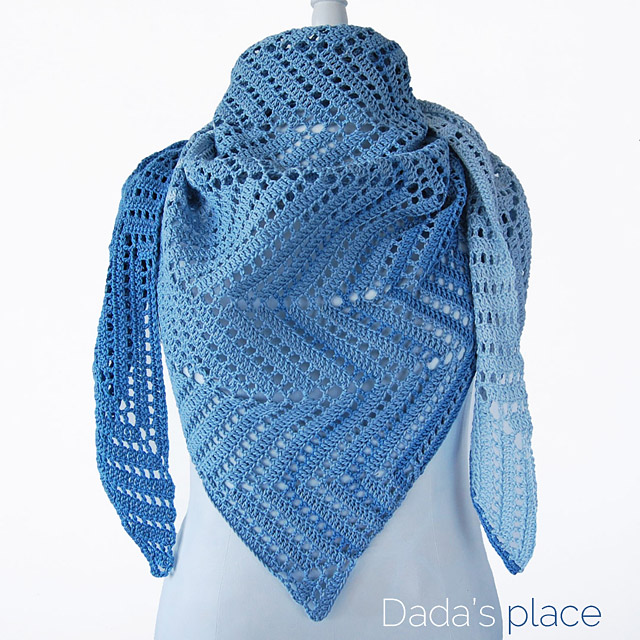
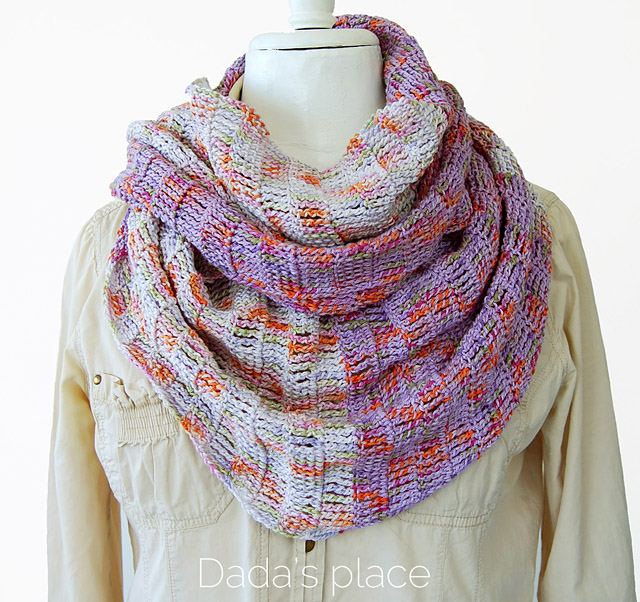
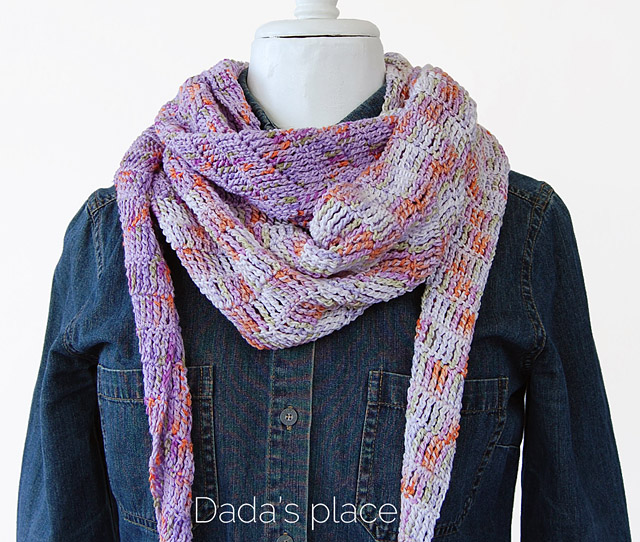
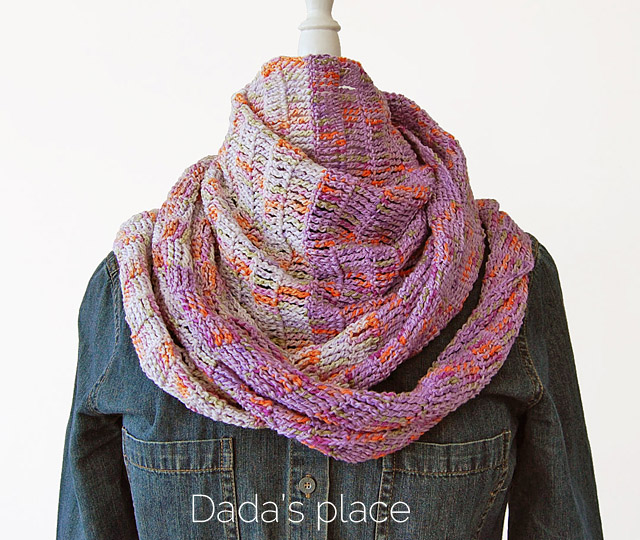
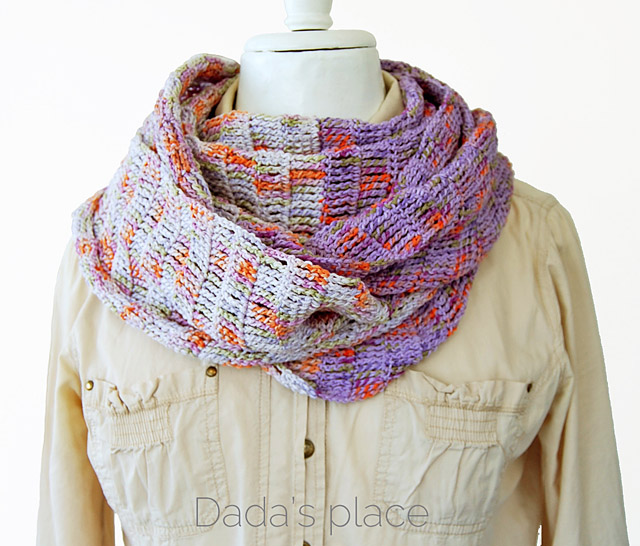
Because this shawl is a great contribution to your wardrobe, and it’s so easy to make that every beginner would be capable of making it. Plus you can watch your favorite podcast or TV show, and after some time you will have something beautiful to wear around your neck.
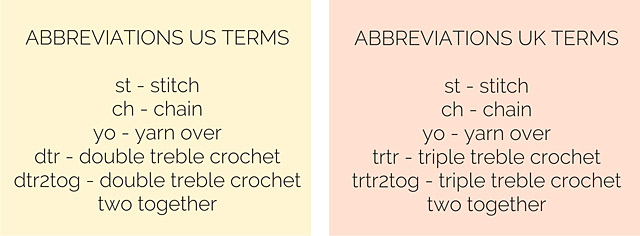
Pattern is written using US crochet terminology. UK terms are given in brackets.
Level: Beginner
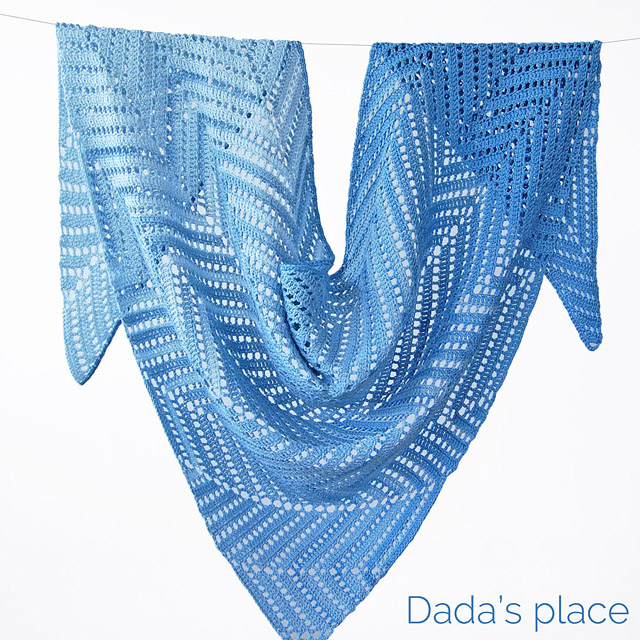
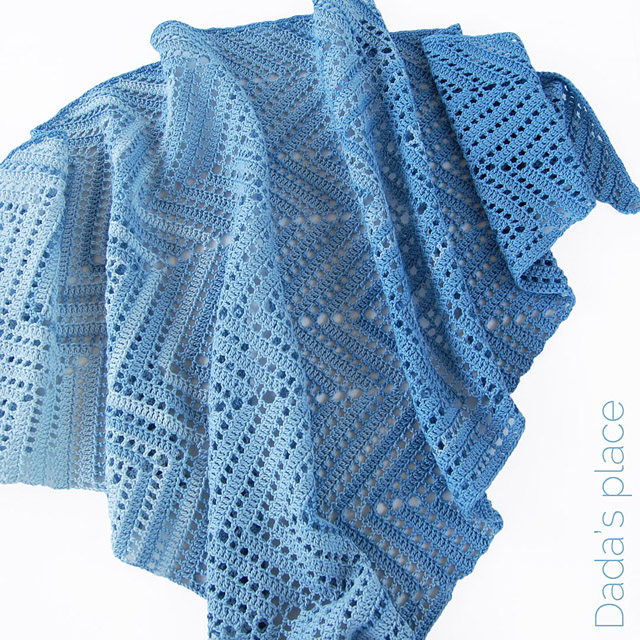
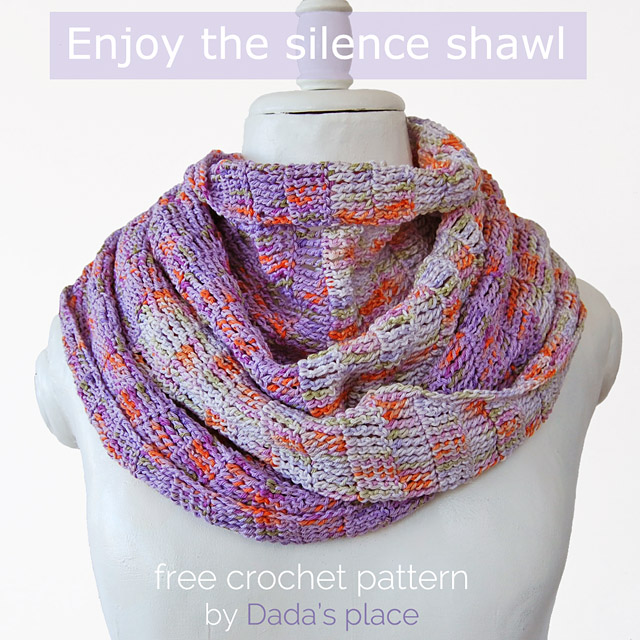
Size: 300 x 35 cm (118” x 12”)
Crochet hook: 3.5mm (USA-E / UK-9)
Gauge: 19 st in 10 cm
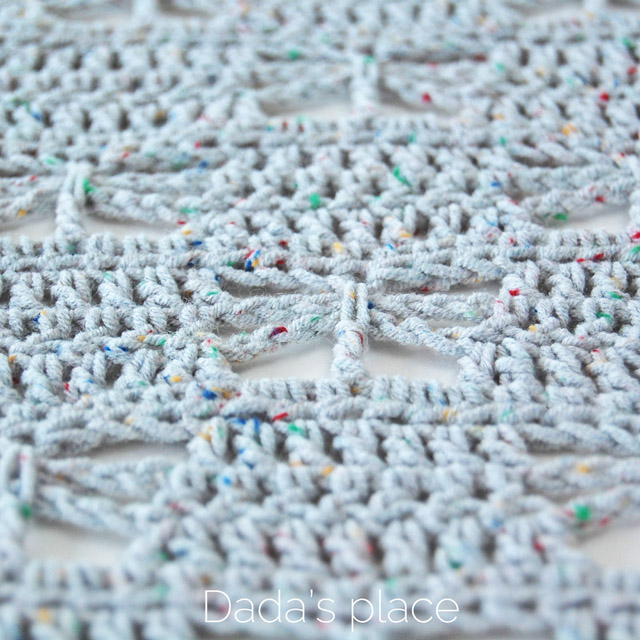
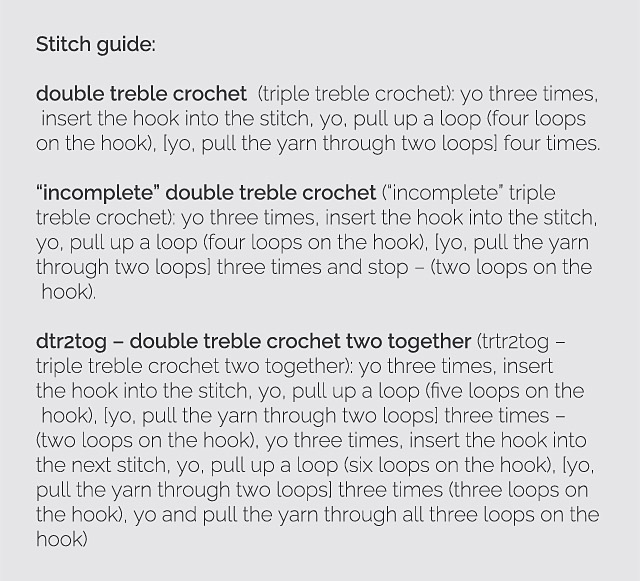
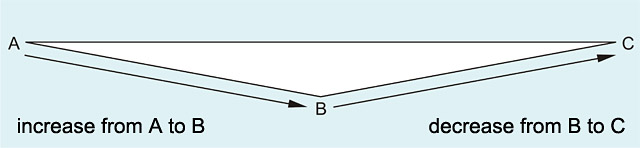
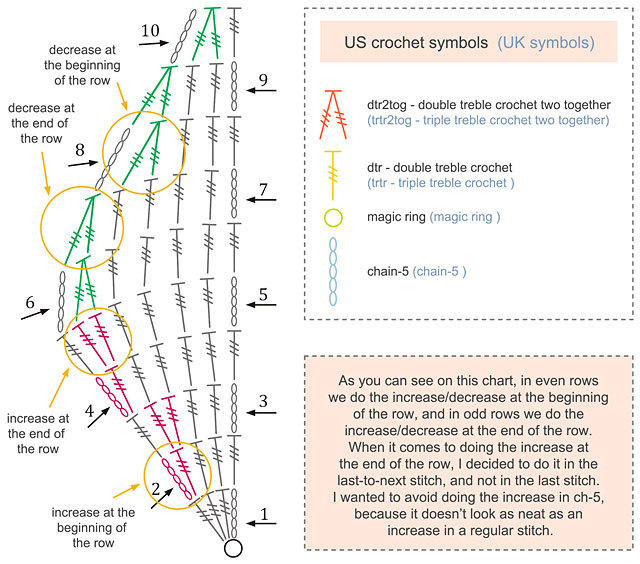
The shawl is very long, narrow and symmetrical. It is crocheted from one tip of the triangle to the other, from point A to point B. If you want your shawl to be shorter and wider, instead of double treble crochet (triple treble crochet) use treble crochet (double treble crochet). Start with one color; change the color when you have gone through the whole skein of yarn. Repeat that until you finish all 6 skeins.

We will always increase/decrease the width on the same side of the shawl. We’ll increase every row by one stitch until we reach the widest point of the shawl. From that point we’re going to decrease every row by one stitch.
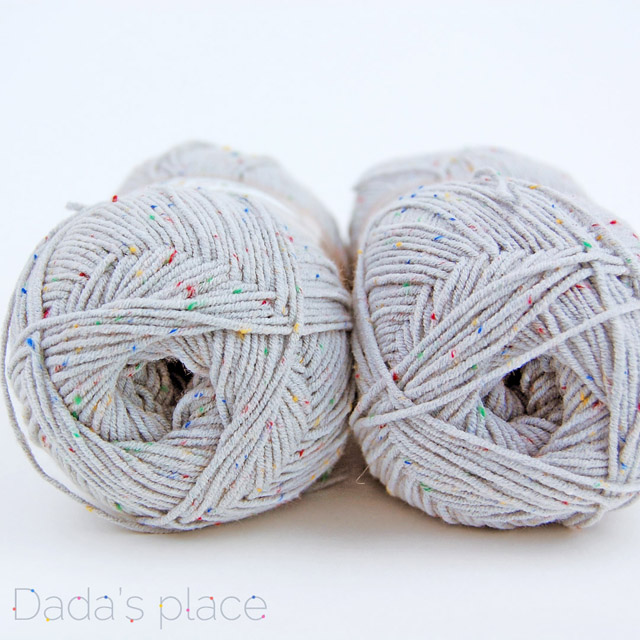
Material needed:
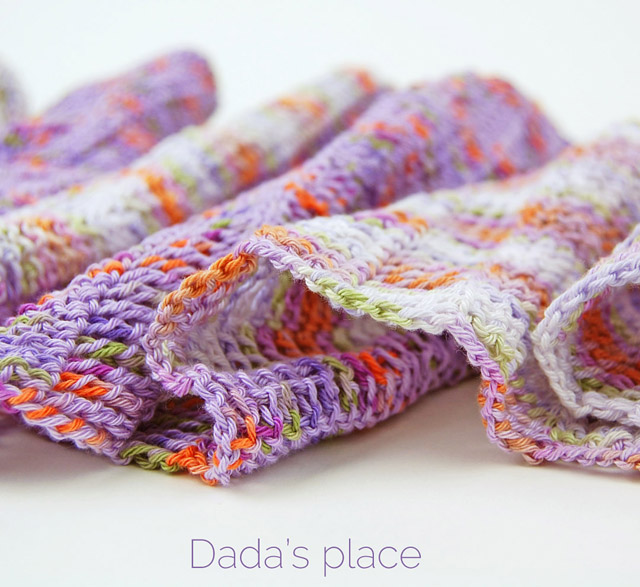
For this shawl you can use whatever yarn you like, I’d only advise against using chunky yarn, because it doesn’t drape very well. I used 100% cotton yarn 125m/50g
3 skeins (50g) of “Tango color” no. 0092 – 100% cotton 125m/50g
3 skeins (50g) of “Tango color” no. 0192 – 100% cotton 125m/50g
In this step-by-step tutorial you will learn how to do the increase/decrease. And that’s the only thing you should know in order to make this super easy shawl.
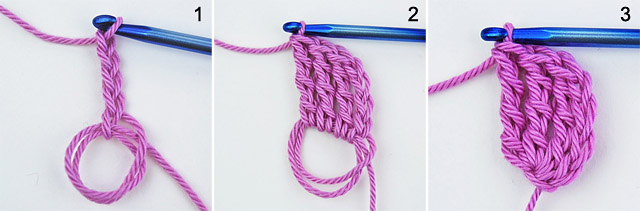
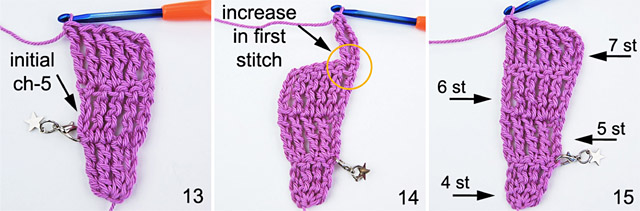
Row 1: Start with a magic ring. Make ch-5 in the ring. Counts as dtr (trtr) – Picture 1
Make 3 dtr (trtr) in the ring. (4 st in total) – Picture 2
Pull the tail and close the ring. – Picture 3
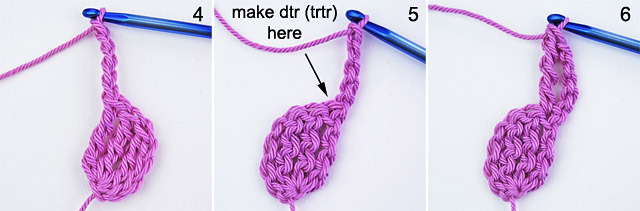
Row 2: Make ch-5, – Picture 4
then turn your work over. – Picture 5
Make dtr (trtr) in the same stitch; (increase) – Picture 6
Make dtr (trtr) in the next 2 stitches. – Picture 7
Make dtr (trtr) in the fifth chain of the initial ch-5. – Picture 8
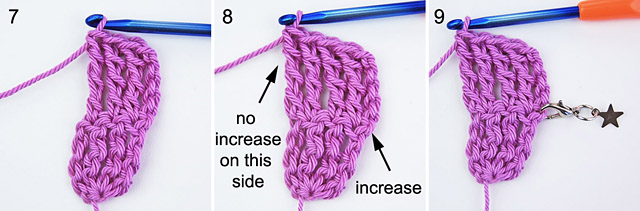
I put the stitch marker on the side where we will do the increase. – Picture 9
Row 3: Make ch-5, turn over your work. Since this is the side where we don’t do the increase, we will not make dtr (trtr) in the same stitch. – Picture 10
Instead, we will make dtr (trtr) in the next 3 st. Now, we need to do the increase, but I don’t like to do it in ch-5 (which is the last stitch). – Picture 11
Instead, we will do the increase in the last dtr (trtr) of the row, so make one more dtr (trtr) in the last dtr (trtr) of the row. – Picture 12
so, make dtr (trtr) in the fifth st of the initial ch-5. – Picture 13
Row 4: Make ch-5, turn over and make dtr (trtr) in the same stitch (increase). – Picture 14
Make dtr (trtr) in the next five stitches. As you can see we increased every row by one stitch. – Picture 15
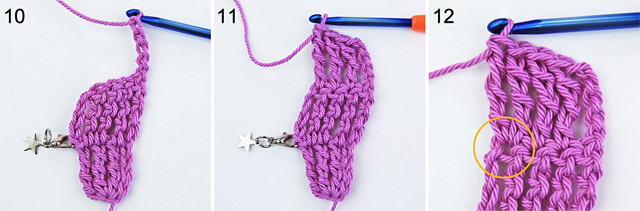
And now you know how and where to do the increase. You only have to repeat the second and the third row until you reach the widest point of the shawl.
In the second row we did the increase at the beginning of the row – in the first stitch. In the third row we did the increase at the end of the row – in the next-to-last stitch, which is dtr (trtr). The last stitch is ch-5.
So, repeat the second and the third row until you achieve the desired width. Now, we are going to do the decrease in every row, on the same side of the shawl where we did the increase.
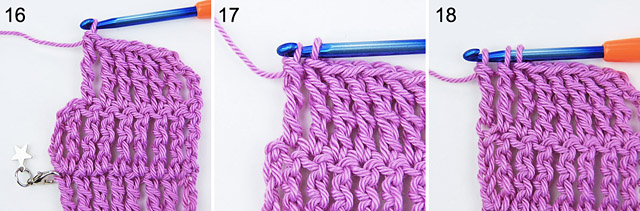
When you achieve the desired width, make ch-5, turn over, make 1 dtr (trtr) in every stitch, until you reach the last dtr (trtr) of the row, which is the next-to-last stitch. Now we’re going to make dtr 2tog (trtr2tog) – Picture 16
make an “incomplete” dtr (trtr) – yo three times, insert your needle into the next dtr (trtr), pull up a loop, [yo, draw the yarn through two loops] three times, and now stop. You should have 2 loops on the hook. – Picture 17
Make one more “incomplete” dtr (trtr) in the fifth chain of ch-5; now you should have 3 loops on your hook. – Picture 18
yo and draw the yarn through all three loops. We’ve just done the decrease at the end of the row. – Picture 19
Now, we’re going to do the decrease at the beginning of the row, so make ch-5; – Picture 20
make an “incomplete” dtr (trtr) in the next stitch; – Picture 21

make another “incomplete dtr (trtr) in the next stitch – you should have three loops on the hook; – Picture 22
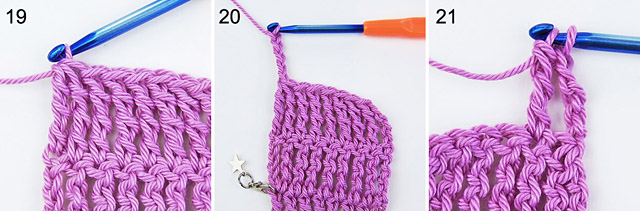
yo, and draw the yarn through all three loops on your hook. – Picture 23
continue working 1 dtr (trtr) in each stitch until you reach the end of the row; – Picture 24

make ch-5, turn over, make 1 dtr (trtr) in each stitch; – Picture 25
make 1 “incomplete” dtr (trtr) in the last two stitches; – Picture 26
yo, and draw the yarn through all three loops on the hook. – Picture 27
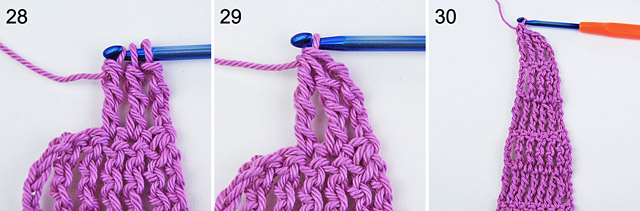
Again, we’re going to do the decrease at the beginning of the row, so make ch-5, turn over, make an “incomplete” dtr (trtr) in the next two stitches, – Picture 28
yo, and draw the yarn through all three loops. – Picture 29
Now, you just have to repeat those two rows – the row where you do the decrease at the end of the row, and the row where you do the decrease at the beginning of the row, until you’re left with only four stitches. Cut the yarn and fasten off. – Picture 30
And now you have it! Very easy and simple to make beautiful crochet shawl pattern!
Feel free to sell the finished products made from this pattern, but please link back to my site: dadasplace for credit. And, please don’t use my pictures to sell your work.
Although this pattern is free, it is copyright protected, so please don’t sell or publish this pattern anywhere, don’t translate it, or make YouTube videos without my permission. Thank you for respecting my work!
Hope you will like the pattern, and maybe will try it out! If so, I would love to see it! Please be free to share it to my Facebook page, or on Instagram, and use hash tag #enjoythesilenceshawl. I’m looking forward to seeing your beautiful creations, it will bring me a lot of joy!