• Facebook
  • Instagram
  • Pinterest

Dada's Place

Crochet wonderland

  • Home
  • Blog
  • Dada’s shop
  • Free Patterns
  • Categories
  • About
  • Contact

DIY: Phone Pouch Free Tutorial

30/10/2015 by Dada Filed Under: Free crochet patterns 10 Comments

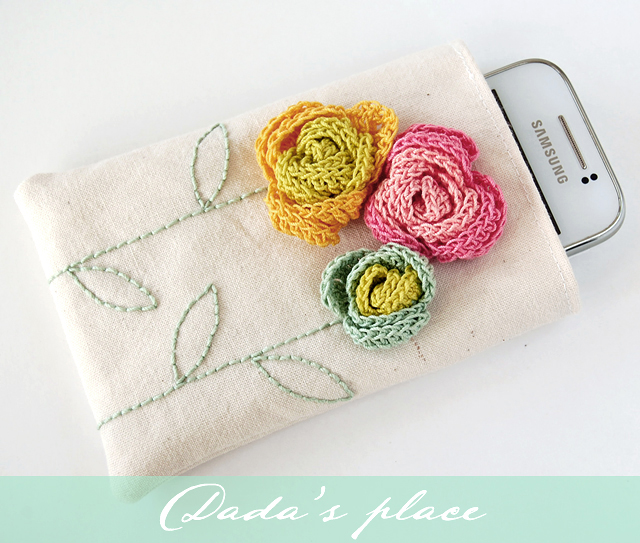
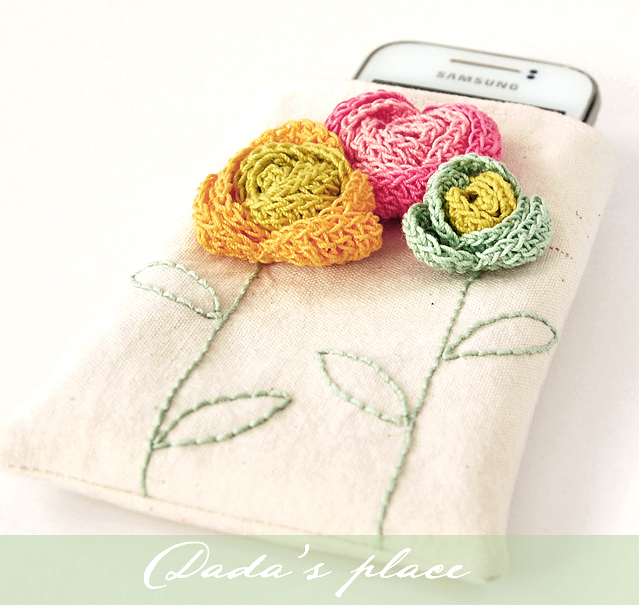
Phone pouch with crochet flowers
When I posted the picture of my newest cell phone pouch on Facebook I saw that you really liked it, so I decided to show you how to make one for your own phone. So, I sat down, and made this DIY free tutorial.
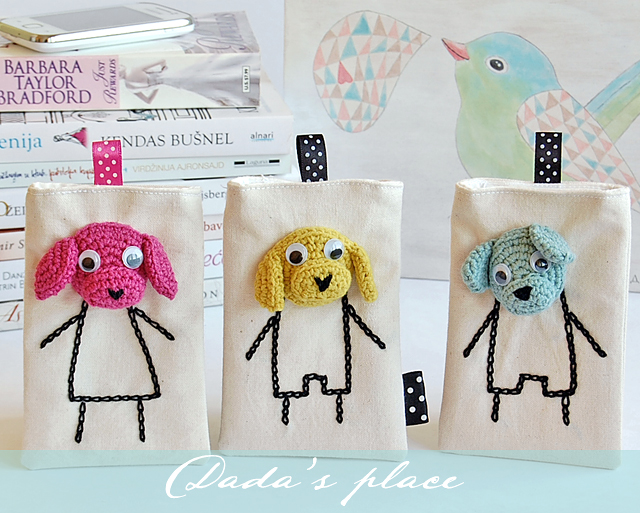
Phone pouch with crochet dogs
Before we start, I want to look back at my brief history of making phone pouches. These guys are my first  pouches. I made them at the beginning of my crochet obsession, and wrote a post about them here.
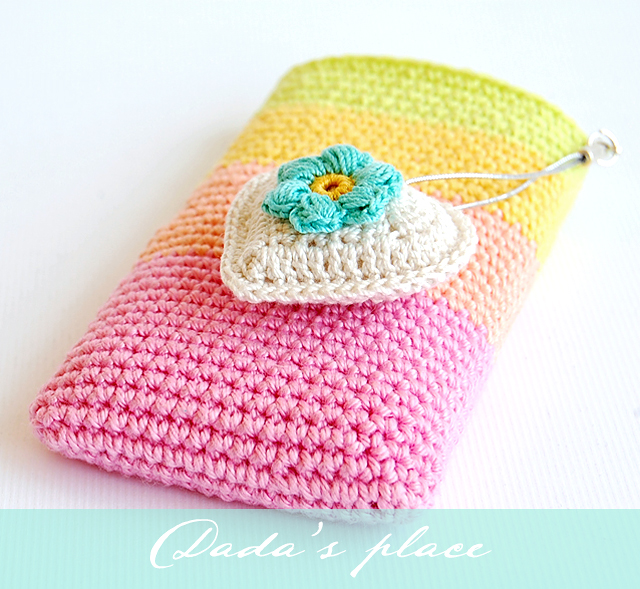
Rainbow crochet phone pouch
This pouch was made in October of 2013. It’s very easy to make, and you can find the link to the free pattern in this post.
Phone pouch free tutorial


If you’re familiar with the basics of sewing you will be able to easily make this cute phone pouch. Just one more note before we start. Plaid fabric on the pictures always represent the inner bag (lining) and plain fabric the outer bag. So, let’s get started!

Supplies needed:

* crochet thread for doilies
* 2 rectangular pieces of medium or heavyweight fabric for the outer bag
* 2 rectangular pieces of lightweight fabric for the inner bag (lining)
* one small piece of Velcro tape (hook & loop tape)

Dadas place phone pouch free tutorial
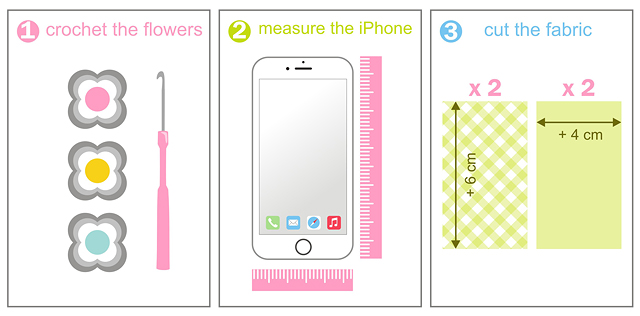
1. First decide which flowers you want to crochet. I found the pattern for my flowers in this Japanese craft book, but there are so many beautiful and free flower patterns on the Internet. If you spend some time on Pinterest, you will find plenty of beautiful flower patterns. Make as many flowers as you wish. I made only three, but you can make a whole bouquet of flowers.
2. Measure your phone.
3. Cut out the fabric for the outer and inner bag. For the outer bag, as well as for the inner bag you need to cut out 2 rectangular pieces of fabric which are 4 cm (1,6″) wider and 6 cm (2,4″) longer than your phone.
Phone pouch step by step free tutorial
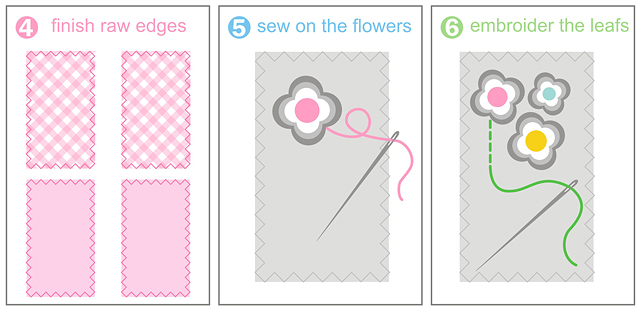
4. Finish raw edges with Zig-Zag stitch to protect them from fraying. It isn’t necessary step, so you can skip it if you want.
5. Sew on your previously crocheted flowers on the right side of the fabric for the outer bag. Arrange them as you like, play with them a little to find the best possible composition.
6. Embroider the stems and the leafs. Decide on how many stems and leafs do you want. Don’t make too many leafs though. You know the phrase: “less is more”, and I totally agree with that. I embroidered my stems and leafs with back stitch. If you don’t know how to do it, you can learn watching this video.
Cell phone pouch with crochet flowers tutorial
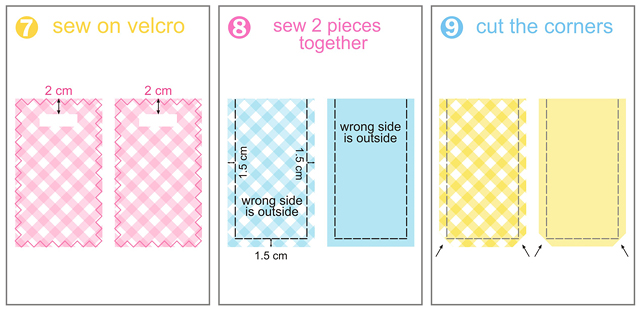
7. Cut the small piece of velcro tape approximately 1.5 cm (0,6″) tall  and 4 cm (1,6″) wide. You should sew on the velcro tape on the right side (if the fabric has the right and wrong side) of the inner bag’s fabric. So, place the loop side of the velcro tape on one piece of the fabric, abut 2 cm (0,8″) below the top. Make sure to place it in the middle, in the same distance from the left as well as from the right side of the fabric. Then place the hook side on the second piece of the inner bag’s fabric. Carefully sew around all four sides of the velcro tape. It might be a little tricky, so sew slowly.
8. Take the pieces of the outer bag’s fabric and place them facing right sides together. Sew around the sides and bottom edge. Do the same with the inner bag.
9. Trim the corners at the bottom of your inner and outer bag.
Crochet flowers cell phone pouch free tutorial
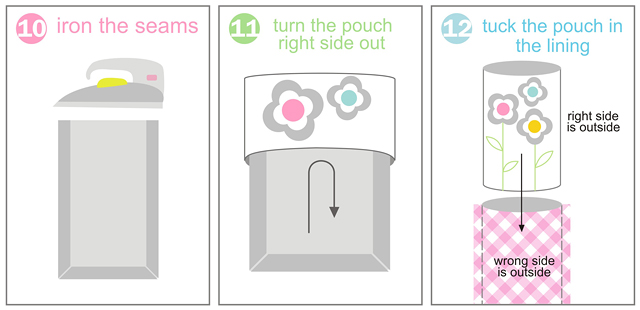
10. Fold the seams inward and press them with iron.
11. Turn the outer bag right side out.
12. Place your outer bag inside the inner bag (lining). The right side of the outer bag should be facing the right side of the lining.
Crochet flowers iphone pouch free tutorial
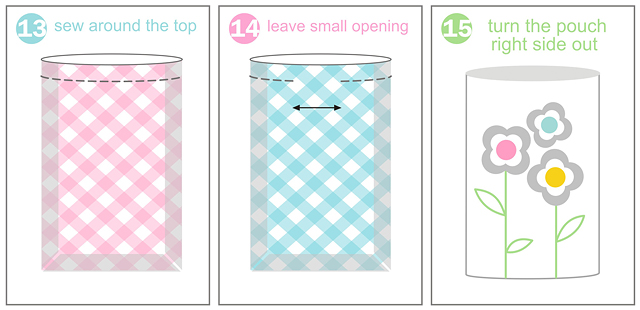
13. Sew a 1.5 cm (0,6″) seam around the top of the pouch.
14. Leave the small opening on one side.
15. Turn the pouch right side out through the opening you left, and push the lining inside the bag.
Crochet flowers pouch free photo tutorial
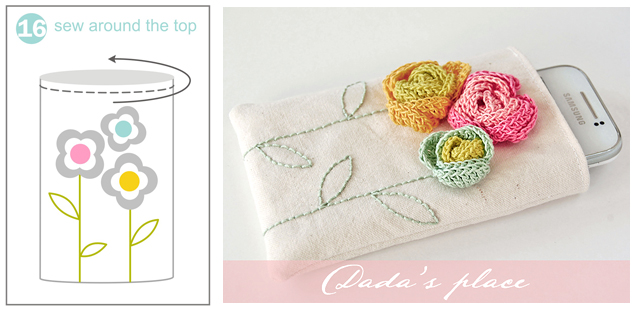
Press the opening closed and top stitch around the opening of the bag, very close to the edge. This will close your opening and make everything look nice. Introduce the pouch to your phone.
Phone pouch with crochet flowers 2
Hope you will like this tutorial. Sewing is not my area of expertise, especially sewing terminology (yet in English!), and it is quite possible that I’ve made some mistakes, so if you encounter any, please let me know in the comments.
Enjoy the tutorial and have a nice week!
*

Secret Garden Crochet Shawl tutorial: Part II

21/10/2015 by Dada Filed Under: Free crochet patterns 12 Comments

Secret garden shawl free pattern
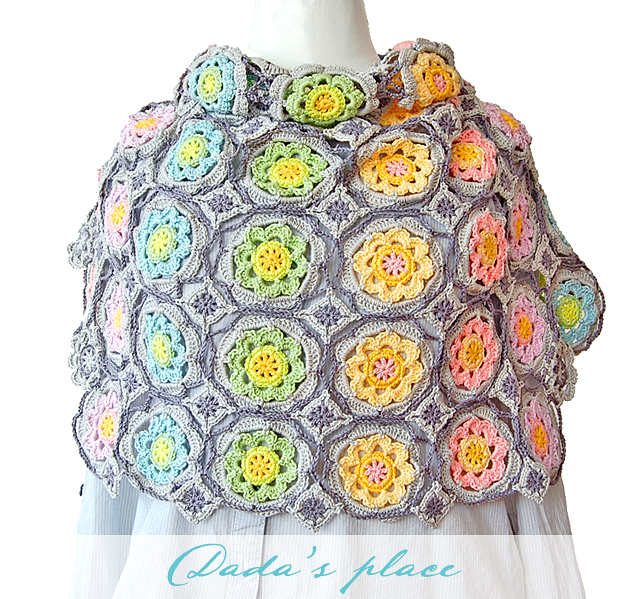
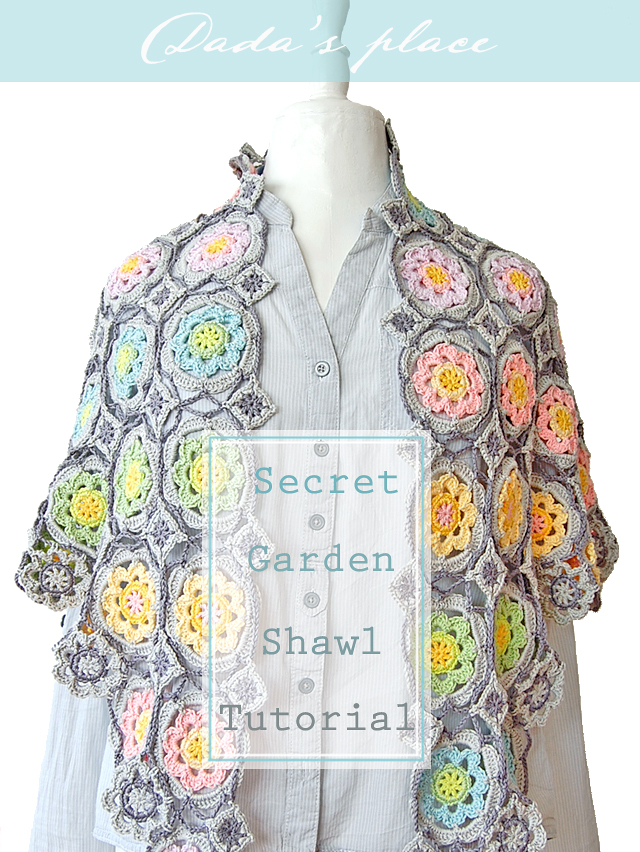
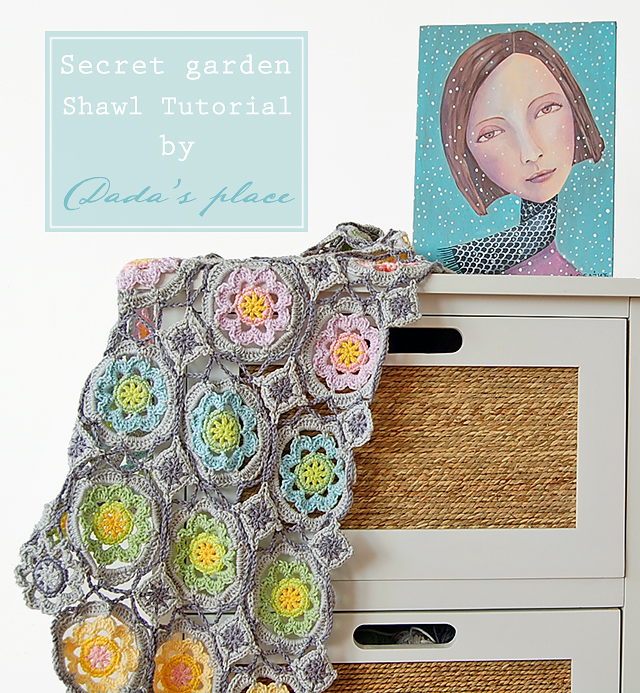
I’m always very happy and excited when I have something to give, and today I’m sharing with you the second part of my Secret Garden Shawl tutorial! So, I’m happy! Very happy! Hope you will be happy too! In the first part of the Secret Garden Shawl tutorial, I showed you how to make Secret garden flower. Now, it’s time to learn how to join our flowers. We will use “join as you go” method. In this tutorial I use U.S. crochet terms.
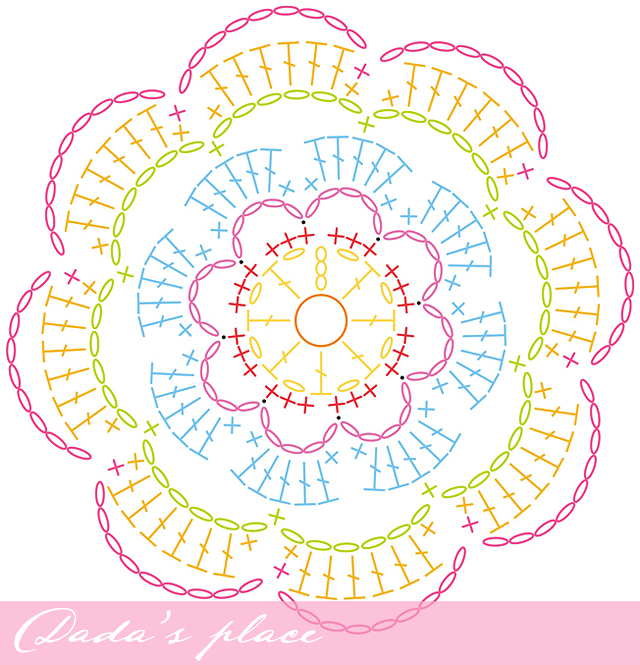
Secret garden flower free crochet chart
I know that many of you, prefer crochet charts instead of written tutorial (me included), so I made one colorful chart for you. I like to make every round in different color, because it’s easier to differentiate one round from another, which is sometimes very helpful. This is, of course the crochet chart for Secret Garden Flower.
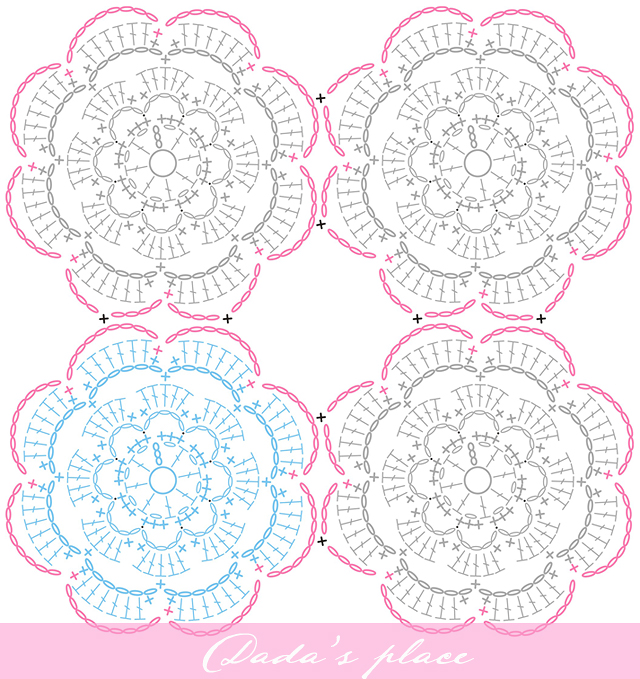
Secret garden flower motif free crochet chart
And this is the chart for joining the flowers. We have to make only one complete square (the blue one on the picture), with others, we need to complete only the first six rounds, the last round we will make and in the same time join our flowers. So, let’s start!
Secret garden shawl free photo tutorial
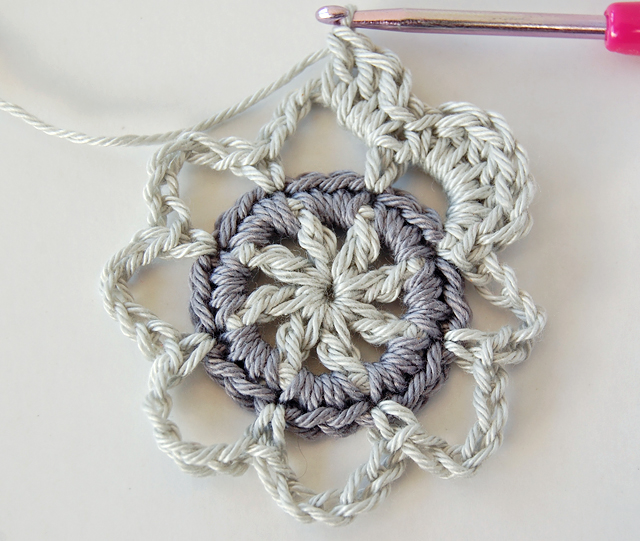
Make one complete flower, and complete the first six rows of the next flower. After you make several ch-9 petals of the last (seventh) round, make ch-4, take the first completed flower and insert your hook into any of ch-9 spaces; make slip stitch, then ch-4.
Secret garden crochet scarf free pattern
Make sc in the first stitch of the next petal, which is sc.
Crochet shawl free pattern
Make ch-4, then again, insert your hook into the next ch-9 space of the first flower, yo,
Dadas place crochet shawl free pattern
and make slip stitch.
Dadas place crochet scarf free pattern
Make sc in the first sc of the next petal. We’ve just joined the first two flowers. Continue the last round of the second flower as you normally would.
When you finish the second flower, join the third flower in the same way we joined the first and the second flower together. Then join the forth flower with second and third. Look at the chart to see where to make joints.
Crochet shawl free pattern and step by step tutorial
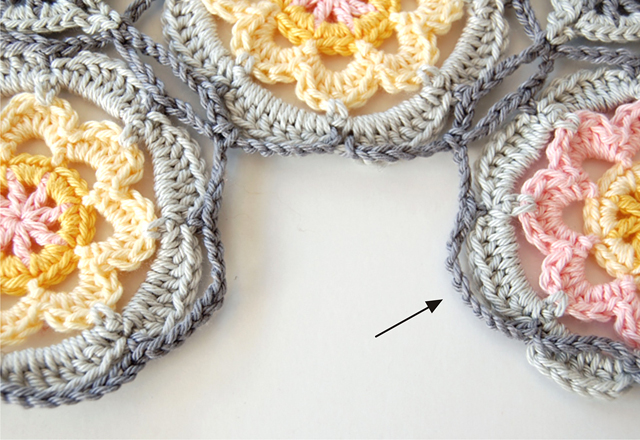
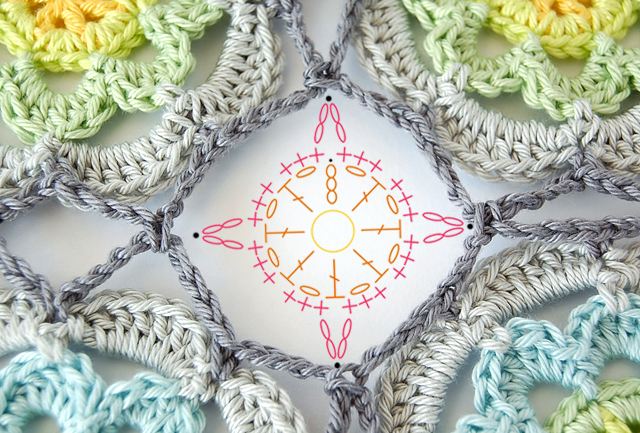
In this space between 4 joined flowers we will make our small square element. We will join it together with the flowers also with slip stitch.
Crochet scarf free pattern and photo tutorial
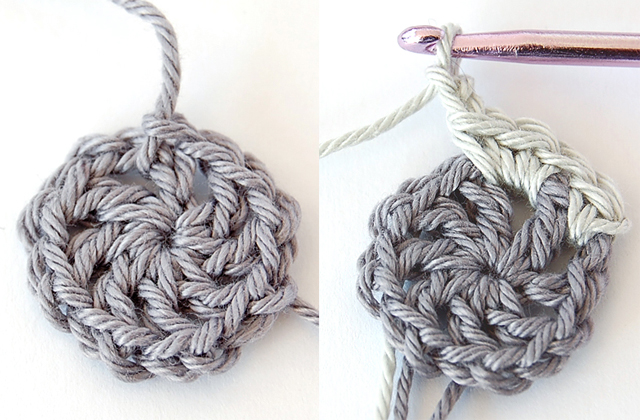
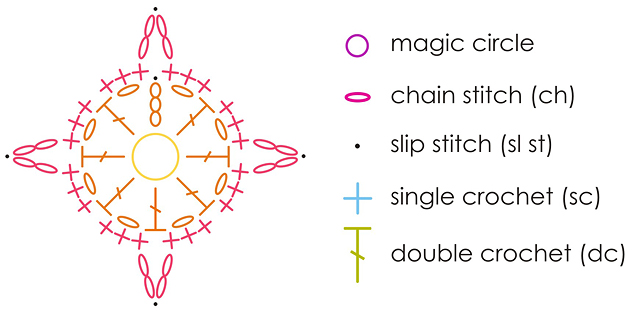
First, make a circle in the same way you made the first round of the Secret Garden Flower. Begin with a magic ring. Make ch-4 in the ring. (Counts as dc and ch-1)  Make * dc in the ring, then ch-1; Repeat from * 6 more times. You should have 8 dc with ch-1 between each dc; Pull the yarn tail and close the ring. Join with slip stitch to the first ch-1 space.


Insert a new color (light gray) in any of the ch-1 spaces, make ch-1, then make sc in the same space. Make 3 sc in the next ch-1 space, then make ch-2.
Crochet scarf free pattern and step by step tutorial
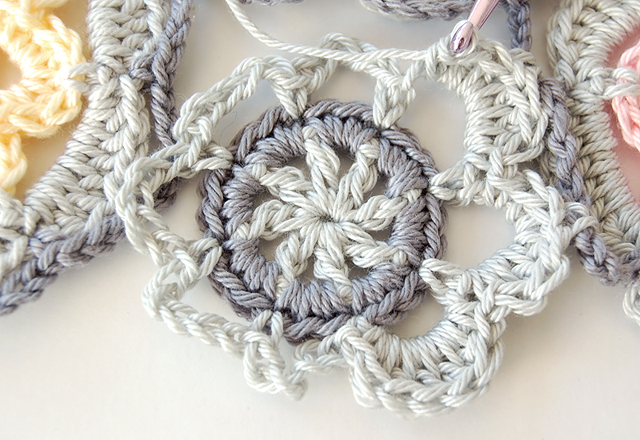
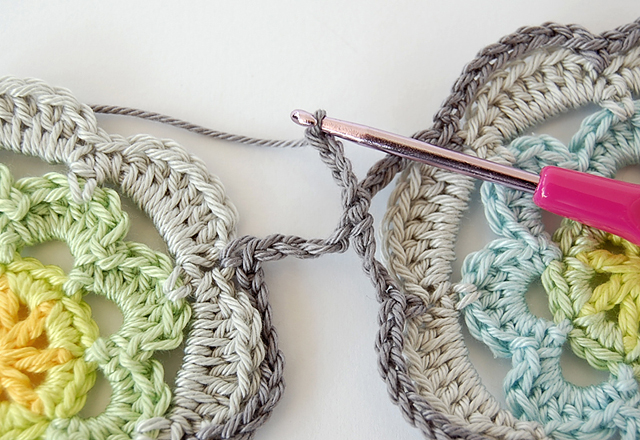
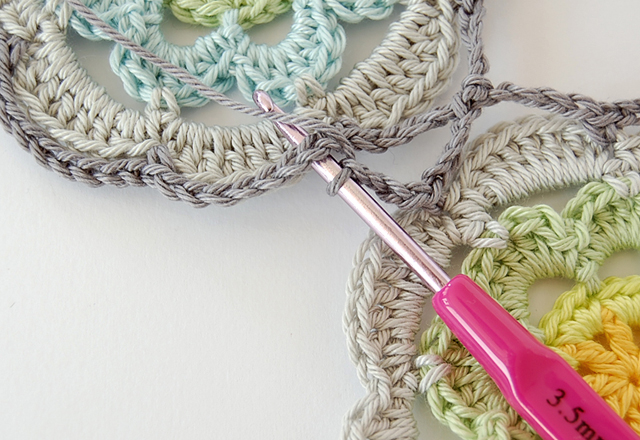
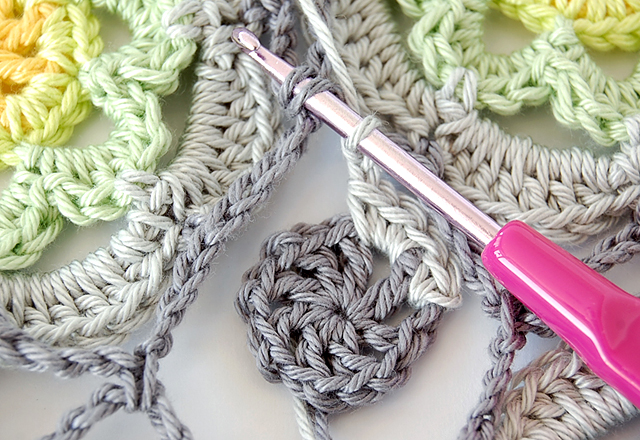
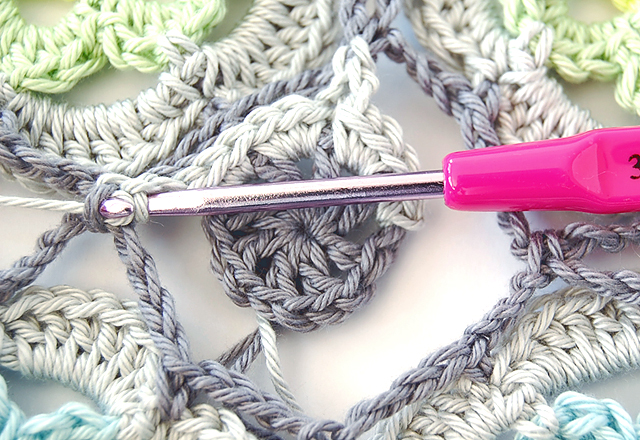
Insert your hook into the joint of two flowers, through both loops
Flowery crochet motif free pattern
 yo, and pull the yarn through the stitch and through the loop on your hook, which means to make slip stitch.
Flowery crochet motif free photo tutorial
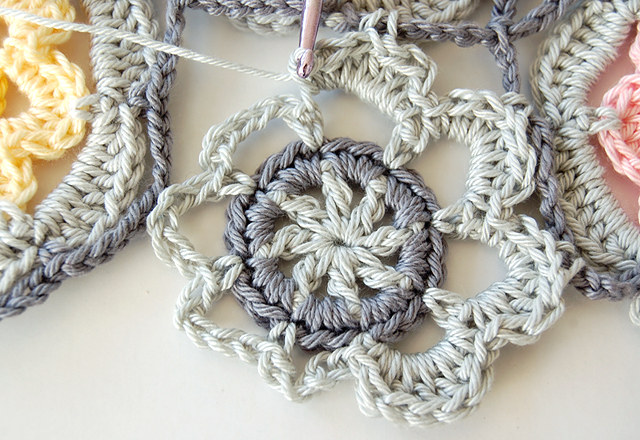
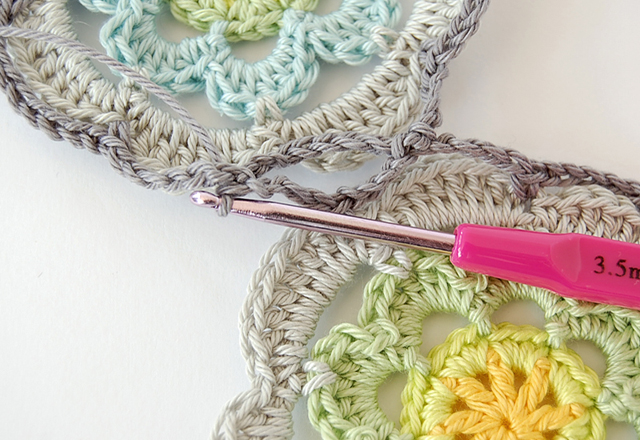
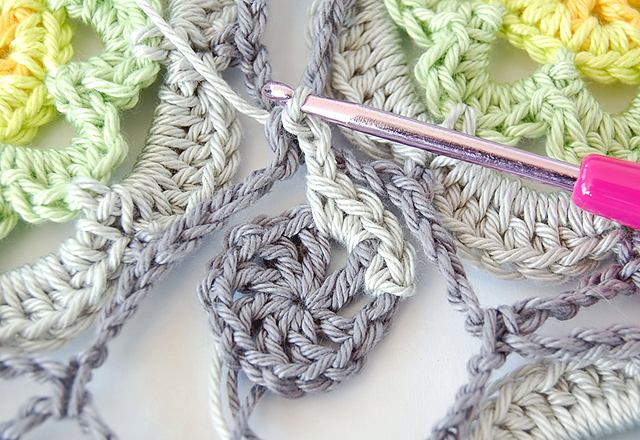
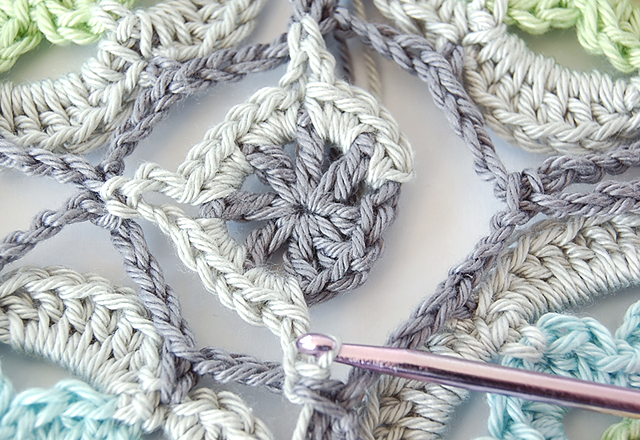
Make ch-2, then 3 sc into the next ch-1 space.
Dadas place free crochet step by step tutorial
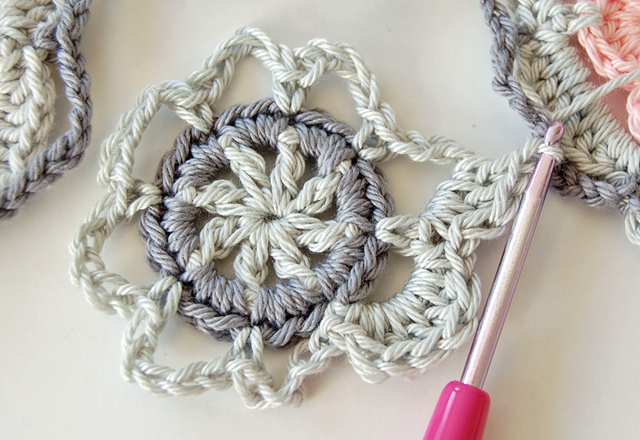
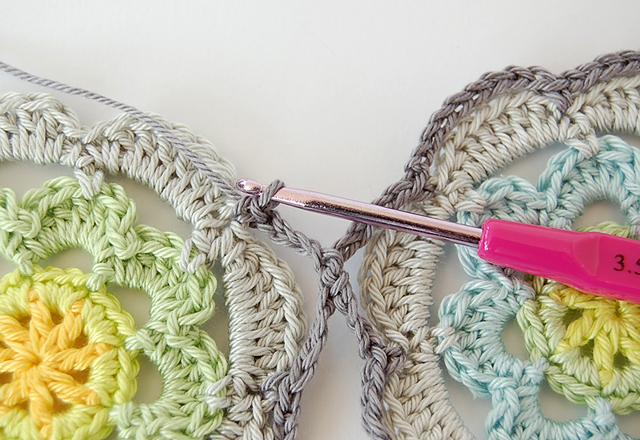
Make 3 sc in the next ch-1 space, ch-2, then again, insert your hook into the next join of two flowers (through both loops), yo and pull the yarn through the stitch and through the loop on your hook. (make slip stitch)
Dadas place free crochet step by step photo tutorial
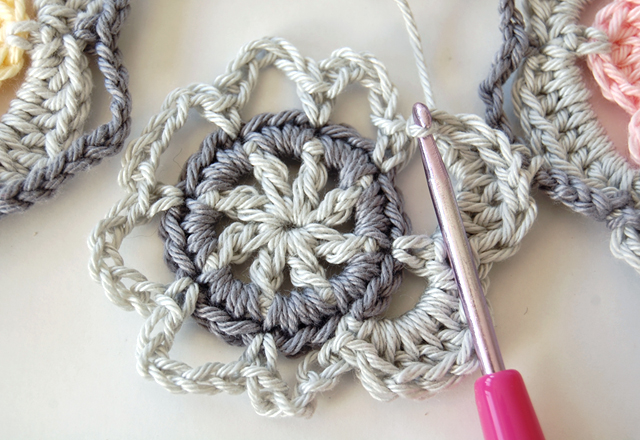
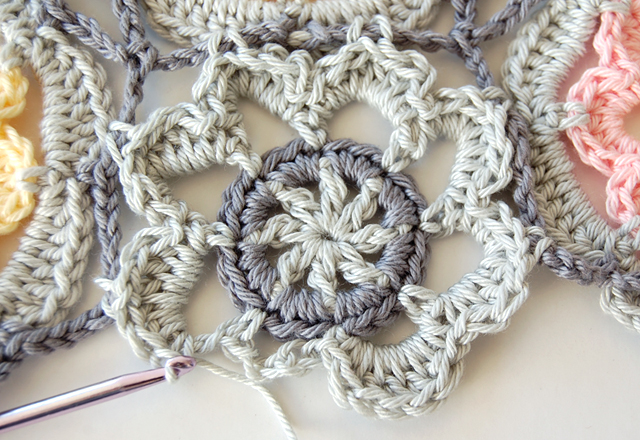
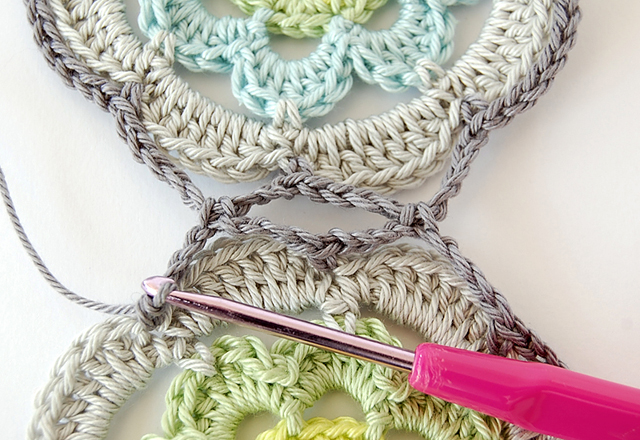
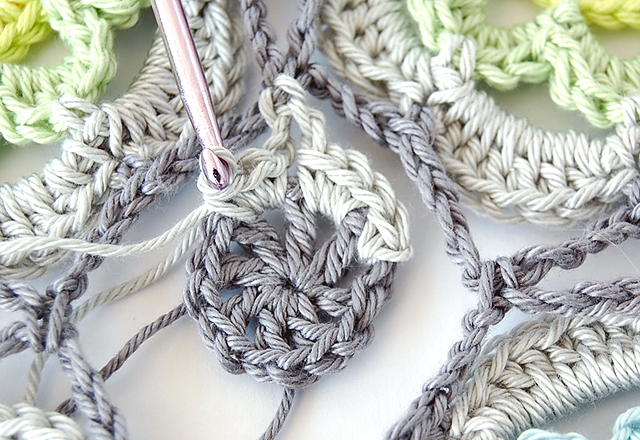
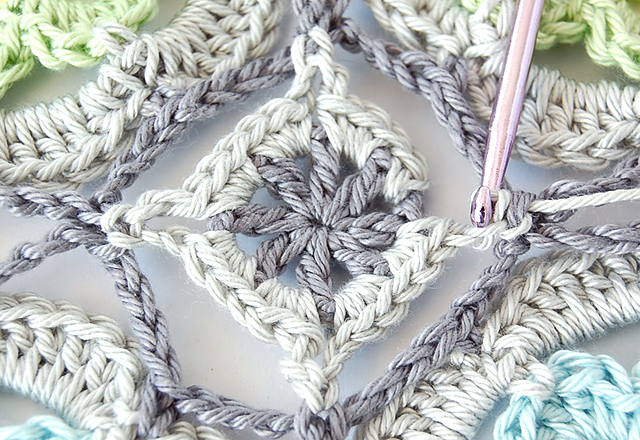
Make * ch-2, 3 sc in the next 2 ch-1 spaces, ch-2 and make slip stitch into the next joint of two flowers.
Dadas place free crochet tutorial for beginners
Repeat from * one more time.
Free crochet step by step photo tutorial
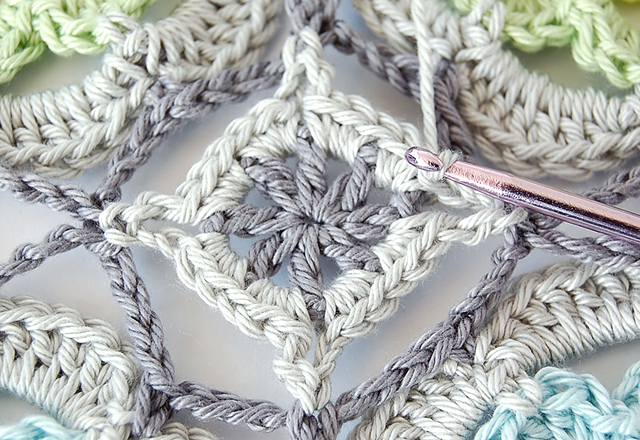
Make ch-2, then sc in the first ch-1 space where we’ve already made our first sc. Cut the yarn and pull it through the stitch. We’re going to make an invisible join.
Free crochet motif step by step photo tutorial
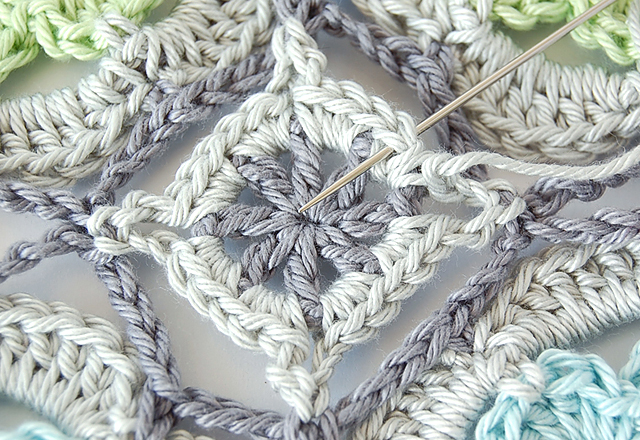
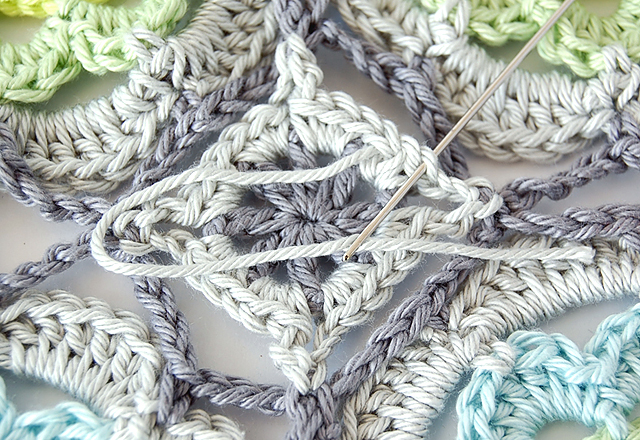
Thread the tapestry needle, and insert the needle below both loops of the first sc we made, from back to front, and pull it through.
Free crochet pattern and step by step photo tutorial
Insert your needle back, into the last sc you made – through the back loop only, from front to back, and pull it through.Weave in yarn end.
Free crochet photo step by step tutorial for begginers
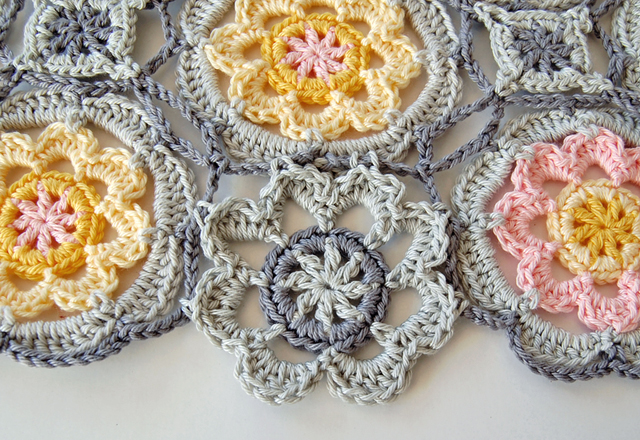
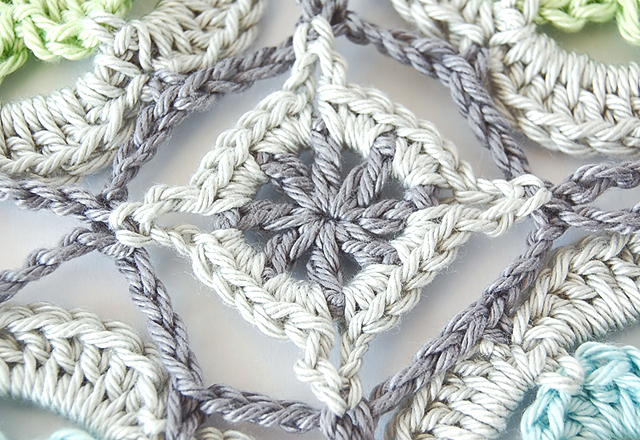
And this is how our small square element should look like. It was easy. Isn’t it?
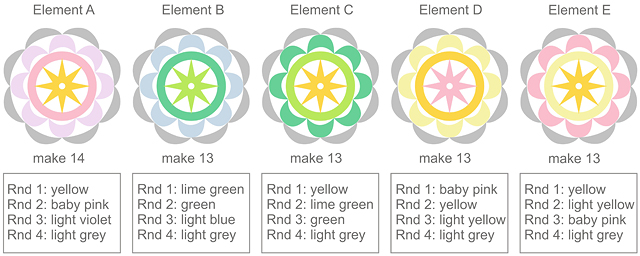
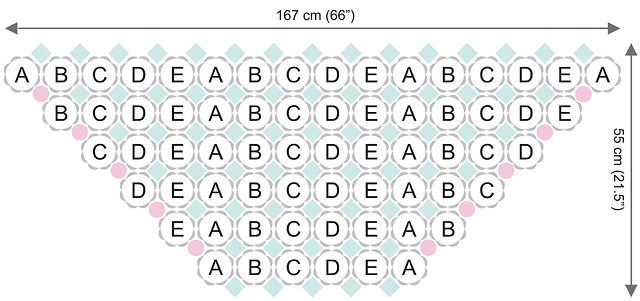
Next time, in the third part of the Secret Garden Shawl, I will show you how to make and join those little flowers on the edge of the shawl. I will also make color chart for the elements of the shawl as well as the element placement chart.
Crochet motif free crochet chart
The first part of the Secret Garden Shawl tutorial you can find here.

Click here to see the third part of the Secret Garden Shawl Tutorial

Victorian flower crochet baby blanket pdf pattern

14/10/2015 by Dada Filed Under: Crochet baby blanket patterns 18 Comments

Dadas place crochet blanket pattern
Today I’m very happy and a little proud to announce that my Victorian flower baby blanket pdf pattern & step-by-step tutorial is finally available in Dada’s  shop!
Dadas place beautiful crochet
The pattern is very detailed. It has 22 pages, more than 100 step-by-step photographs,5 crochet charts, detailed instructions on how to make Victorian flower square, how to join the squares and how to make border. The pattern is written using US crochet terms, and it’s available only in English.
Crochet baby blanket pattern and step by step photo tutorial
For this blanket I used 100% cotton yarn “Tango”, “Golf” and “Una” (from St. George) 125m/50g, and 3.5 mm crochet hook (USA E – size 4)
Crochet blanket pattern and step by step photo tutorial for beginners
I had such a great time making this blanket, that although I’ve already started another regular sized blanket, as well as several other projects, I’m still thinking about making a full sized Victorian blanket just for myself.

*

Victorian Flower Blanket pattern and step-by-step tutorial is now available in Dada’s place shop (payment options: Credit cards & PayPal).

*

Yo can also buy it in my Ravelry shop and in my Etsy shop. (payment option: PayPal)

*
Next time I will publish the second part of the Secret Garden Shawl. The first part is available here.
*


  • « Previous Page
  • 1
  • …
  • 22
  • 23
  • 24
  • 25
  • 26
  • …
  • 50
  • Next Page »

Copyright © 2025 · Dadas Place.com