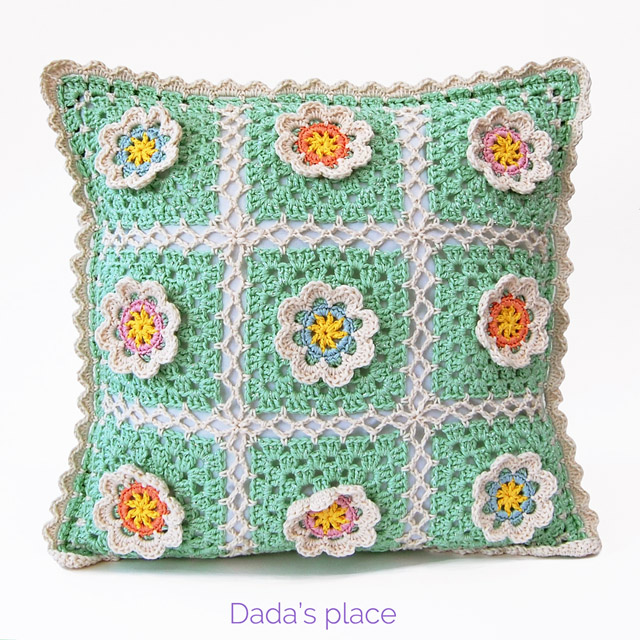
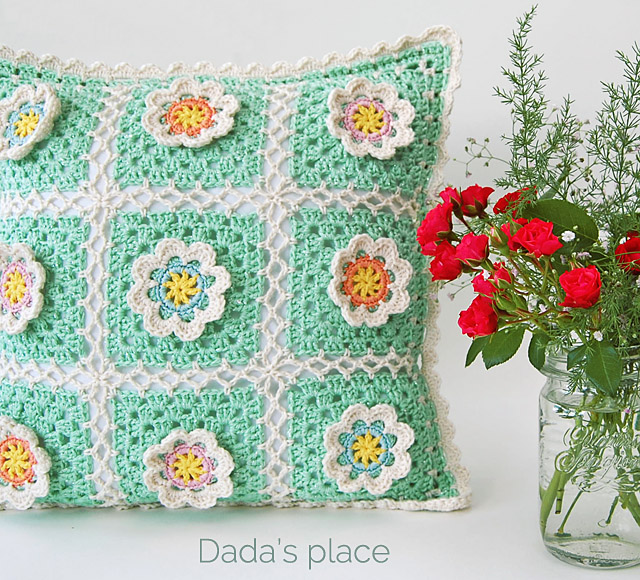
For the past 2 weeks I’ve been working on my first ever poncho pattern, and although I’m very excited about it, the process of making it has been a little boring. I’ve been working with only one color, back and forth in rows, the same stitch for over 150 rows… You can imagine how monotonous it could be. And in the middle of making the second poncho, which I’m going to take the pictures of for the photo tutorial, I felt that I needed something colorful, and interesting and happy and quick to make. All at the same time. So, I decided to make a crochet pillow.
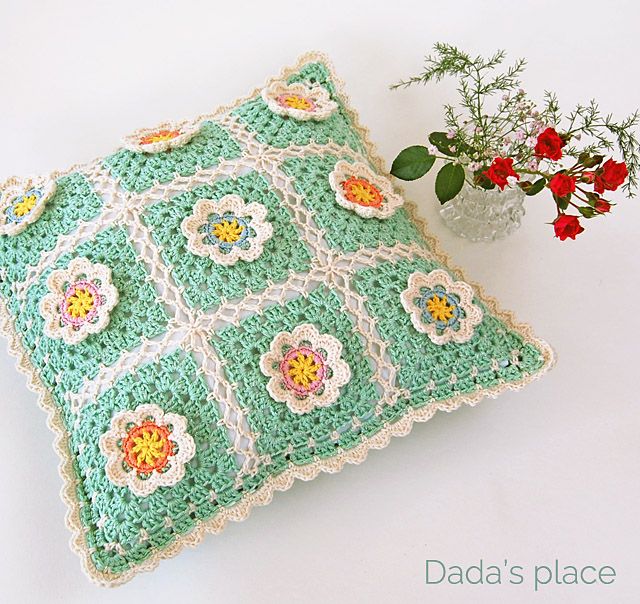
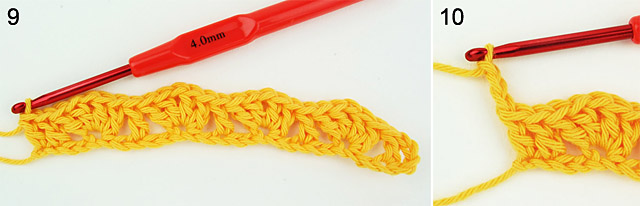
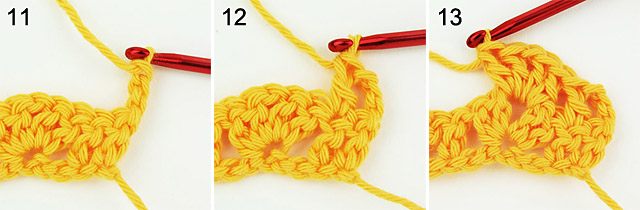
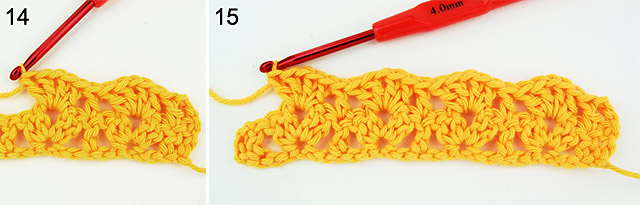
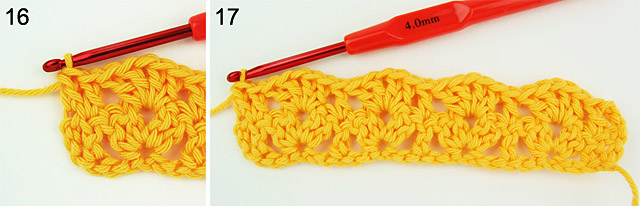
I was wondering which pattern I should use? Should I use one of my existing patterns, should I try some new pattern from my Pinterest crochet board, or should I come up with a new pattern? I grabbed my crochet hook, played around a little bit and came up with this flowery granny square.
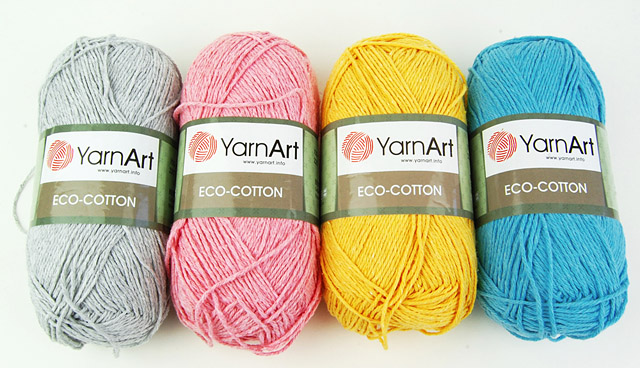
Then I looked at my yarn stash in search for the appropriate yarn, and first thing that caught my eye was the green glittering yarn I have had for ages. I think that we should always have something shiny and sparkling in our lives, even if it’s a simple skein of yarn. I decided to use it as the background. Then I chose several other bright colors, and the ivory color to balance everything.
If you don’t live in Serbia, you can skip this section where I write about the yarn, because unfortunately, you can’t buy this yarn anywhere outside Serbia, nor you can order it online. All the yarn I used was manufactured by St. George. The green glittering yarn is “Una” 50g/115m 50% acrilyc, 45% cotton, 5% metallized polyester.
The ivory yarn is “Cotton classic” 100% cotton, 50g/120m, and yellow, orange, pink and blue yarn is “Cotton Cable”, 100% cotton, 50g/95m.
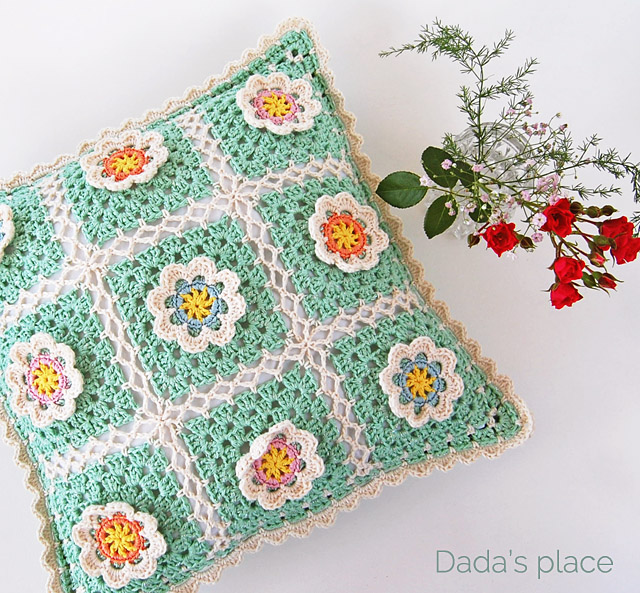
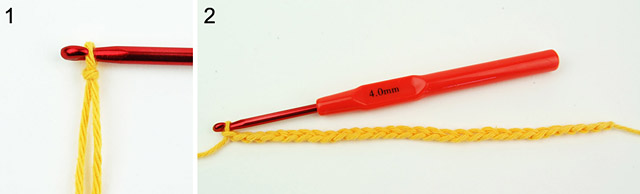
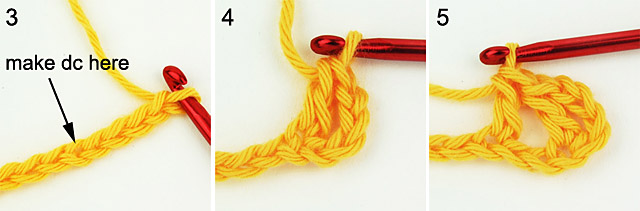
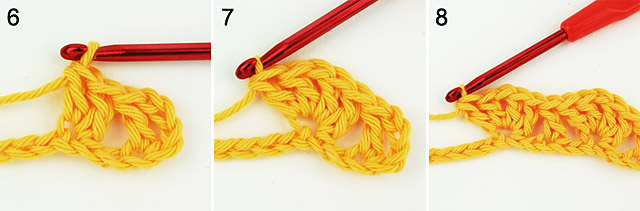
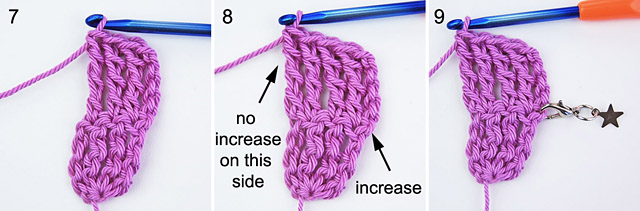
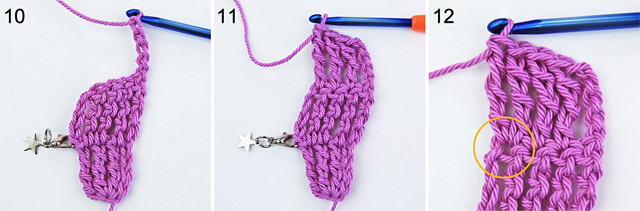
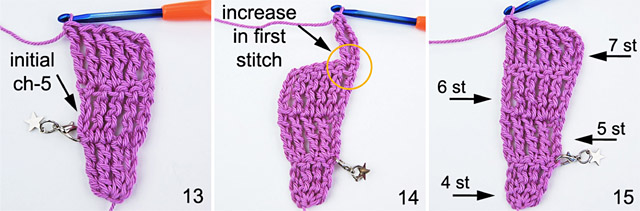
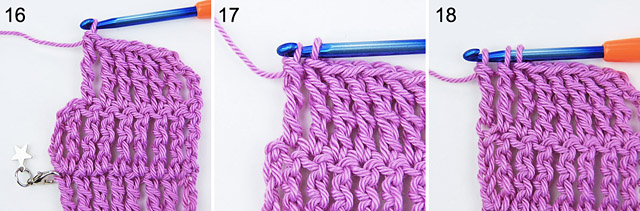
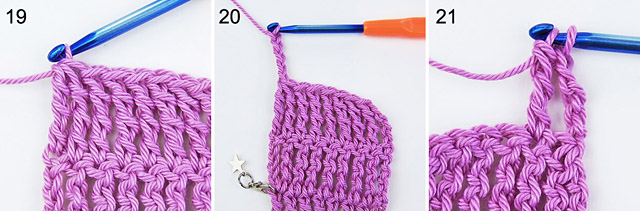
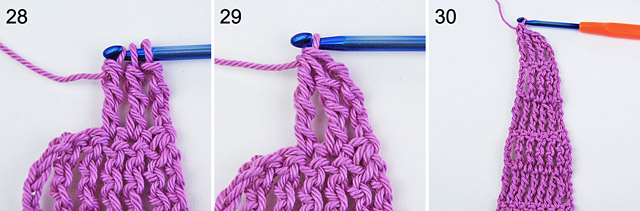
I used 3.5 mm crochet hook. At first I didn’t know which method of joining squares to use. In the end, when I finished all 9 squares I decided to use join-as-you-go method to join the squares together which I think works well with these squares.
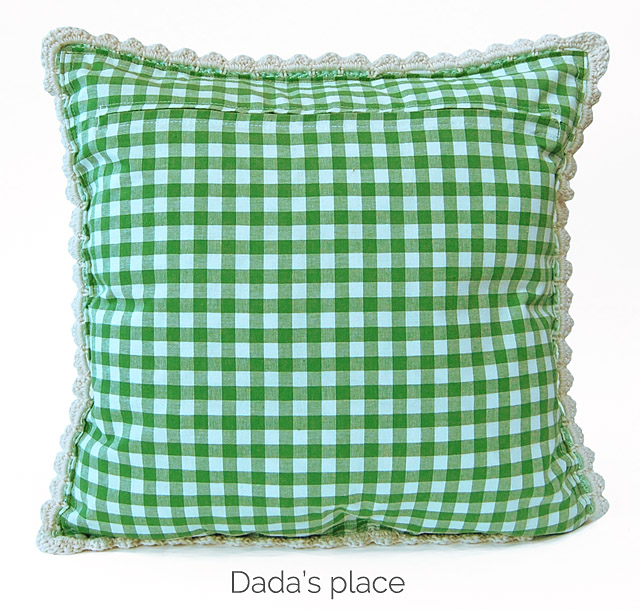
As with all of my previous pillows I didn’t crochet the back side. I just took a piece of plaid fabric, installed a zipper and sewed it on at the back of the crocheted piece. Nice and easy.
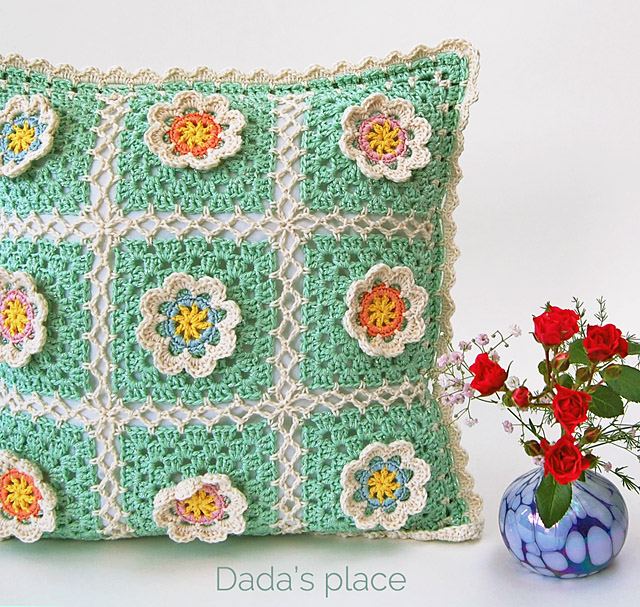
What else can I say about this pillow? First, that I really like how it turned out! I especially like the colors and the yarn I used. Second, that I decided to make the pattern and tutorial for this flowery granny square. Not sure about the whole pillow, though. Will see. Maybe I will also make a baby blanket using the same square pattern. I’m curious to see how it would look, and I have so much yarn in my stash that I could use in that project. Or in some another project…
*
Update: The flowery granny square pattern and step-by-step tutorial is now available in Dada’s place shop, (payment options: Credit cards & PayPal), in my Ravelry shop, and in my Etsy shop. (payment option: PayPal)
*