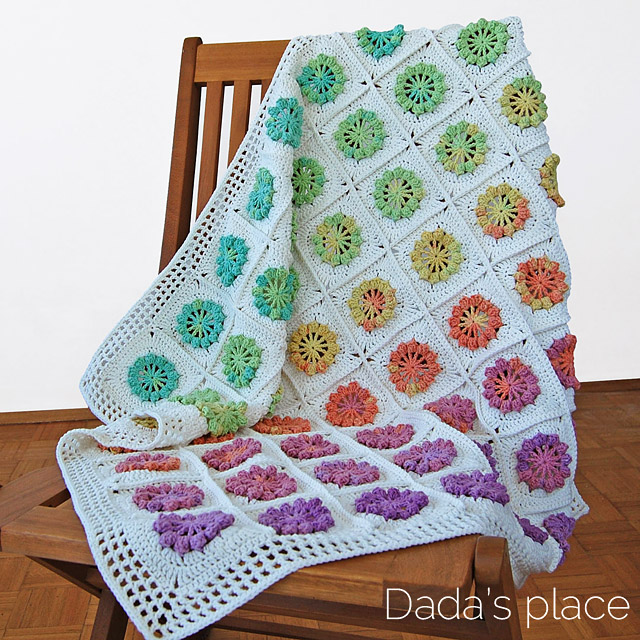
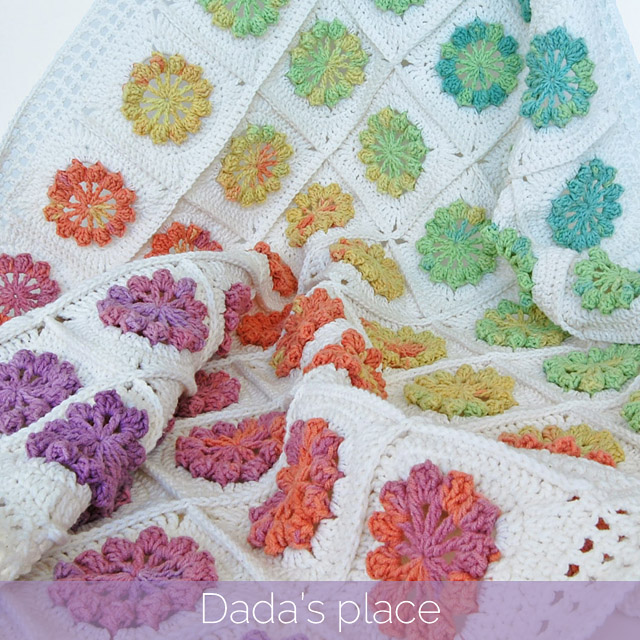
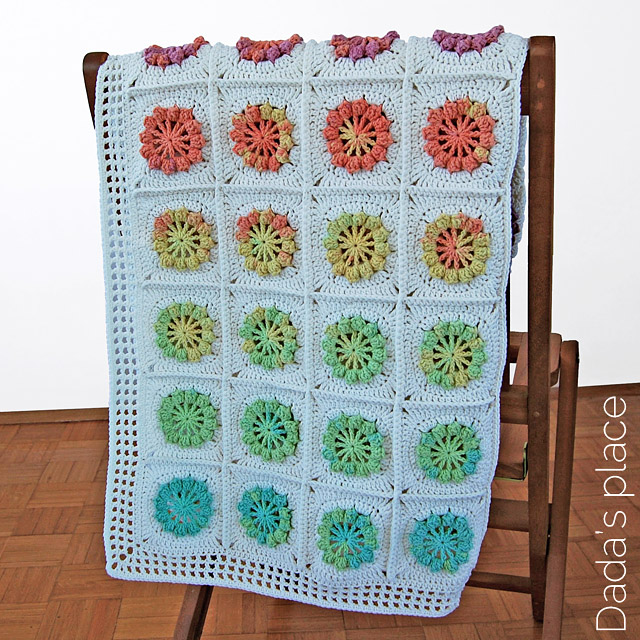
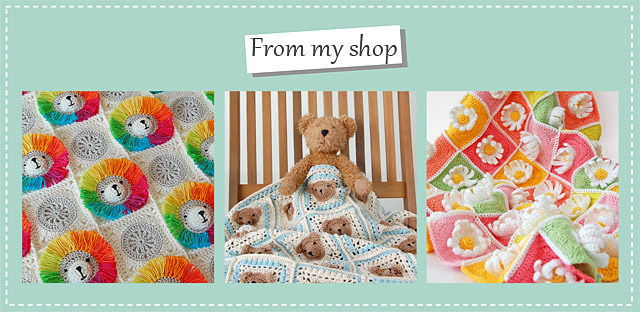
If you love crochet blankets, stripes, simplicity and ease, then please continue reading, because this blanket is as simple and easy to make, as it is beautiful and stylish. And stripes surely add that modern touch to it.
You can make Lily’s blanket in just two colors (and I honestly think that gray-white combination might be the real winner), three colors, four colors (like I did), or as many colors as you like. By making every row (or every 2 or 3 rows) in different color it might be the ideal crochet project for going through all of the remaining yarn from your stash, which you don’t know what to do with.
Regarding the yarn, this pattern is not demanding at all. Although I used quality cotton yarn, you can make it with any beautiful, soft yarn. Even with acrylic yarn.
This blanket is worked back and forth in rows, and can be made in any size.
If you’d like to make a different size blanket, simply work the foundation chain to the desired width in a multiple of 6.
Crochet terms: Pattern is written using US crochet terminology. If you prefer UK terminology instead of double crochet make treble crochet, and that’s it! It’s that simple!
![]()
Level: Beginner
Size: 70 cm (27.5”) width, 100 cm (39”) length
Crochet hook: 4 mm (USA – G/6)
Gauge: 10 stitches and 9 rows in 10 cm (although gauge is not critical to this project)
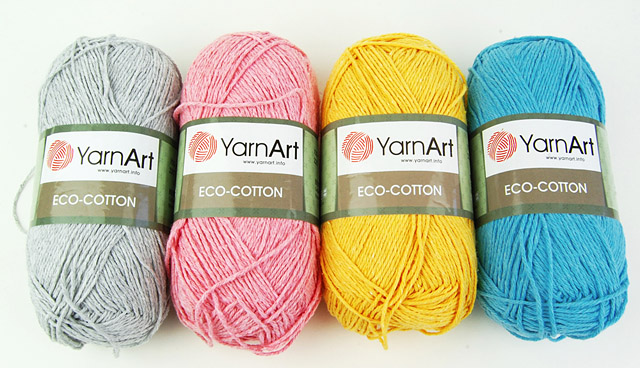
Yarn:
Yarn Art – Ecco-cotton
100g/220m
85% cotton 15% polyester
● 3 skeins of gray (763)
● 1 skein of pink (766)
● 1 skein of yellow (764)
● 1 skein of turquoise (765)
or any Light worsted yarn (3 or Light)
![]()
So, let’s get started!
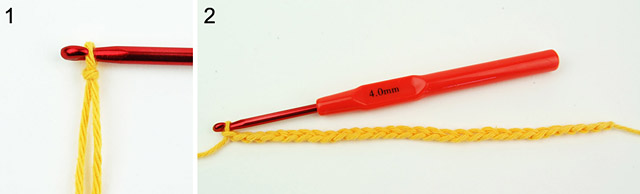
* To start, make a slip knot on your hook; (Picture 1)
* continue making foundation chain. Count your chains as you go, and stop when you reach the desired width in multiples of 6. I made ch-x. (Picture 2)
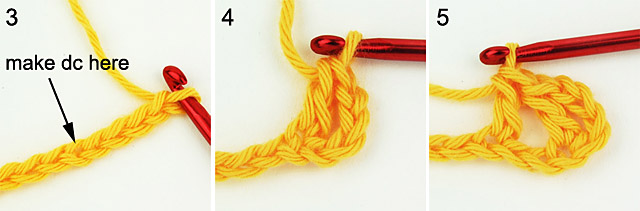
* Count fifth chain of your hook, (Picture 3)
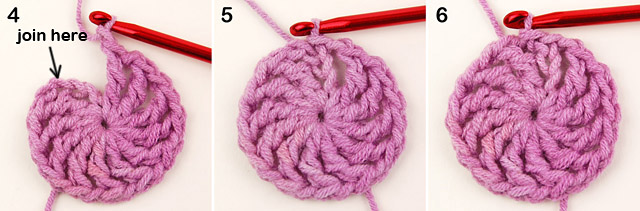
* and make dc in that st. (Picture 4)
* Skip the next two chains, and make dc in the next ch. (Picture 5)
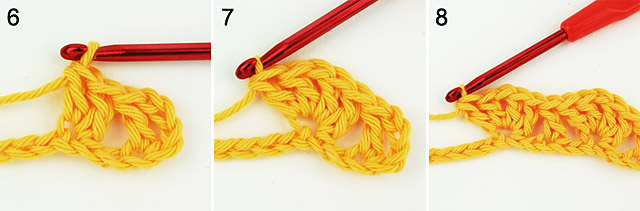
* Make one more dc in the same stitch; (Picture 6)
* Make ch-1, 2 dc in the same stitch. (Picture 7)
* skip the next two chs and make dc in the next ch, skip the next two chs and make [2 dc, ch-1, 2 dc] in the next ch. (Picture 8)
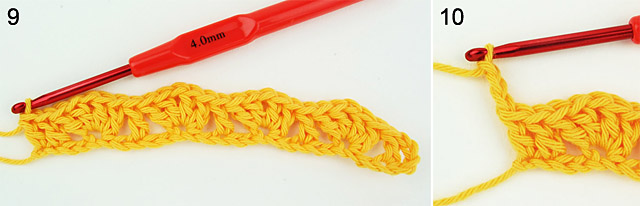
* Repeat from * until you are left with only 4 chs. Skip the next two sts, and make dc in the next two sts. We will make 2 dc at the end of each row. We will make ch-3 (which counts as dc) and dc at the beginning of each row. (Picture 9)
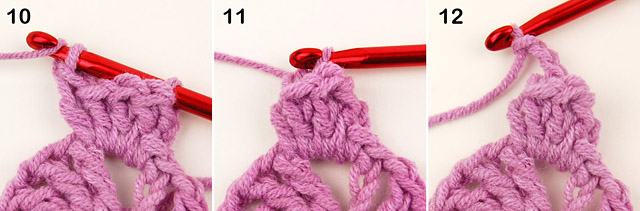
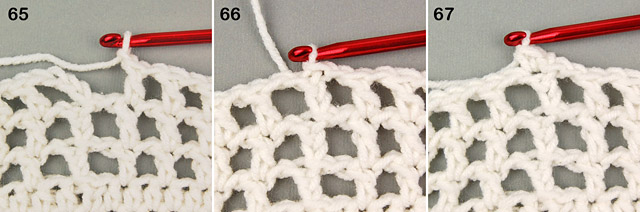
* Make ch-3 (counts as the first dc), (Picture 10)
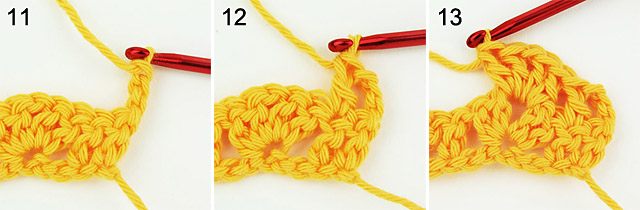
* turn your work over, (Picture 11)
* and make dc in the next dc. (Picture 12)
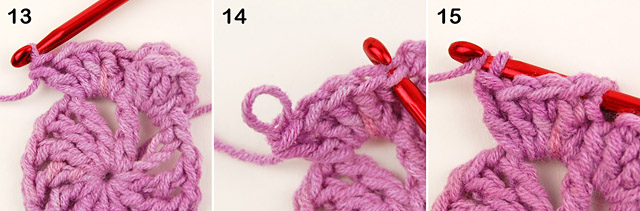
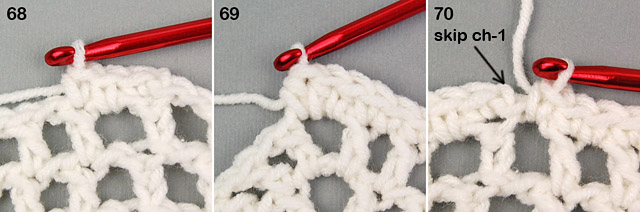
* Skip the next two dc and make [2 dc, ch-1, 2 dc] in the next ch-1 space; (Picture 13)
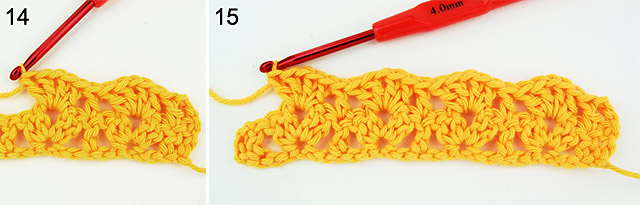
* next dc, skip the next two dc and make [2 dc, ch-1, 2 dc] in the next ch-1 space; (Picture 14)
* Repeat from * until you’re left with only four sts. (Picture 15)
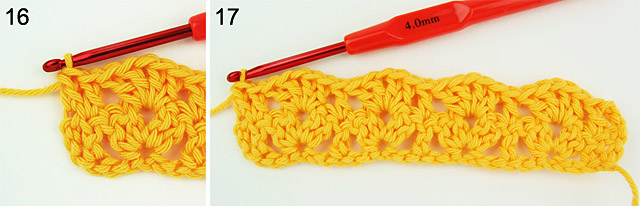
* Skip two dc, make dc in the next dc, and at the end make dc in the last dc. (Picture 16)
* And this is the all you need to know in order to make this blanket. Repeat this row until you reach the desired length.(Picture 17)
Written pattern row by row:
With gray color: Make foundation chain of 150 stitches.
Row 1: Make dc in the fifth chain from the hook, *skip 2 chs, [2 dc, ch-1, 2 dc] into the next ch, skip 2 chs, dc in the next ch; repeat from * 23 more times, dc in the last stitch.
Row 2: ch-3, dc in the next dc, * skip two dc, [2 dc, ch-1, 2 dc] into the next ch-1 space, skip 2 dc, dc in the next dc; repeat from * 23 more times, dc in the top of the initial ch-3.
Row 3 – 6: Repeat row 2. Change the color to pink in the last stitch of the 6th row.
Row 7 – 14: With pink color: Repeat row 2. Change the color to gray in the last stitch of the 14th row.
Row 15 – 20: With gray color: Repeat row 2. Change the color to yellow in the last stitch of the 20th row.
Row 21 – 28: With yellow color: Repeat row 2. Change the color to gray in the last stitch of the 28th row.
Row 29 – 34: With gray color: Repeat row 2. Change the color to turquoise in the last stitch of the 34th row.
Row 35 – 42: With turquoise color: Repeat row 2. Change the color to gray in the last stitch of the 42nd row.
Row 43 – 48: With gray color: Repeat row 2. Change the color to pink in the last stitch of the 48th row.
Row 49 – 56: With pink color: Repeat row 2. Change the color to gray in the last stitch of the 56th row.
Row 57 – 62: With gray color: Repeat row 2. Change the color to yellow in the last stitch of the 62nd row.
Row 63 – 70: With yellow color: Repeat row 2. Change the color to gray in the last stitch of the 70th row.
Row 71 – 76: With gray color: Repeat row 2. Change the color to gray in the last stitch of the 76th row.
Row 77 – 84: With turquoise color: Repeat row 2. Change the color to gray in the last stitch of the 84th row.
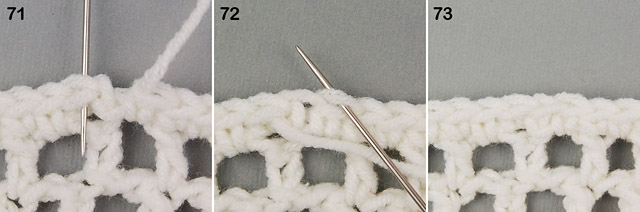
Row 85 – 90: With gray color: Repeat row 2. At the end of the 90th fasten off. Weave in the yarn end.
And now you have it! Very simple, but beautiful crochet blanket pattern! Hope you will like the pattern, and if you make it, please share it using the tag #lilysblanket. I would be thrilled to see your own creations of this pattern.
I’m planning on hosting a yarny giveaway related to this blanket very soon, so if you don’t want to miss it, please sign up for my newsletter, or follow me on social media: Facebok here, and Instagram here.
Happy crocheting!