• Facebook
  • Instagram
  • Pinterest

Dada's Place

Crochet wonderland

  • Home
  • Blog
  • Dada’s shop
  • Free Patterns
  • Categories
  • About
  • Contact

The Smitten Crochet Blanket

20/11/2015 by Dada Filed Under: Crochet blankets, Free crochet patterns 55 Comments

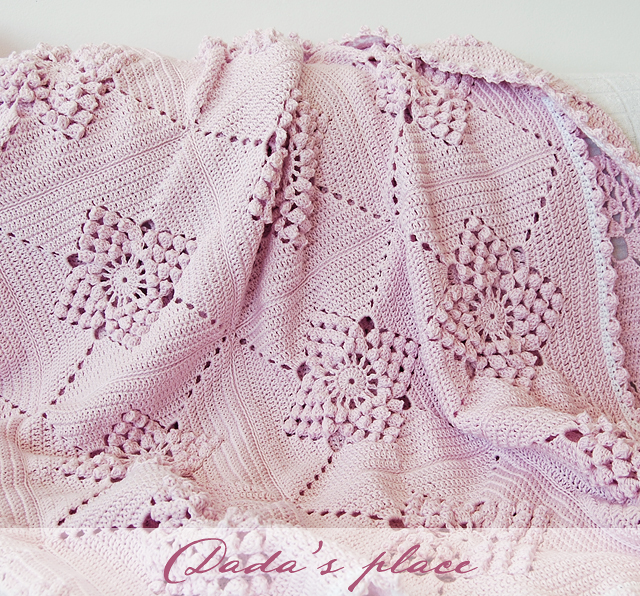
Smitten crochet blanket
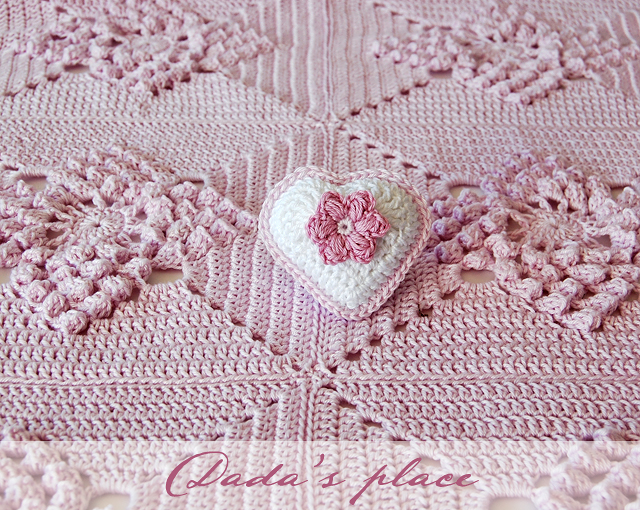
To say that I love this blanket would be an understatement! I utterly adore this blanket! Every time I finish some of my crochet projects I thank the Universe for the fact that I discovered crochet! It was a miracle, a gift which completely changed the course of my life! I’m so grateful for that!smitten-blanket-free-pattern
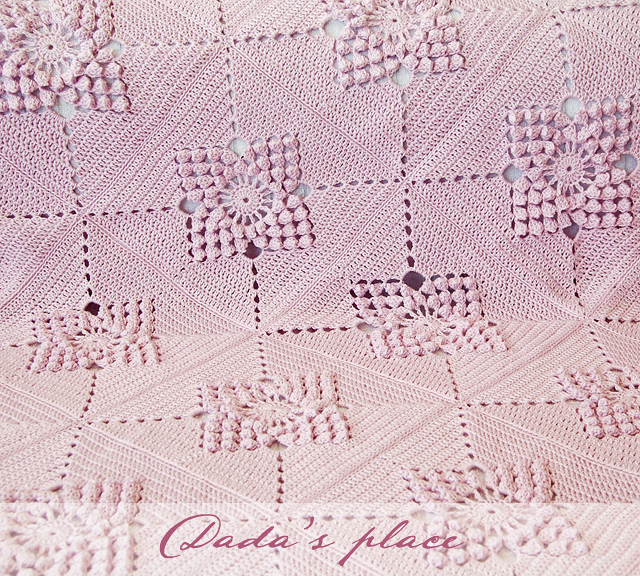
This blanket has been on my to do list for a while, actually, as soon as I saw this post I new that I will make this blanket one day. It has been Love at first sight.For the blanket I used my trusty “Tango” yarn which is 100% cotton yarn 125m/50g (3 or Light in the USA; DK (Double Knit) or 8 ply in the UK; 8 ply in Australia). I really like how this color (light lilac no. 406) emphasizes the beauty of this pattern. I absolutely love this blanket, and I really enjoyed making it! I’s my favorite crochet project so far!Free crochet popcorn granny square pattern
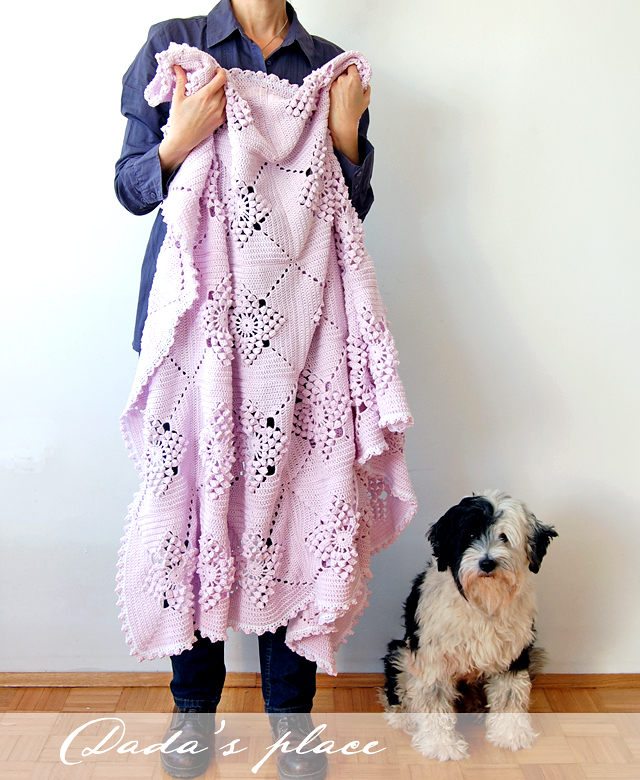
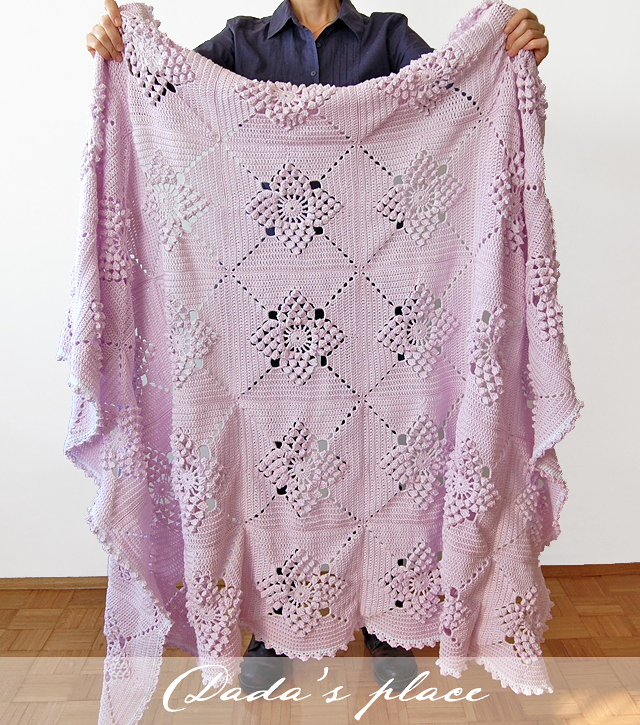
I wanted to make a regular sized blanket, but not too large, because, cotton is heavy, and I didn’t want the blanket to bee too heavy, so I made a “sofa sized” blanket, as I called it. It’s the perfect size to snuggle under it on the sofa with some interesting book, or some awesome crochet project in your hands…
This handsome guy in the picture is my 3-year-old Tibetan terrier Timi. He’s my black & white shadow, and he takes me kindly for a walk to a park every single morning!Simple crochet edge free pattern
The blanket measures 115 x 165 cm (45″ x 65″), and weighs 1400g. It consists of 35 granny squares (5 x 7). I joined the squares with slip stitch, in the same way Haafner joined her squares. You can find the instructions in her post.Free crochet border pattern
And now to get to the point you are waiting for since the beginning of this post, the pattern. Where can you find the pattern for this blanket? That’s good news! The pattern is free and you can find it here, on one of the most beautiful crochet blogs! I’m sure that most of you are familiar with gorgeous byHaafner blog. This is a place I visit often, and I’m always eager to see what new Haafner made with her magical hands. I really love her style, her use of colors, photography, everything actually.Smitten blanket border
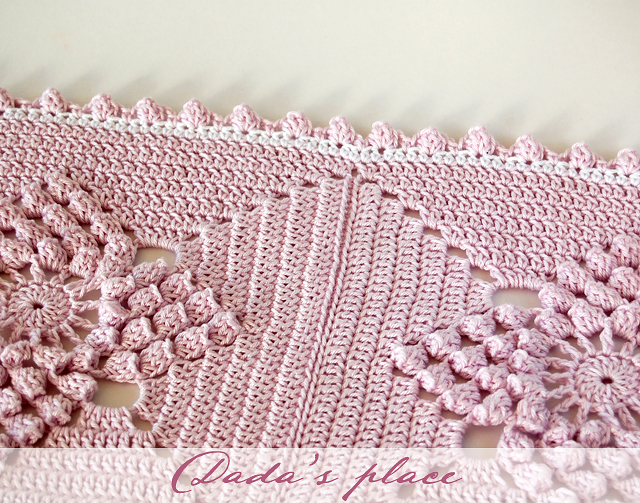
The border. From the beginning, I knew that I want a simple edge. The pattern itself is so rich and full of texture, that I didn’t want to attract attention to the edge, didn’t want the edge to speak its own story. So, it plays just a supporting role here. But also very important role.
First, I made one row of dc with the same color, then I made one row of hdc with white yarn, and then added this simplest border ever. I think it looks nice.Smitten blanket crochet border chart
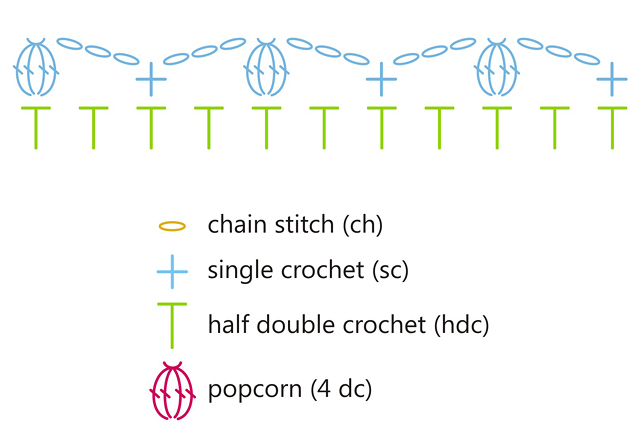
I made this crochet chart for the edge in case you like it. As you can see it’s very simple.
ch-3, skip the next hdc, made Popcorn stitch (4dc) in the next hdc, ch-3, skip the next hdc, make sc in the next hdc. Repeat that along the blanket.Vintage granny square free pattern
Thank you so much Haafner for this beautiful pattern and for sharing your remarkable work with us! It’s always a great pleasure to visit your beautiful place!
*

New Primavera Flower Tunic

12/11/2015 by Dada Filed Under: Free crochet patterns 31 Comments

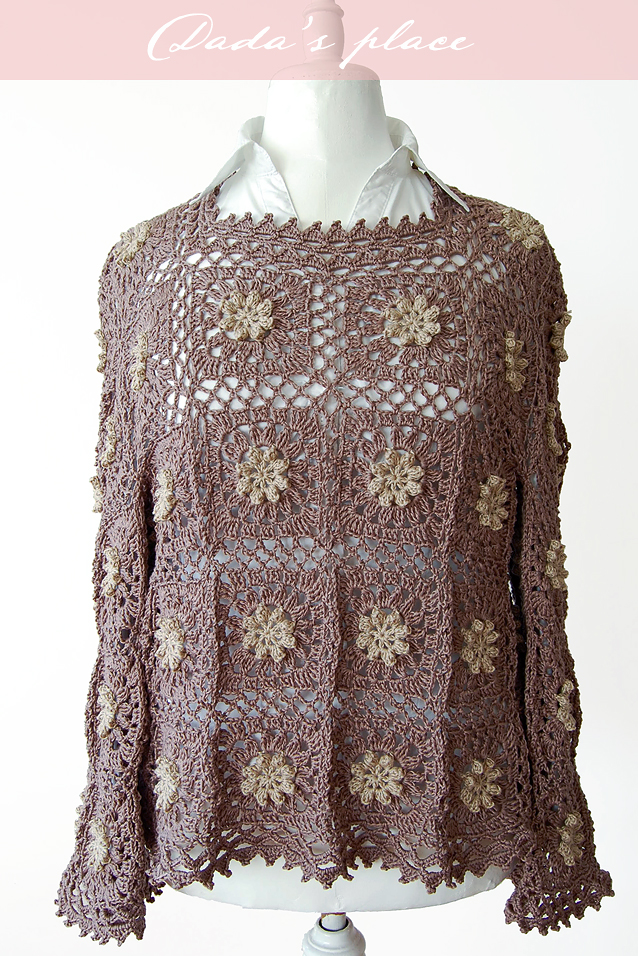
New primavera flower tunic
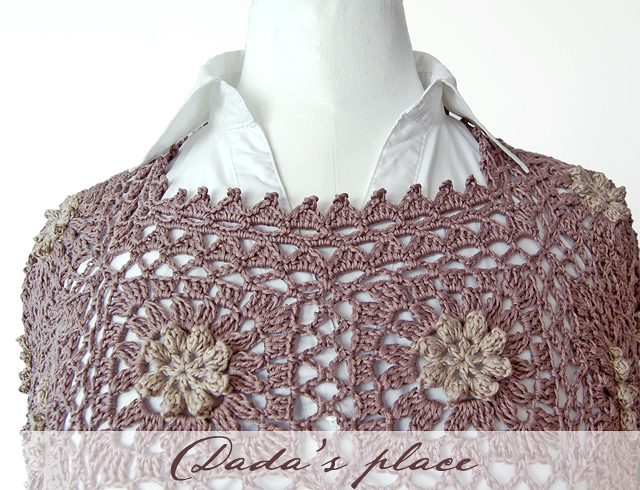
Do you remember my post about New Primavera Square, in which I was talking about how I had started a poncho? Yes, I started a poncho, but somehow it turned out into a tunic. And I’m pretty happy with the result! This is my first tunic ever, which I made without any pattern, just playing around with the squares, using trial and error method, which works quite well for me. Almost all of my color combinations and designs are results of using this method. I’m not afraid of errors. I consider them just as indicators that something didn’t work. Let’s do it again, to see what will work! It’s that simple.
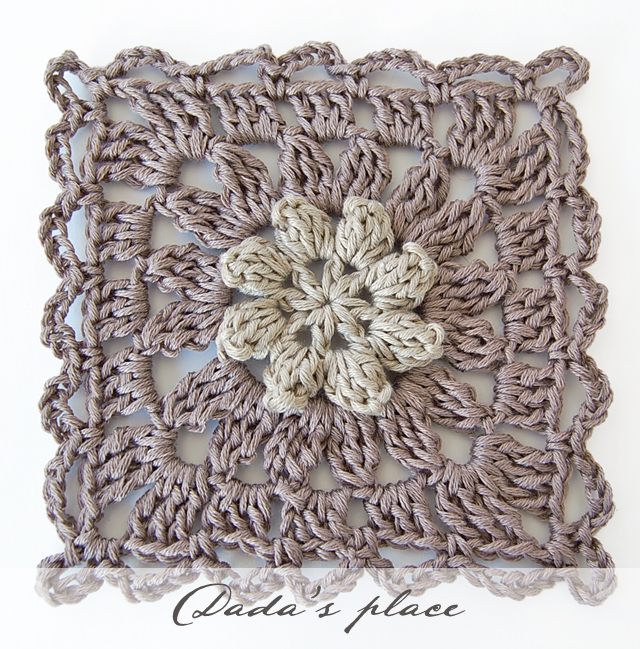
New Primavera flower granny square free pattern
For this tunic I used 100% cotton yarn “Golf” from St. George, and 3.5 mm crochet hook. The yarn is 125m/50g. The square measures approximately 12 x 12 cm (4.7″ x 4.7″)


My New Primavera granny square is almost the same as the old Primavera flower square. I just make some small changes, because I wanted a little bigger square, which in the end proved unnecessary, because the tunic turned out a little to big for me. If I used my old Primavera square it would probably suite me better.
New primavera square
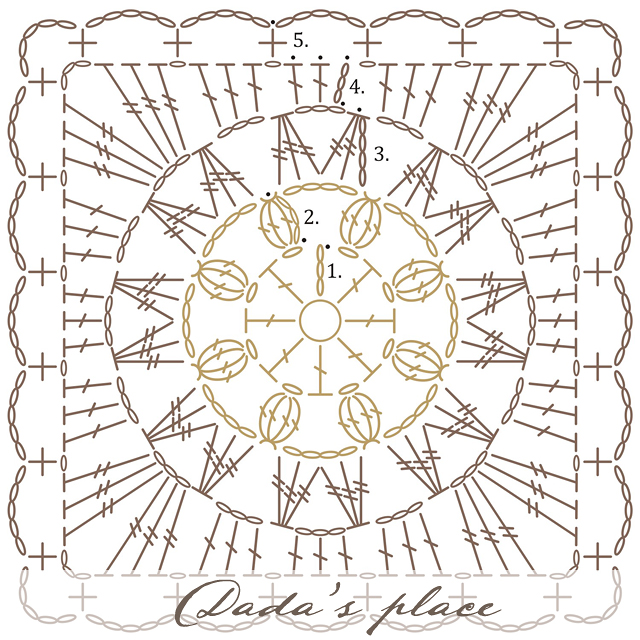
I made this crochet chart and written pattern in case you’d like to use the square for one of your own crochet projects. It’s very easy and quick to make, and you can use it for variety of things, like blankets, pillows, bags, scarfs… And one more good thing. It looks good in two colors as well as in 4 colors (old Primavera Flower square)

Color A is gold, color B is brown

Begin with a magic ring.
Rnd 1: Color A
ch-4 in ring (counts as dc and ch-1), * dc in ring, ch-1; repeat from * 6 more times. Close the ring. Join with slip st to initial ch-4 space (8 dc)
Rnd 2: Color A
Make Beginning Popcorn, then ch-4; * Popcorn in next ch-1 space, chain-4; repeat from * six more times, join with slip stitch to Beginning Popcorn. (8 Popcorn stitches with ch-4 between each Popcorn)
Rnd 3: Color B
Join color B in any ch-4 spaces of the second round, make beginning Cluster (tr3tog – treble crochet three together), ch-3, tr3tog in same ch-4 space, ch-3, * (tr3tog, ch-3, tr3tog) in next ch-4 space, ch-3; Repeat from * 6 more times; Join with slip st to top of beginning Cluster (16 tr3tog with ch-3 between each tr3tog)
Rnd 4: Color B
Make slip st to next ch-3 space, ch-3 (counts as dc), 2 dc in same space, ch-1, * 3 dc in next ch-3 space, ch-1, (3 tr, ch-3, 3 tr) in next ch-3 space, ch-1, (3 dc in next space, ch-1) twice; repeat from * 2 more times, 3 dc in next space, ch-1, (3 tr, ch-3, 3 tr) in next space, ch-1, 3 dc in next space, ch-1, join with slip st to top of initial ch-3.
Rnd 5: Color B
Make slip st in 2 next dc, (sc in next ch-1 space, ch-5) twice, * (sc, ch-5, sc) in next ch-3 space of the corner, (ch-5, sc in next ch-1 space) four times, ch-5; Repeat from * 2 more times, (sc, ch-5, sc) in next ch-3 space, (ch-5, sc in next ch-1 space) twice, ch-5, join with slip st to first sc or make an invisible join.

New Primavera Tunic
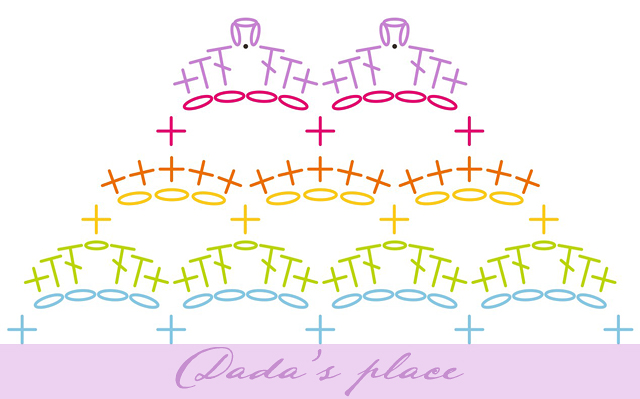
When I joined all the squares together, the collar looked a little, I don’t know, maybe boring, or somehow unfinished, so I added 6 additional rows. In that way I decreased the collar and added a little finishing touch, which in my opinion raised the collar and the whole tunic to a higher level. I made a crochet chart for the collar, and wrote the pattern, so who knows, maybe some of you will find it useful.

New Primavera tunic chart
Row 1: sc in ch-5 space, ch-4
Row 2: sc, hdc, dc, ch-1, dc, hdc, sc in ch-4 space
Row 3: sc in ch-1 space, ch-3
Row 4: 5 sc in every ch-3 space
Row 5: sc in third sc, ch-4
Row 6: sc, hdc, dc, Picot-3, dc, hdc, sc in each ch-4 space

In case you aren’t familiar with my “old” Primavera flower square, you can find the detailed step-by-step tutorial with lots of photographs here.
*
Click here to check out all of Dada’s place free crochet patterns.


This is the end of the story about poncho, I mean, tunic. Till the next story, have a beautiful, colorful and creative week!
*

Secret Garden Shawl free tutorial: Part III

05/11/2015 by Dada Filed Under: Free crochet patterns 9 Comments

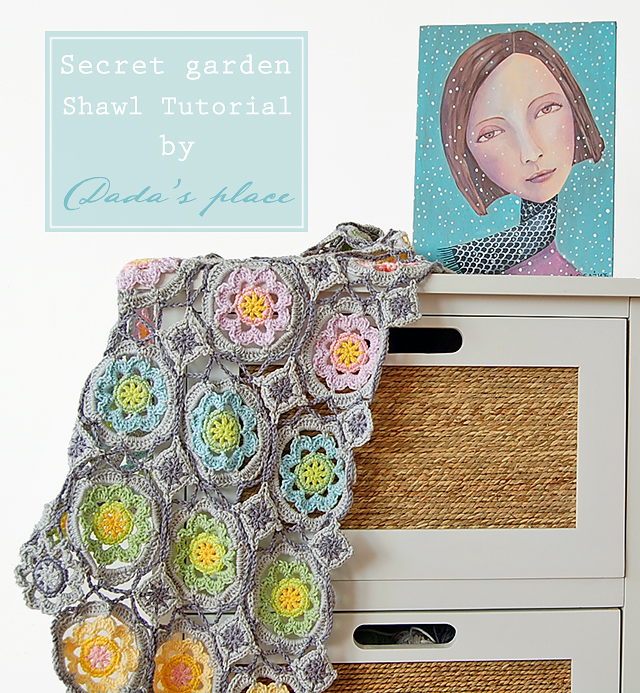
Secret garden crochet shawl free step by step photo tutorial
And now it’s time for the last part of our Secret Garden Shawl tutorial. First, a few words about the yarn. For this shawl (as for majority of my projects) I used “Tango” yarn. It’s 100% cotton yarn 125m/50g. The manufacturer is St. George from Serbia.
Flowery crochet scarf free tutorial
I used these colors:
1. light yellow 0303
2. yellow 0004
3. lime green 0113
4. light green 0350
5. light blue 0404
6. light pink 0394
7. light lavender 0408.
8. light grey 0025
9. grey 0370
Secret garden crochet shawl chart
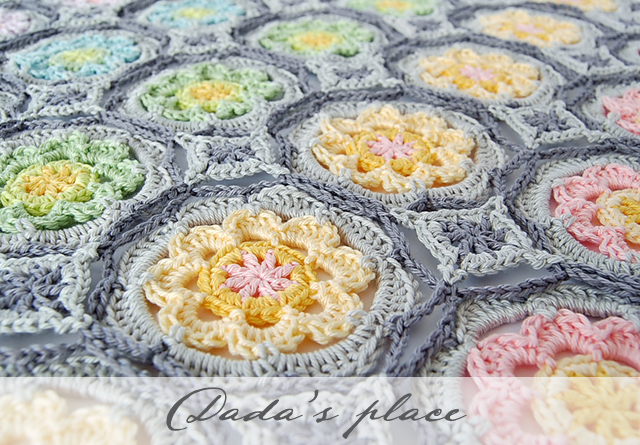
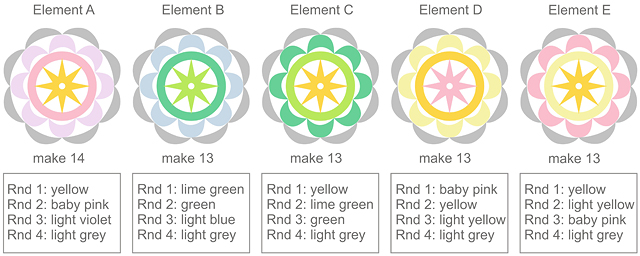
These are the Secret Garden Flower elements. There are 5 different elements. You need to make 66 elements in total, 14 pieces of  element A, and 13 pieces of all the other elements.
Dadas place free crochet shawl chart
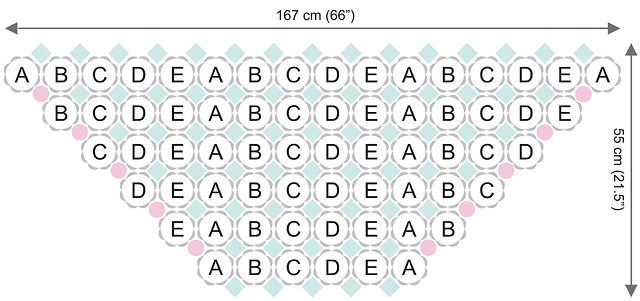
This is the chart of the whole shawl. You can see that you need to make 65 small square elements (little blue squares in the picture), and 10 small flowers (pink circles), five on each side of the shawl. Now you think: “It sounds like a lot of work!” Yes, it is, but I think the shawl is worth the effort.Flowery crochet motif free step by step photo tutorial
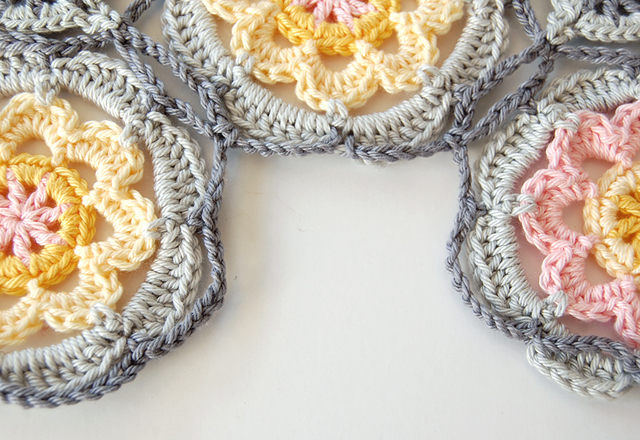
The last lesson you have to learn is how to make and join the small flowers on the sides of the shawl. So, let’s get started!This is the place where we will join our small flower.
Beautiful crochet motif step by step photo tutorial
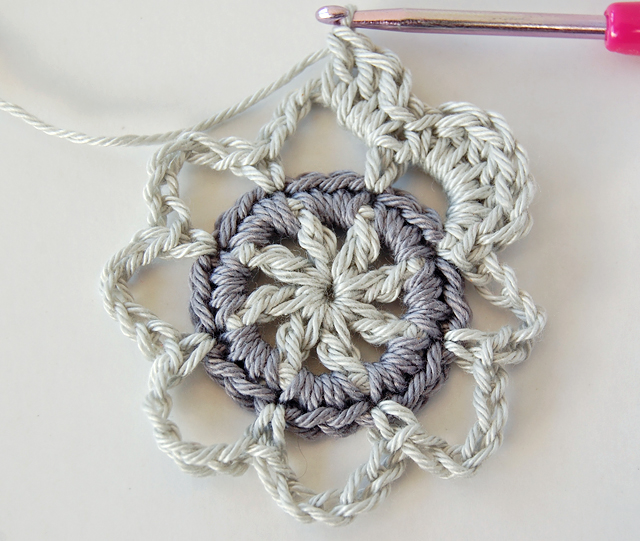
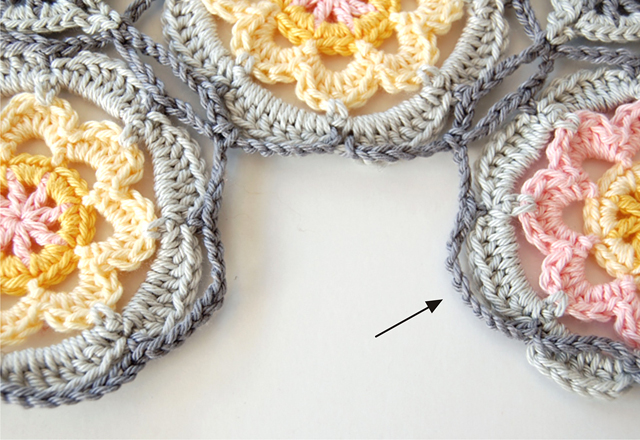
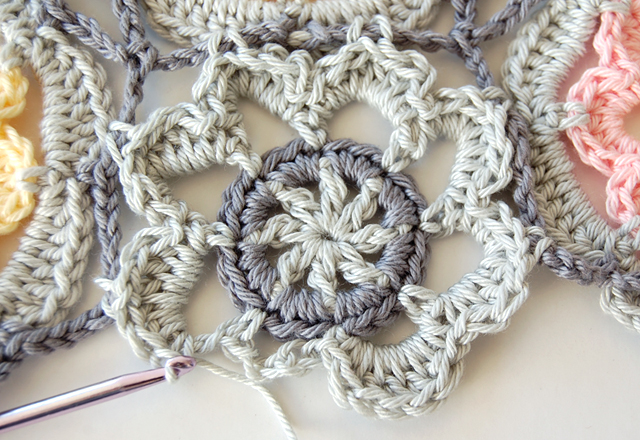
Complete the first three rounds of the Secret Garden flower. Work through the fourth row, make one complete petal, and stop once you’ve worked the third dc of the second petal.
Beautiful crochet flower free step by step photo tutorial
The arrow in the picture indicates the place where you should join the first petal.
Beautiful crochet flowery motif free step by step photo tutorial
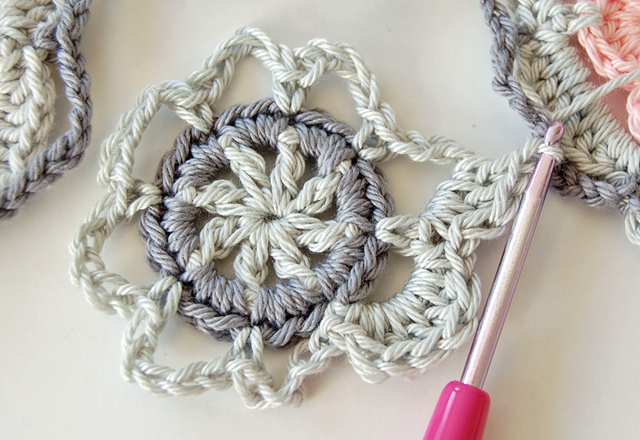
So, just make slip stitch in that ch-9 space
Dadas place crochet flower free tutorial
then make 2 dc and sc in the same ch-5 space (these are remaining stitches of the petal)
Dadas place free crochet tutorial
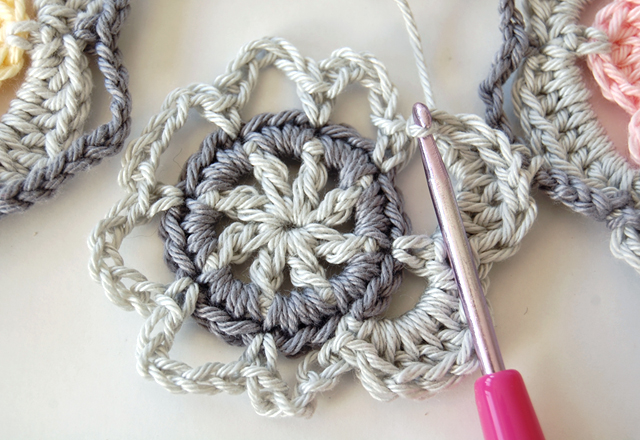
Make sc, then 3 dc in the next ch-5 space, and then again, join the petal to the next ch-9 space with slip stitch. Make the rest of the petal – 2 dc, sc in the same ch-5 space.
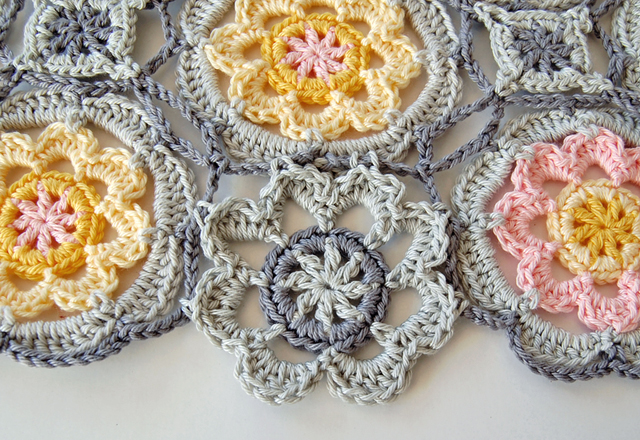
Beautiful crochet free step by step tutorialNow, join the third petal to the next ch-9 space in the same way you’ve already joined the two previous petals.
Beautiful crochet shawl free step by step photo tutorial
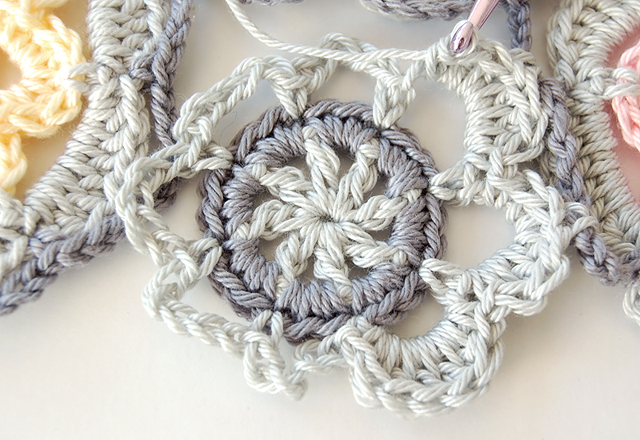
Join the fourth,  the fifth and the sixth petal to the next 3 ch-9 spaces. Now we just have to make one more petal.
Free crochet flower tutorial for beginners
So, make the last petal (sc, 5 dc, sc in the last ch-5 space), and join with slip stitch to the first sc, or make an invisible join. Fasten off. Join 9 remaining flowers in the same way. Now, when you’re done, you can enjoy your shawl and be proud of yourself!
Dadas place free crochet shawl photo tutorial
Hope you will like this tutorial! If you do, and decide to make one for yourself, please send me a picture, I would be delighted to see it!
The first part of the Secret Garden Shawl tutorial you can find here. The second part is available here.
Have a creative week!
  • « Previous Page
  • 1
  • …
  • 4
  • 5
  • 6
  • 7
  • 8
  • 9
  • Next Page »

Dada's shop


Copyright © 2025 · Dadas Place.com