The Rainbow Ruffle blanket is super warm, soft, cuddly, and so easy to make! The pattern is unbelievably simple, the entire blanket is crocheted in double crochet. The ruffle is added at the end, in front loops between two different colors.
Skill level: Beginner – I made this tutorial to be super easy, even for beginners. All you have to do is to grab your crochet hook, make some coffee or tea, and follow the pictures. I like to call my tutorials brain friendly, because you don’t have to think at all and figure things out. Which is a good thing, I think. You can relax and enjoy yourself, and at the same time make something useful and beautiful.
The tutorial is written in standard US crochet terms, but if you’re from the United Kingdom, you can easily follow the tutorial, just make treble crochet instead of double crochet, and that’s it! The other 2 stitches are the same (chain stitch, and slip stitch). Yes! It’s that simple!
Stitches: chain stitch, double crochet, slip stitch
Special stitches: standing dc – Make a slip knot on the hook, yarn over, insert your hook into desired stitch, pull up a loop, yarn over and pull through 2 loops, yarn over and pull through 2 remaining loops.
Crochet hook: 3.5 mm (USA – size 4/E, UK – 9)
Gauge: 20 dc and 5 rows = 4” (10cm)
Size: 25.6” (65cm) wide x 27.5” (70cm) long. The blanket weights 507g
Yarn: “Golf” (St. George) 100% cotton 125m/50g, “Cotton classic” (St. George) 120m/50g
• Yellow (Cotton Classic – No. 0023) 1 skein of 50g
• Pink (Cotton Classic – No. 0005) 2 skeins of 50g
• Lavender (Cotton Classic – No. 0028) 2 skeins of 50g
• Orange (Golf – No. 0950) 2 skeins of 50g
• Turquoise (Golf – No. 0911) 2 skeins of 50 g
• Green (Golf – No. 0981) 1 skein of 50 g
• White (Tango – No. 0006) 3 skeins of 50g
Notes:
I recommend weaving in yarn ends as you go.
This blanket is worked back and forth in rows, and can be made in any size. You can adjust the size simply by adding or decreasing the number of stitches of foundation chain, and adding or decreasing the number of rows.
So, let’s get started!
Before you start, decide on how big you’d like your blanket to be. For example, my blanket is 63 cm wide, so I made the foundation chain of 130. To start, make a slip knot on your hook, (picture 1) and continue making foundation chain. (picture 2)
Measure your chain as you go, and stop when you reach the desired length. For the purpose of this tutorial, I made the foundation chain of only 30 stitches, 14 cm long.
When you’re satisfied with the length of your foundation chain, make 3 more stitches, which will count as the first dc. I marked the stitch where you should make the first dc. (picture 4) It’s the fourth stitch from the hook. So, make the first dc in that stitch. (picture 5)
Continue making 1 dc into each stitch, until you reach the end of the row. (picture 6) It’s important that you have the same number of stitches in each row. I made the foundation chain of 30, and added ch-3 (counts as the first dc) which means that I should have 31 stitches. (30+1)
Now, we’re going to make the second row of the same color. Make ch 3 – counts as dc, (picture 7) then turn your work over, (picture 8) and see where you should make your first dc. It’s the next dc. (picture 8)
Make dc in the next dc, (picture 9) and continue working 1 dc into each dc, until you reach the last stitch, which is ch-3, marked by the arrow in picture 10. Be careful not to skip that last stitch because it’s very easy to overlook it. When you have made dc in the last dc of the row, it seems that you’ve completed the row, but you haven’t. If you count your stitches, you will see that you have 1 stitch less than in your previous row. So, pay attention to that! It would be a big mistake to miss that last stitch. It would make your blanket narrower after each row. So, make the last dc of the row in the third chain of ch-3. Now, you’ve completed the row. (picture 11)
Cut the yarn and pull it through the stitch (picture 12). I recommend you count your stitches to see if you have the same number in both rows. It’s important to keep the same number of stitches, to have straight, even edges. Now, take the second color of your choice, we’re going to work 2 rows of dc with the next color. If you’d like to make the same blanket as mine, look at the color chart at the end of this tutorial. We will use only the back loops, because we’ll need the front loops for the ruffle later.
Turn your work over so that the first stitch on the right is the last dc we’ve just made. I started the row with standing dc, (make a slip knot on your hook, yarn over, insert your hook into indicated stitch and make regular dc) but you can also start with ch-3. Be sure to make standing dc or ch-3 into back loop of the first dc of the row. (picture 13) So, let’s take a closer look at the front and back loops. (picture 14) You can see in picture 15 that I inserted my hook only through the back loop out of the two loops, and it’s the loop farther away from me.
Make dc into the back loop of the next dc. (picture 16) Continue working 1 dc into each dc, (in back loop) until you reach the last stitch of the row, which is ch-3. (picture 17) Remember? Don’t skip it, but make the last dc of the row in the third chain of ch-3. (picture 18)
Make ch-3, turn your work over, (picture 19) and make dc into the next dc – in both loops. (picture 20) Work 1 dc into both loops of each dc, along the row, until you reach the last stitch, which is standing dc. (picture 21)
Make dc into standing dc. (picture 22) Cut the yarn and pull it through the stitch. Turn your work over, the last dc you’ve just made should be the stitch where you’ll start your next row. Change the color. Again, we will work only in back loops. Start the first row of the next color with standing sc. (or ch-3) Make standing dc into the back loop of the first dc. (picture 23) Make dc in the back loop of the next dc. (picture 24)
Continue working 1 dc into back loop of each dc to the end of the row. Remember not to skip the last stitch – ch-3! (picture 25) Make ch-3, turn your work over, and make dc into both loops of the next dc. (picture 26) Continue along the row, in the same way, making 1 dc into both loops of each dc until you reach the end of the row. (picture 27) Cut the yarn and pull it through the stitch.
Once you’ve finished the first 6 rows of the blanket, (two rows of three different colors) it should look like this. (picture 28) This is the “right” side of the blanket, where you can see the front loops. Insert the next color of your choice and make the next 2 rows in the same way we’ve made our previous rows. (picture 29) It’s important to always make the first row of the new color on the “right” side of the blanket. Work the first row of each color only in the back loops, turn your blanket over, and work the second row in both loops. Fasten off. Continue adding two rows of different color to your blanket until you reach the desired length. (picture 30)
If you’re like me, and didn’t listen to my advice to weave in yarn ends as you went along, now you’re left with a whole bunch of yarn ends to weave in. So, make yourself a cup of coffee or a favorite tea, turn on some pleasant, calming music and try to enjoy the work… It’s important that you weave in ends on the “wrong” side of the blanket, the side without visible front loops. (picture 31)
Now, we just have to add a ruffle. Don’t worry, it’s very easy to do. We will use the front loops. (picture 32) Attach white yarn to the front loop of the first stitch and make ch-5. (picture 33) Make slip stitch into the next dc. (picture 34)
You may find making the ruffle a little tricky at first, but once you’ve figured it out, it will be pretty easy, especially if you bend the blanket along the row you’re working on. (picture 35) Continue making ch-5, then slip stitch into the next dc along the blanket. (picture 36)
And eventually, after many ch-5 and slip stitches we’ve finally finished our first ruffle row! Congratulations! (picture 37)
Continue making ruffle in front loops between two different colors. (picture 38)
And finally, when you’re totally exhausted from making so many chains and slip stitches, and ruffles, you realized that your blanket is finally done! I only hope that at the end you will think that it was totally worth the time and effort you invested in this blanket!
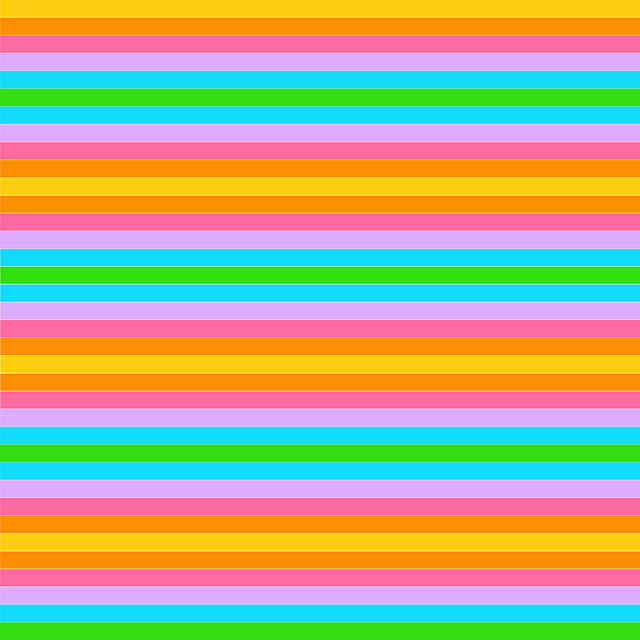
This is the color scheme that I used for my Rainbow Ruffle Blanket.
***************
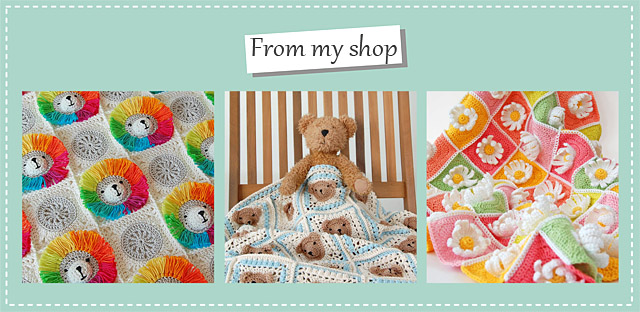
Feel free to sell the finished products made from this pattern, but please link back to my site: dadasplace.com for credit. And, please don’t use my pictures to sell your work.
Although this pattern is free, it is copyright protected, so please don’t sell or publish this pattern anywhere, don’t translate it, or make YouTube videos without my permission. Thank you for respecting my work!
I hope you will like this tutorial, and if you make your own Rainbow Ruffle Blanket I would love to see it! You can share the pictures of your Rainbow Ruffle Blanket to my Facebook page, or tag me on Instagram.
Happy crocheting! Let me know in the comments how you like the tutorial!