
I think it’s time for another tutorial! I’m so glad that you liked my previous tutorial for Teddy Bear Granny Square.

For this granny square, as for my Primavera flowers baby blanket I used 100% cotton yarn 125m/50gr called “Golf” manufactured by St. George, and 3.5 mm crochet hook.
The tutorial is written in US terms.
Stitches you will use:
Single crochet – sc
Half double crochet – hdc
Double crochet – dc
Treble (or triple) crochet – tr
Slip stitch – sl st
Special stitches:
Popcorn stitch
3 double cluster stitch (dc3tog)
So, grab your favorite hook and some yarn because we’re going to start!

We’ll start by making a magic ring and chain 4 (picture 1),
Make dc, then chain 1 in the ring (picture 2)

Make 6 more dc in ring, with 1 chain between each one. When you finish the last dc, make chain 1 – you should have 8 stitches in total (picture 3)
Pull tail yarn and close the ring (picture 4)

Slip stitch into the first chain space – between chain 4 and first dc, (picture 5) Cut the yarn and pull it through stitch.
Now, we’re going to make our first Popcorn stitch – attach a new color into any of the chain spaces, then chain 3 (picture 6)

Make 4 dc in the same chain space – you should have 5 stitches (picture 7),
Drop the loop from your hook, insert the hook from front to back through the first chain space (between chain 3 and first dc), grab the dropped loop with your hook (picture 8) and pull it through the stitch

Chain 3 (picture 9)
Now, we’ll begin our second Popcorn stitch by making dc in the next chain space (picture 10)

Make 4 more dc in the same chain space – you should have 5 stitches (picture 11),
then again, drop the lop from your hook, insert hook from front to back in the top of the first dc of group (indicated by the arrow in picture 11), grab the dropped loop with your hook and pull it through the stitch, then make chain 3 (picture 12)

Continue in this way, around the circle, making 1 Popcorn stitch in each chain space, with 3 chains between each Popcorn stitch. After you finish the last Popcorn stitch, make chain 3. End round with slip stitch in the top stitch of the first Popcorn stitch (picture 13)
Now we’re going to make a Cluster stitch. Insert a new color in any chain 3 space (between 2 Popcorn stitches), and chain 3 (picture 14)

Now we’ll make an “incomplete dc” – yarn over, insert hook in the same chain 3 space, yarn over and pull up loop (you should have 3 loops on hook), yarn over, draw the yarn through 2 loops on the hook – now you have 2 loops on the hook (picture 15)
Repeat the preceding step by making another incomplete dc – You should end up with 3 loops on the hook (picture 16)

To complete Cluster stitch, yarn over and draw the yarn through all 3 loops on the hook. You’ve just made your first 3 double cluster. (picture 17)
Chain 2 (picture 18)

We should make another cluster stitch in the same chain 3 space between 2 Popcorn stitches – so, make 3 incomplete dc (as it is explained in picture 15) – this time you should have 4 loops on the hook (picture 19)
To complete Cluster stitch – yarn over and draw the yarn through all 4 loops on the hook, then chain 2 (picture 20)

Continue in this way, making 2 clusters in each chain 3 space, with 2 chains between each one, until you get round to the beginning. You should have 16 clusters. Make chain 2 after last cluster you made (picture 21)
To finish the row, make a slip stitch into the first chain 2 space – between 2 clusters (picture 22)

We’re going to make the background now. Insert a new color in any chain 2 space (between 2 clusters), then chain 3 (picture 23)
dc in the same space (picture 24)

3 hdc in next chain space (picture 25)
3 dc in next chain space (picture 26)

Now, in the next chain space, we’re going to make a corner. You need to make 3 trebles, chain 2 and then make another 3 trebles into the same chain space (picture 27)
3 dc in next space; 3 hdc in next space; 3 dc in next space; then another corner – 3 tr, chain 2, 3 tr in next space (picture 28)

3 dc in next space; 3 hdc in next space; 3 dc in next space; 3 tr, chain 2, 3 tr in next space (picture 29)
and repeat one more time 3 dc in next space; 3 hdc in next space; 3 dc in next space; 3 tr, chain 2, 3 tr in next space (picture 30)

To finish our last row, we should make 1 dc into the same space where we made our first chain of 3 (picture 31) We are not going to do slip stitch. Instead, we’re going to make an invisible join.
Cut the yarn and pull it through the stitch. Thread a needle. Skip the beginning chain 3, and insert the needle under both loops (front & back) of the next stitch from back to front, as it is shown in the picture 32, and pull it through

insert the needle back into the last stitch you made – through back loop only, from front to back – as it is shown in the picture 33 and pull it through
And there it is, your Primavera flowers granny square! (picture 34)

It was easy. Wasn’t it?

Although this pattern is free, it is copyright protected, so please don’t sell or publish this pattern anywhere, don’t translate it, or make YouTube videos without my permission. Thank you for respecting my work!
*
Hope you liked and enjoyed this tutorial. I really tried this tutorial to be easy to follow and understand, even for beginners, but if you encounter any mistake or problem with it, please let me know in the comments.
You can find more of my patterns and step-by-step tutorials here.
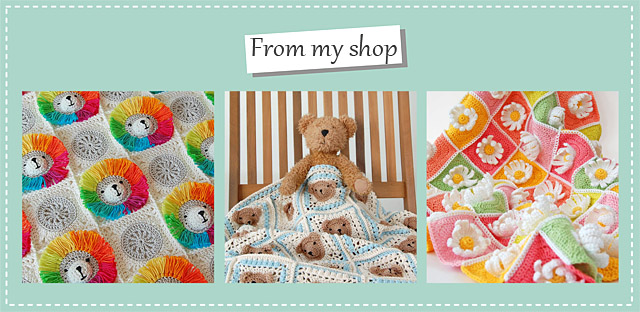
Click here to check out my other patterns.
*
Many of you asked me how I had joined the squares and made the border, so I decided to make those tutorials too.
I grabbed my crochet hook, bought some pretty yarn and made a complete new Primavera flower blanket and at the same time took the pictures for the tutorial. As always, there are plenty of step-by-step pictures, and you will not have any trouble joining the squares together and making the border.
Click here to check out the joining and border tutorial.
*


