• Facebook
  • Instagram
  • Pinterest

Dada's Place

Crochet wonderland

  • Home
  • Blog
  • Dada’s shop
  • Free Patterns
  • Categories
  • About
  • Contact

Free Crochet Flowery Hexagon Tutorial

14/05/2016 by Dada Filed Under: Free crochet patterns 27 Comments

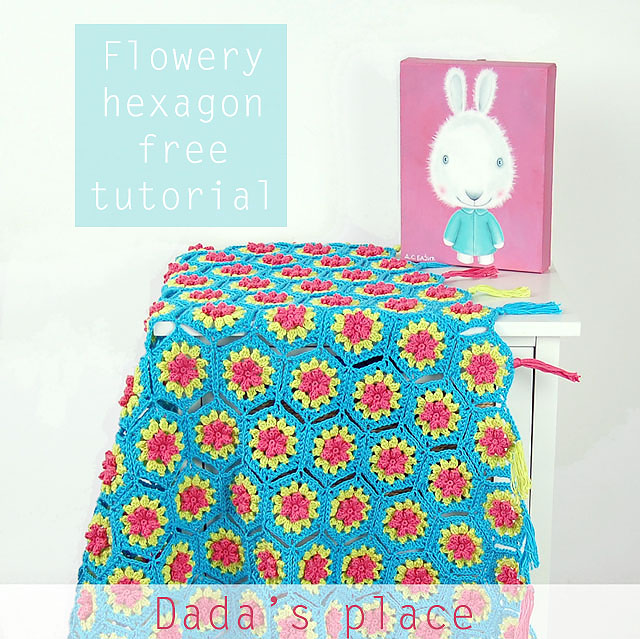
Free crochet flowery hexagon tutorial
As I promised in my last post, I prepared for you the free pattern and step by step tutorial for this flowery hexagon. It’s very simple crochet project and so easy to make. I think that this pattern would be a perfect project for an advanced beginner who has mastered the basic stitches. For this hexagon I used 100% cotton yarn 125m/50gr called “Tango” by St. George, and 3.5 mm crochet hook.
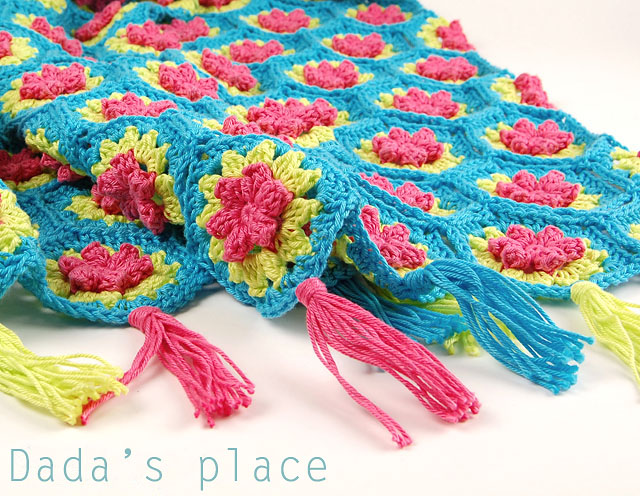
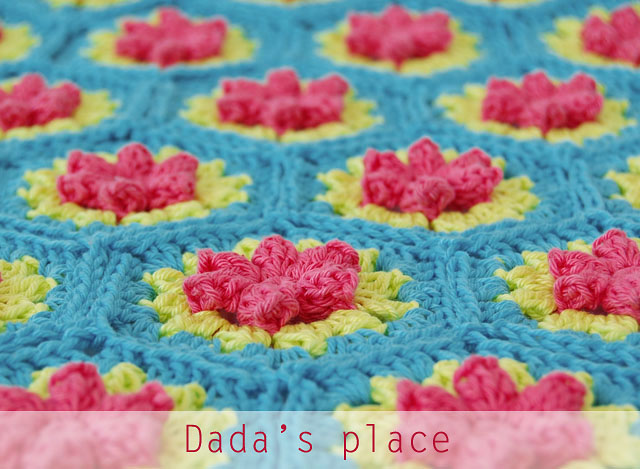
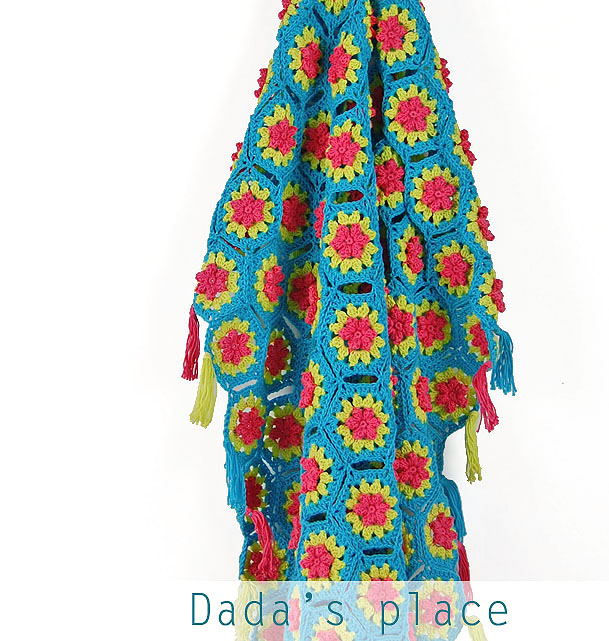
Crochet hexagon flowery blanket
The tutorial is written using U.S. crochet terms.
Stitches we will use:
Magic ring
Single crochet – sc
Double crochet – dc
Slip stitch – sl st
Chain stitch – ch
Special stitches:
Popcorn stitch
Cluster (dc3tog)-double crochet three together
So, let’s get started!
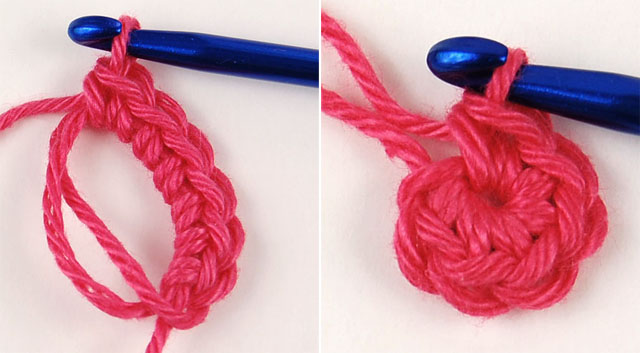
Free crochet flowery hexagon photo tutorial
We’ll start with a magic ring. Make 6 sc in the ring.
Pull the yarn tail and close the ring.
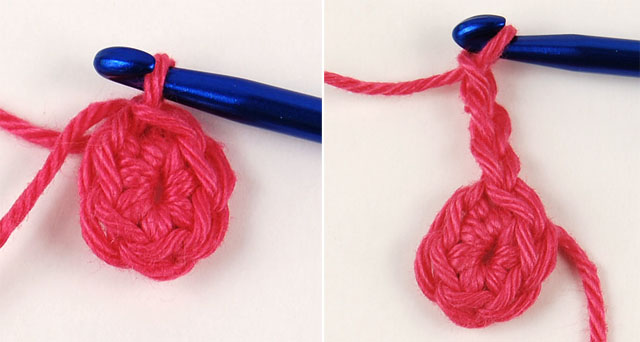
Free crochet hexagon blanket tutorial
Join with slip stitch to the first sc.
Now, we’re going to make a Popcorn stitch, so make ch-3 (counts as dc)
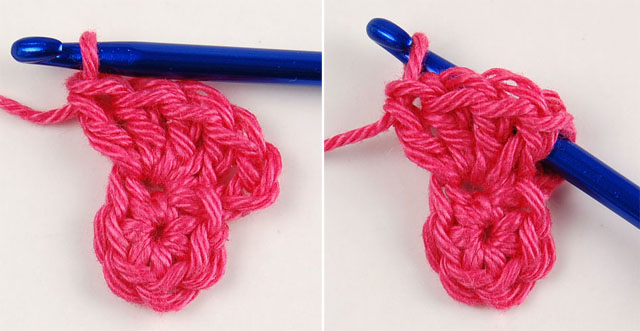
Free crochet hexagon step by step tutorial
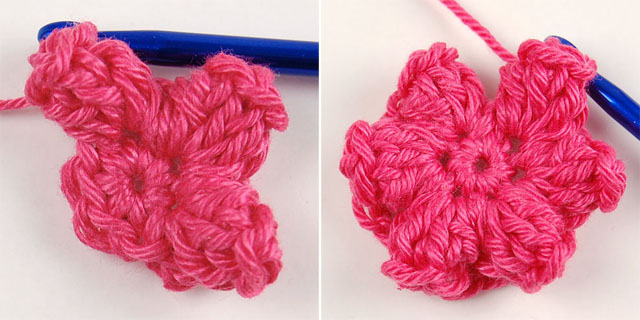
Make 4 dc in the same space.
Now, drop the loop from your hook. Insert your hook from front to back into the space between the initial ch-3 and the first dc, then grab the dropped loop with the hook,
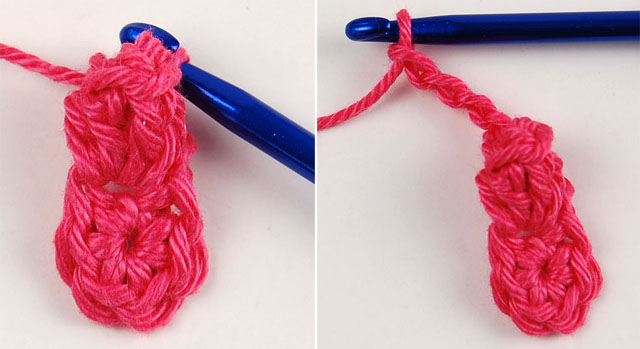
Free crochet hexagon step by step photo tutorial
and pull it through the stitch. We’ve just made our first Popcorn stitch!
Now, make ch-4;
Free flowery hexagon step by step tutorial
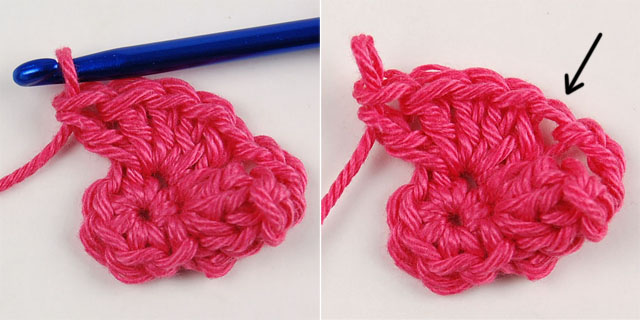
Make 5 dc in the next sc.
Drop the loop from your hook. Now, look at the picture to see where you should insert your hook. It’s the first dc of the group of 5 dc.
Free hexagon step by step beginners tutorial
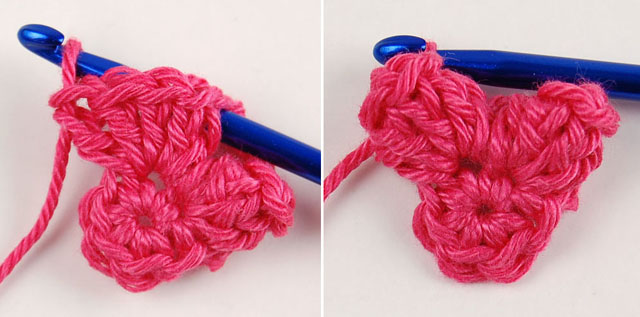
Insert your hook from front to back through the first dc, grab the dropped loop,
and pull it through the stitch.Free crochet beginners step by step tutorial
* Make ch-4, then Popcorn in the next sc.
Repeat from * three more times;Free crochet step by step tutorial for beginners
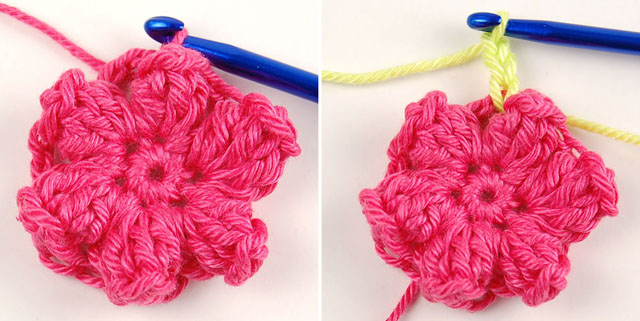
Make ch-4 and join with slip st to the top of the beginning Popcorn. Fasten off.
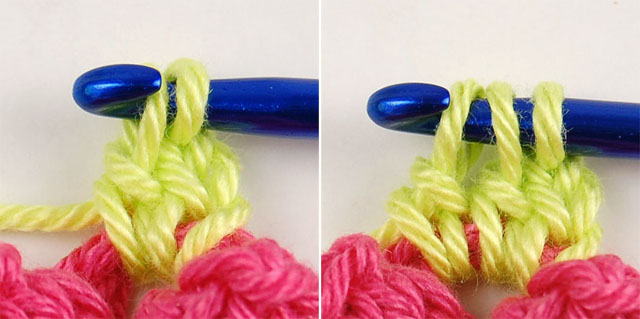
Now, we’re going to make a Cluster stitch – dc3tog (double crochet three together), so insert a new color in any ch-4 space, and make ch-3 (counts as dc);
Free crochet hexagon tutorial for beginners
Make an “incomplete” dc – yarn over, insert hook in the same chain-4 space, yarn over and pull up loop (you should have 3 loops on hook), yarn over, draw the yarn through 2 loops on the hook – now stop. You should have 2 loops on the hook.
Make another “incomplete” dc in the same space. you should have 3 loops on the hook.
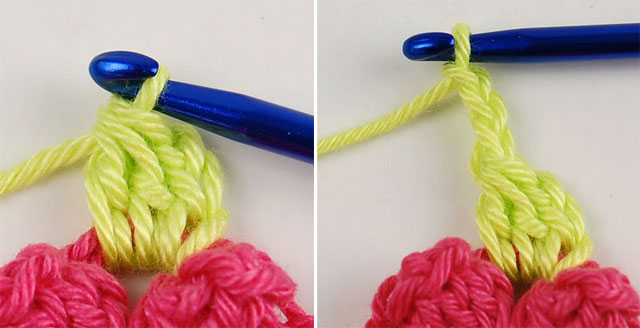
Easy free crochet step by step tutorial
To complete Cluster stitch, yarn over and draw the yarn through all 3 loops on the hook.
Now, we’re going to make another Cluster (dc3tog) in the same ch-4 space, so make ch-3;
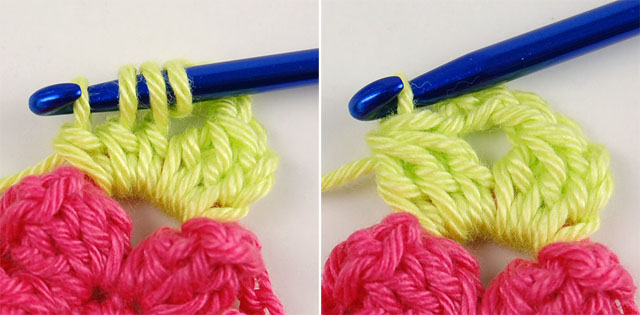
Easy free crochet step by step tutorial for beginners
Make 3 “incomplete” dc in the same space (now, you should have 4 loops on your hook);
Grab the yarn with the hook and pull it through all 4 loops on the hook.
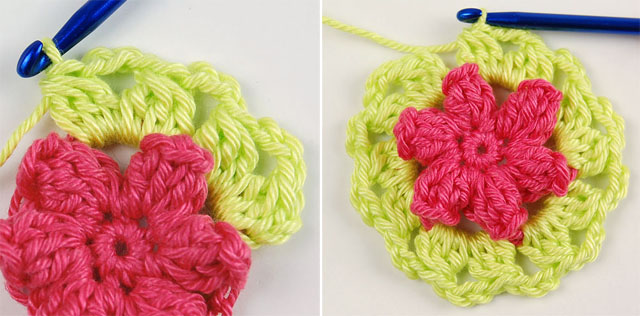
Easy free crochet hexagon photo tutorial
Make ch-3, then 2 Clusters in the next ch-4 space with ch-3 between them.
Continue making two Clusters into every ch-4 space, with ch-3 between each cluster.
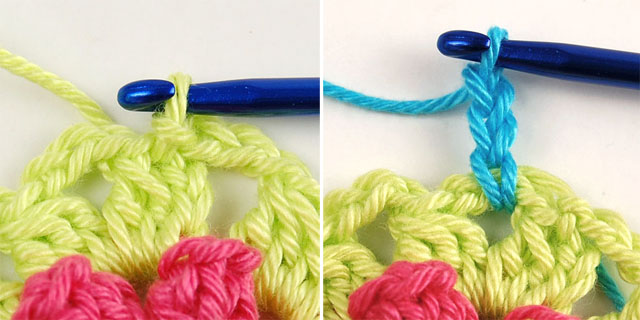
Crochet for beginners hexagon free tutorial
When you reach the beginning of the round join with slip st to the top of beginning Cluster. Fasten off.
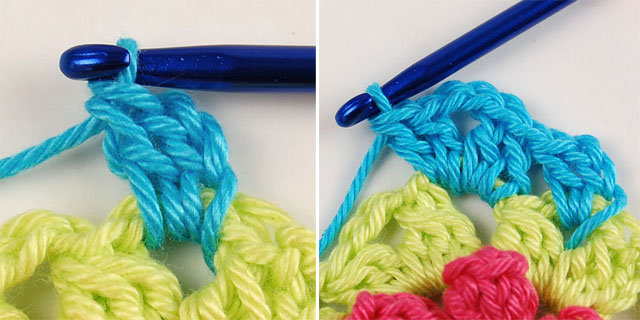
Insert a new color in any ch-3 space, and make ch-3 (counts as dc);
Crochet for beginners free step by step tutorial
Make dc in the same space.
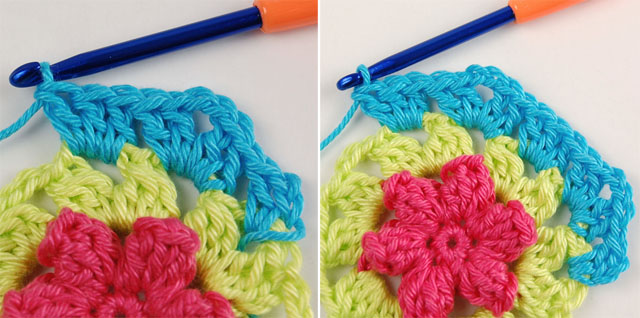
Make 2 dc in the next ch-3 space, ch-2, 2 dc in the same space;
Free crochet step by step photo tutorial for beginners
Make 3 dc in the next space;
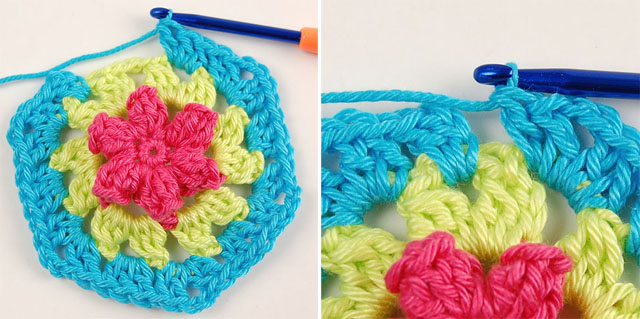
* Make (2 dc, ch-2, 2 dc) in the next space, 3 dc in the next space;
Free chrochet flowery motif pattern
Repeat from * three more times;
Make (2 dc, ch-2, 2 dc) in the next space;
Crochet flowery motif free pattern
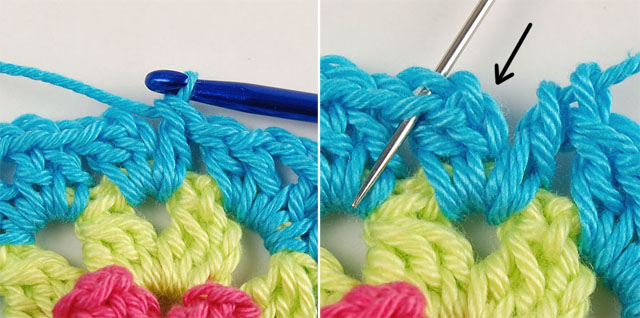
Make dc in the next space (where we’ve already made ch-3 and dc);
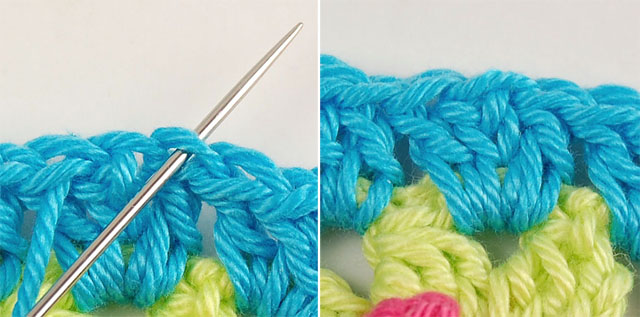
We will finish the hexagon with an invisible join. Cut the yarn and pull it through the stitch. Thread the tapestry needle, skip the beginning ch-3 (marked by arrow in the picture), and insert your needle below both loops of the next dc, from back to front, and pull it through.
Free crochet pattern for beginners
Insert the needle back, in the last dc you made – through the back loop only, from front to back, and pull it through. Weave in yarn end.
The join is invisible. Isn’t it?
Crochet hexagon flower
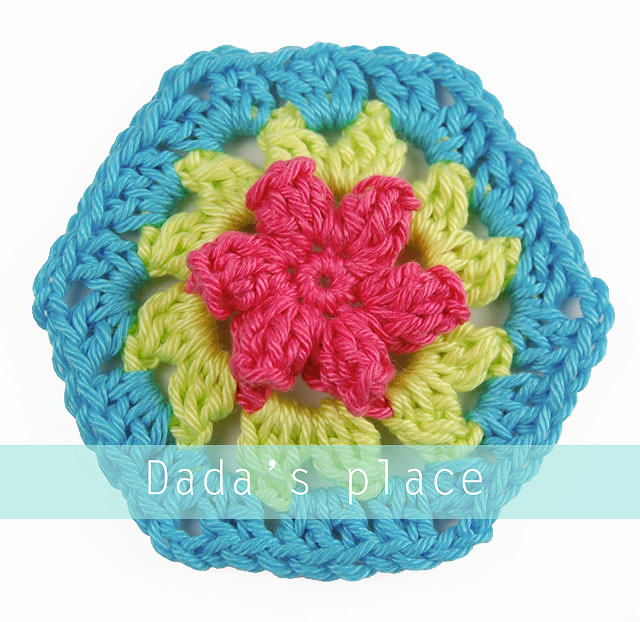
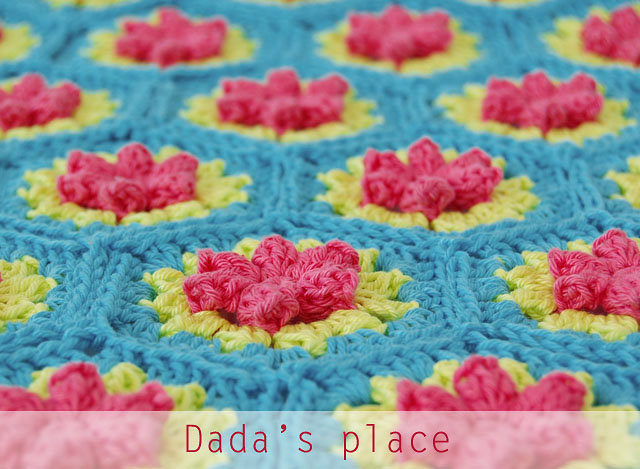
And now you have it! The flowery hexagon! You can use it for making blankets, cushions, scarfs, shawls, ponchos, bags, even rugs (which I consider making). The possibilities are endless. Let your imagination be creative…
Crochet hexagon blanket
Hope you will like this tutorial! I really tried this tutorial to be easy to follow and understand, even for beginners, but if you encounter any mistake or problem with it, please let me know in the comments.
If you liked this tutorial, go and check out my other free tutorials:
Primavera Flower Granny Square
Vintage Style Crochet Blanket
Secret Garden Crochet Shawl
My First Hexagon Blanket

10/05/2016 by Dada Filed Under: Free crochet patterns 9 Comments

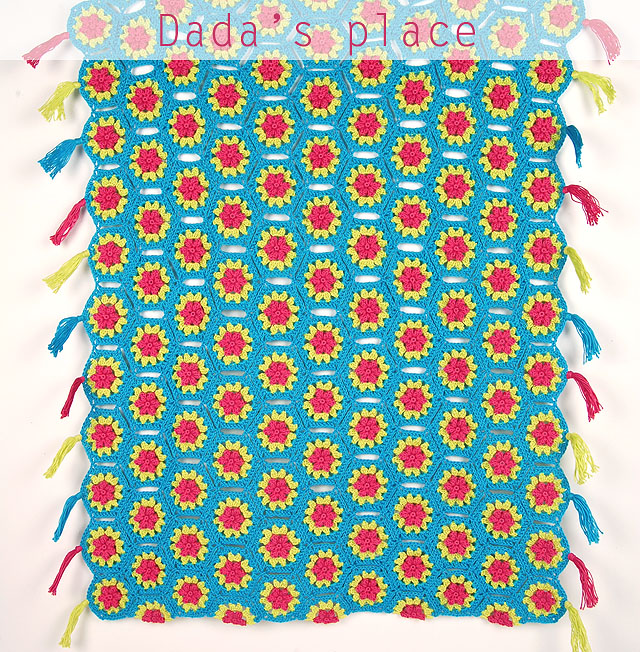
Crochet hexagon blanket free pattern
I haven’t posted anything on my blog for a while, and it may seem that I’ve neglected my blog and work, but believe me, I work very hard to create new patterns and to offer you some (hope to be) beautiful stuff.


Crochet flowery hexagon blanket


I finished this blanket probably a month ago, but immediately after the completion, I’ve got an idea for another blanket, and threw myself into that new project, which isn’t finished yet, and was in the beginning pretty challenging, I must say. All is good now. after many, many trials and errors, I finally told myself: “Dragana, just relax, it doesn’t have at all to be perfect”. (because as you may already know “don’t let the perfect be the enemy of the good” to quote Voltaire), and soon after that, I created the design I was very satisfied with and continued working on the project.
Hexagon blanket border
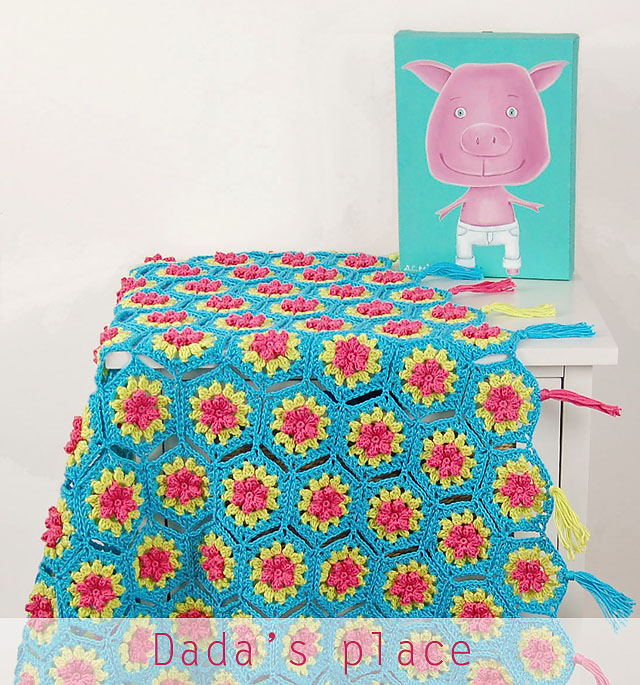
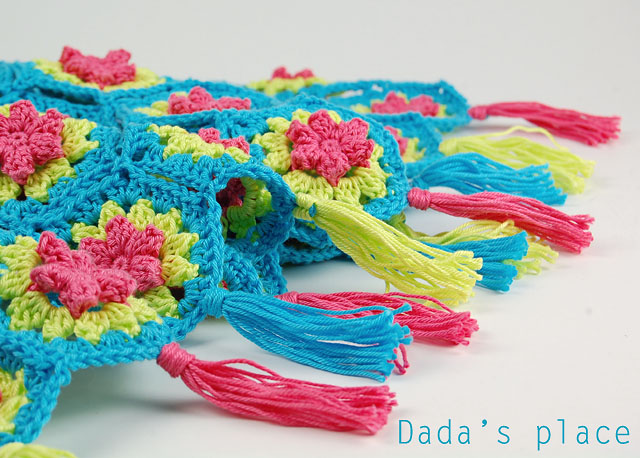
What can I say about this blanket? First, I love the colors. This winter and the beginning of spring were very rainy and gloomy and I really enjoyed working with these bright colors. Second, this is my first hexagon blanket. I honestly don’t know why it took me so long to try something different from squares. I finally did, and I’m very happy with how it turned out.
Dadas place hexagon blanket free pattern
The blanket measures approximately 72 x 80 cm (28″ x 31.5″), and is composed of 116 hexagons! Can you believe that? My last blanket, The English Garden Baby Blanket has only 20 squares, and my Norwegian Forest Blanket only 16. I used my beloved 100% cotton yarn “Tango” 125m/50g from St. George (manufacturer from Serbia who unfortunately doesn’t sell on-line). I used my trusty 3.5 mm crochet hook (USA – size 4).
Hexagon crochet blanket
What else can I say about this blanket? oh, yes, I decided to boost the popularity of hexagons a little (because they deserve it), so I’m going to make free, very detailed step-by-step photo tutorial on how to make these flowery hexagons… Hope you will try them out…
The hexagon step-by-step tutorial is now available here.
Crochet hexagon blanket free tutorial
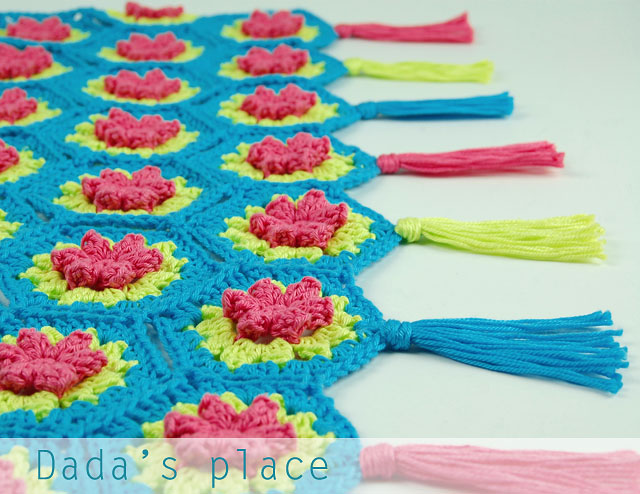
And that fringe! I just love it! 🙂

Vintage Style Crochet Blanket Pattern

16/12/2015 by Dada Filed Under: Crochet blankets, Free crochet patterns 134 Comments

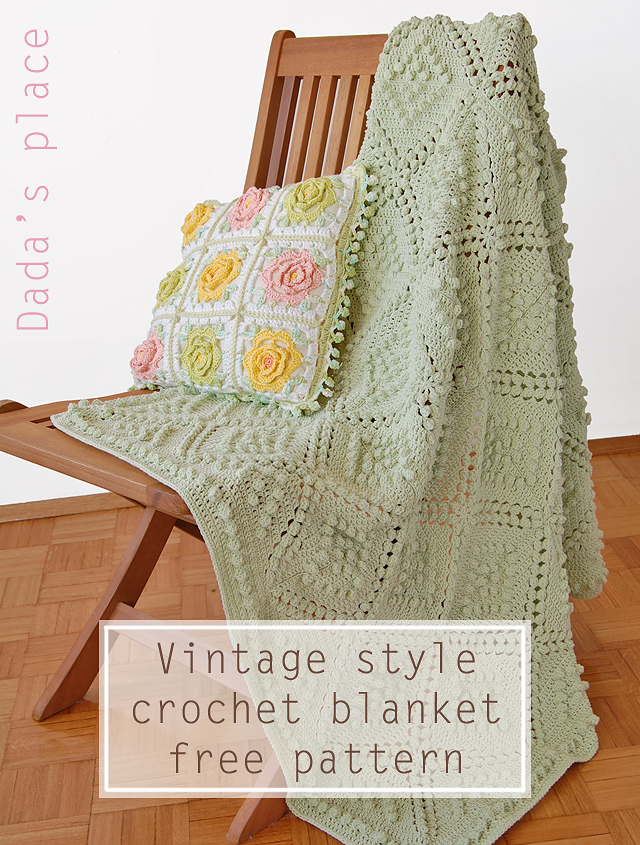
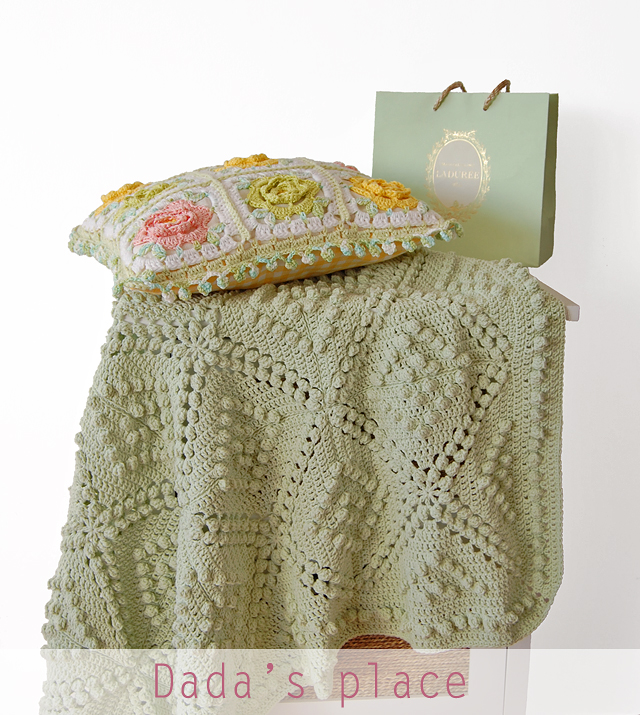
Vintage style crochet blanket free pattern
First, I want to thank you all for your kind comments on my previous post. I’m so glad you like my vintage style crochet blanket! So, as promised, I set down and wrote the pattern.
Just a few words before we begin. The Popcorn stitches in the corners (2 Popcorns made in ch-3 space) of each round are made of 4 dc, and I marked them as Popcorn-4 in the pattern .The others Popcorn stitches (round 6-10) are made of 5 dc (marked as Popcorn-5).
So, lets get started!
Free crochet pattern Vintage style vintage blanket
Begin with a magic ring.
Rnd 1: ch-5 in ring (counts as dc and ch-2), * dc in ring, ch-2; Repeat from * 6 more times. Close the ring. Join with slip st to third chain of initial ch-5.
Rnd 2: slip st to next ch-2 space, Beginning Popcorn (chain 3 + 3dc), ch-3, * Popcorn-4 in next ch-2 space, ch-3; Repeat from * 6 more times. Join with slip st to top of Beginning Popcorn.
Rnd 3: slip st to next ch-3 space, * (Popcorn-4, ch-3, Popcorn-4) in same ch-3 space, ch-2, 3 dc in next ch-3 space, ch-2; Repeat from * three more times. Join with slip st to top of Beginning Popcorn.
Rnd 4: slip st to next ch-3 space, * (Popcorn-4, ch-3, Popcorn-4) in same ch-3 space, ch-2, 2 dc in ch-2 space, dc in next 3 dc, 2 dc in ch-2 space, ch-2; Repeat from * three more times. Join with slip st to top of Beginning Popcorn.
Rnd 5: slip st to next ch-3 space, * (Popcorn-4, ch-3, Popcorn-4) in same ch-3 space, ch-2, 2 dc in ch-2 space, dc in next 7 dc, 2 dc in ch-2 space, ch-2; Repeat from * three more times. Join with slip st to top of Beginning Popcorn.
Rnd 6: slip st to next ch-3 space, * (Popcorn-4, ch-3, Popcorn-4) in same ch-3 space, ch-2, 2 dc in ch-2 space, dc in next 5 dc, Popcorn-5 in next dc, dc in next 5 dc, 2 dc in ch-2 space, ch-2; Repeat from * three more times. Join with slip st to top of Beginning Popcorn.
Rnd 7: slip st to next ch-3 space, * (Popcorn-4, ch-3, Popcorn-4) in same ch-3 space, ch-2, 2 dc in ch-2 space, dc in next 5 dc, Popcorn-5 in next dc, dc in next dc, dc in Popcorn, dc in next dc, Popcorn-5 in next dc, dc in next 5 dc, 2 dc in ch-2 space, ch-2; Repeat from * three more times. Join with slip st to top of Beginning Popcorn.
Rnd 8: slip st to next ch-3 space, * (Popcorn-4, ch-3, Popcorn-4) in same ch-3 space, ch-2, 2 dc in ch-2 space, dc in next 5 dc, Popcorn-5 in next dc, dc in next dc, dc in Popcorn, dc in next 3dc, dc in Popcorn, dc in next dc, Popcorn-5 in next dc, dc in next 5 dc, 2 dc in ch-2 space, ch-2; Repeat from * three more times. Join with slip st to top of Beginning Popcorn.
Rnd 9: slip st to next ch-3 space, * (Popcorn-4, ch-3, Popcorn-4) in same ch-3 space, ch-2, 2 dc in ch-2 space, dc in next 5 dc, Popcorn-5 in next dc, dc in next dc, dc in Popcorn, dc in next 3dc, Popcorn-5 in next dc, dc in next 3 dc, dc in Popcorn, dc in next dc, Popcorn-5 in next dc, dc in next 5 dc, 2 dc in ch-2 space, ch-2; Repeat from * three more times. Join with slip st to top of Beginning Popcorn.
Rnd 10: slip st to next ch-3 space, * (Popcorn-4, ch-3, Popcorn-4) in same ch-3 space, ch-2, 2 dc in ch-2 space, dc in next 5 dc, Popcorn-5 in next dc, dc in next dc, dc in Popcorn, dc in next 3dc, Popcorn-5 in next dc, dc in next dc, dc in Popcorn, dc in next dc, Popcorn-5 in next dc, dc in next 3 dc, dc in Popcorn, dc in next dc, Popcorn-5 in next dc, dc in next 5 dc, 2 dc in ch-2 space, ch-2; Repeat from * three more times. Join with slip st to top of Beginning Popcorn.
Popcorn granny square blanket free pattern
When I finished the blanket, I thought about the border, and given that I wanted very simple edge, in accordance with the blanket, which wouldn’t switch attention from the blanket, I came up with this border. It’s very simple and easy to make.

Row 1: 1 hdc in each stitch, when you reach the left corner of each square make 2 hdc in chain space before Popcorn, 2 dc in chain space after Popcorn (and before the joint of 2 squares), 2 dc in chain space after the joint (and before Popcorn), 2 hdc in chain space after Popcorn (in corners of the blanket: 3 dc in ch-3 space)
Row 2 : 1 dc in each stitch (in corners of the blanket: dc, ch-3, dc in the second dc of the group of 3 dc)

Row 3 : 1 dc in each dc (in corners of the blanket: dc, ch-3, dc in ch-3 space)
Row 4: dc in next 2 dc, Popcorn-6 in next dc; Repeat that along the blanket (in corners: dc, ch-3, dc in ch-3 space)
Row 5  & 6: 1 dc in each stitch (in corners make dc, ch-3, dc in ch-3 space)
Row 7: 1 sc in each dc ( in corners make 3 sc in ch-3 space)
Fenya blanket 5

I joined the squares with slip stitch, using only back loops. If you haven’t done this before, Lucy’s step-by-step photo tutorial is a great place to start. Thank you so much Lucy for this awesome and very detailed tutorial!
The other information about the blanket – (yarn, size, crochet hook) you can find in my previous post about the Vintage style crochet blanket.
Hope you will like this pattern. If you encounter any mistake or problem with the pattern, please let me know in the comments. Enjoy!
*
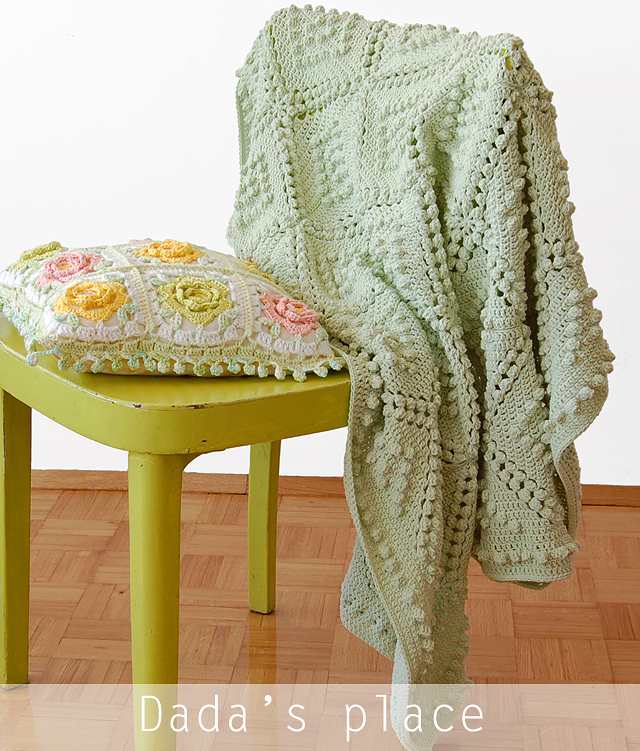
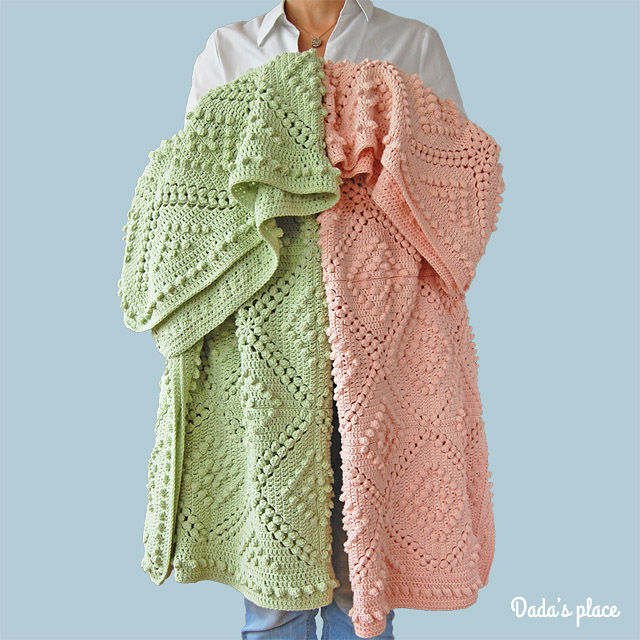
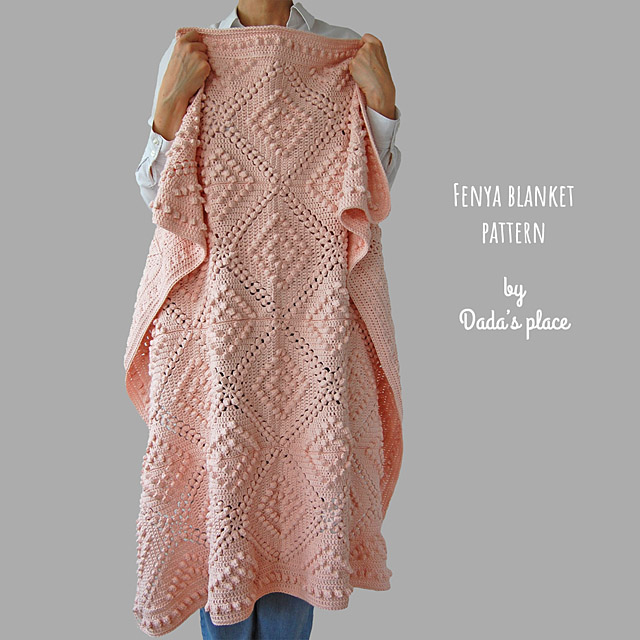
Fenya Vintage crochet blanket pattern

Now you can buy printable pdf crochet pattern and step-by-step photo tutorial for this blanket for only $3.97 in Dada’s place shop (payment options: credit cards and PayPal). It is available in English and German.

*

You can also buy it in Dada’s Etsy shop and in Dada’s Ravelry shop (payment option: PayPal)

*

  • « Previous Page
  • 1
  • …
  • 3
  • 4
  • 5
  • 6
  • 7
  • …
  • 9
  • Next Page »

Dada's shop


Copyright © 2026 · Dadas Place.com